Posted in knitting, sewing, weaving

Back Home

Yesterday we arrived home after spending a week in Wisconsin. The trip was undertaken to help our daughter and her family prepare for a move. It was a weird and wonderful trip. With constant changes implemented by the authorities in the states we traveled through, we never knew what to expect from day to day. Thankfully, many businesses on the interstate highways remained open to provide for the necessities of travelers. All the staff we encountered along the way were both kind and helpful.

The trip was a success. While we stayed with the kids, daughter and son-in-law found and put an offer in on a suitable house in Madison. That’s a big hurdle accomplished.

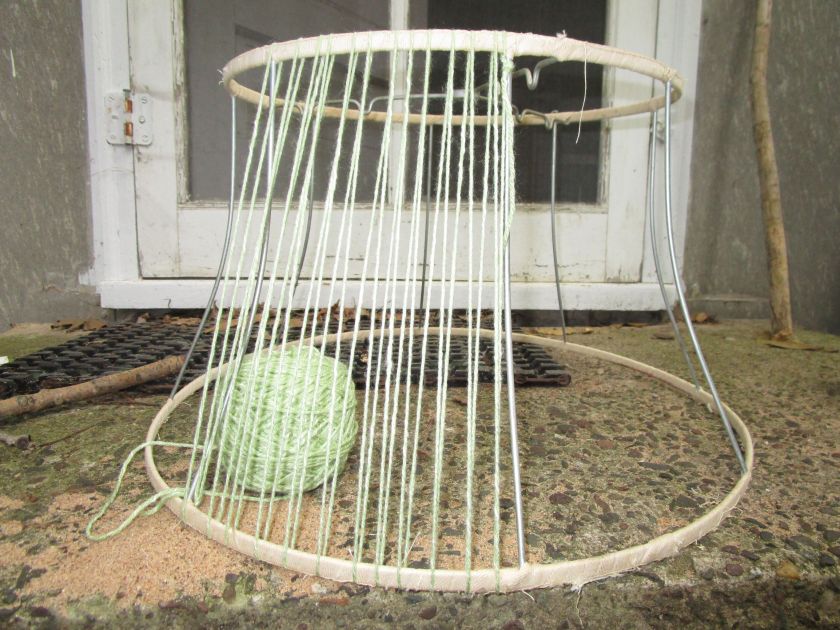
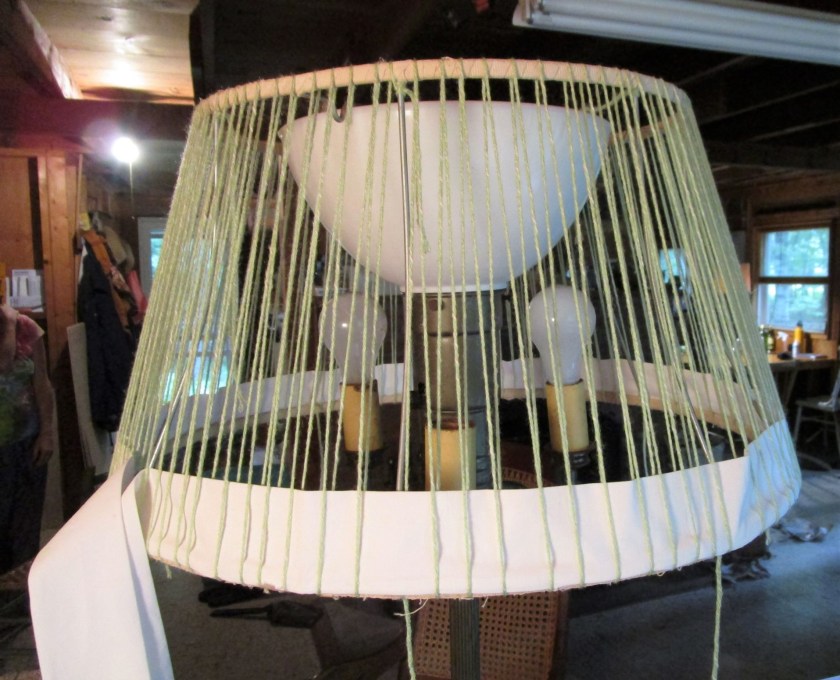
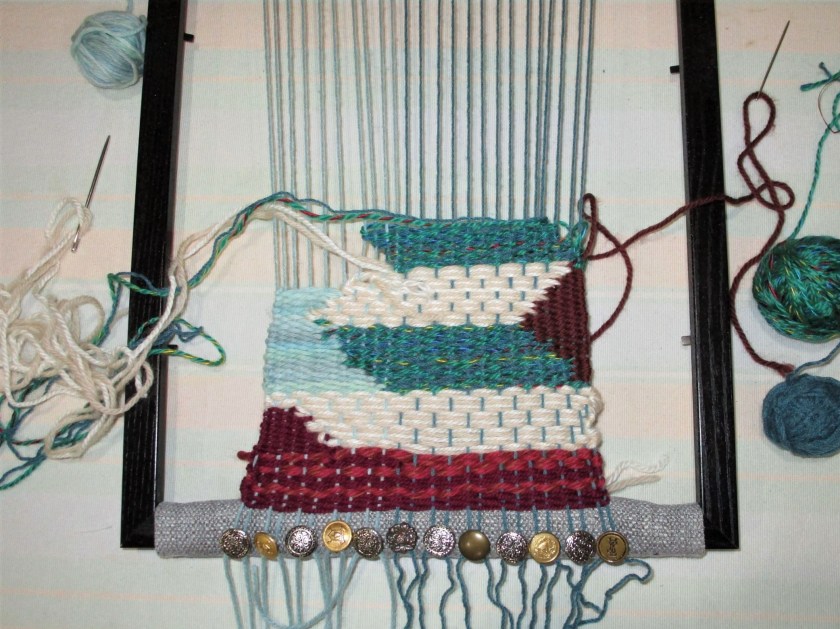
I discovered a new travel craft – weaving on the little 8 by 10 artists’ canvas loom. All the materials fit into an average size project bag, and the motions of the fiber artist do not ever distract the driver. You see in the photo above my attempt to create an S-curve out of two colors of yarn.

I received two items from daughter that will inspire future fiber objects:

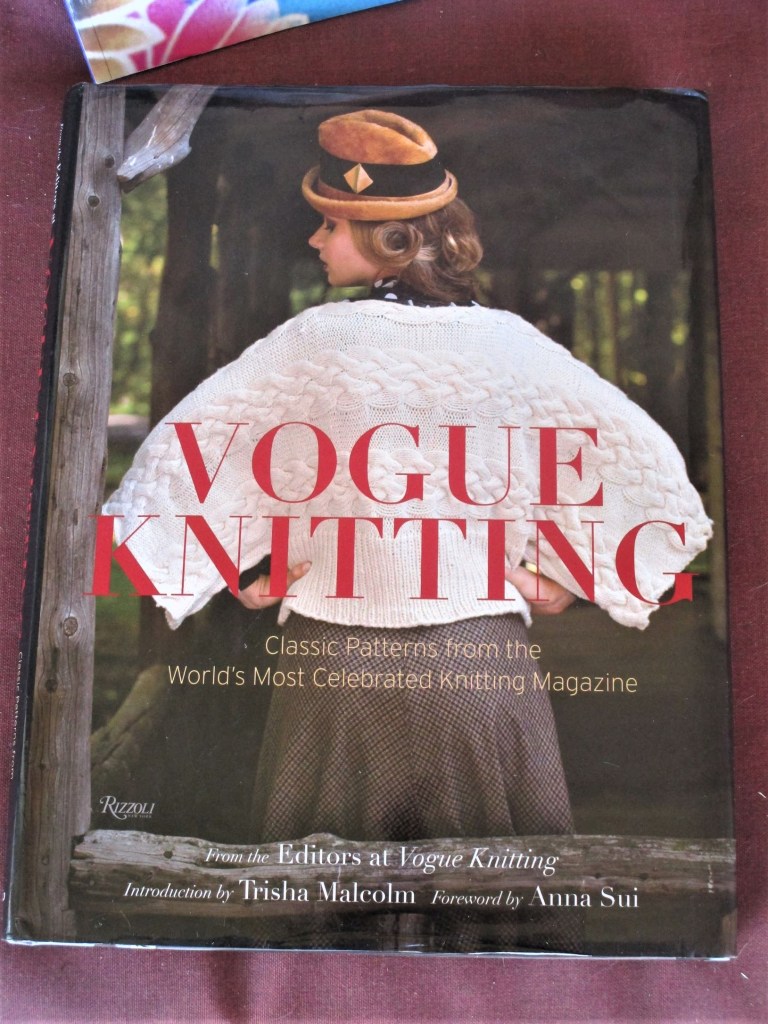
The Vogue Knitting book is a delightful compilation of the best of the Vogue Knitting magazine, from the 1980s through to 2011. Lots of inspiration is here. I have my eye on a couple of patterns found within. Of most value to me are the charts of various lace stitches.

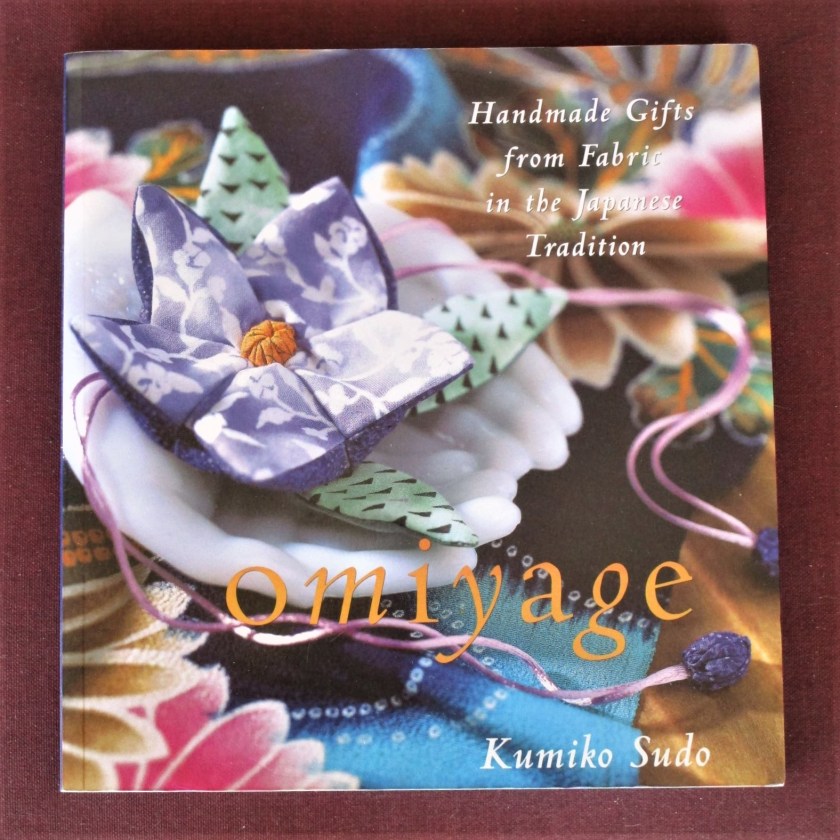
This little book is called omiyage, by Kumiko Sudo. It was purchased by my mom, who passed it to daughter, who gave it to me. The Japanese have a thousand-year-old practice of making and giving small gifts. Back then there were strict rules and a great deal of formality surrounding this ritual. The author re-interprets omiyage for modern times, using fabrics both traditional and modern. As she is a quilter, she pulls fabrics from her stash of quilting cotton, and incorporates bits of silk and wool as well. I plan to try making some Good Luck dolls.

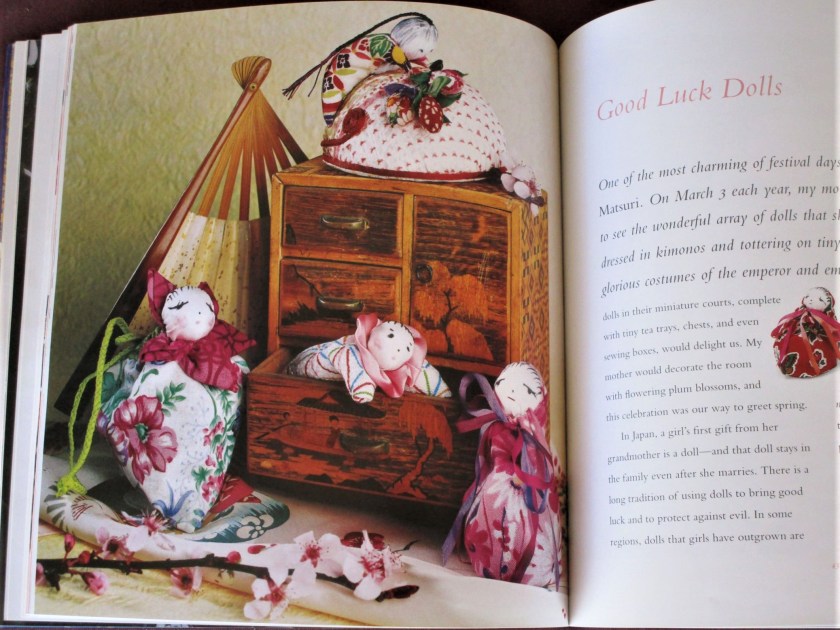
Traditionally these dolls were the focal point for a festival called Girl’s Day. I think they would be wonderful made from some of my hand-painted fabrics. Because they are small, making one should be a fun, inexpensive and quick project.

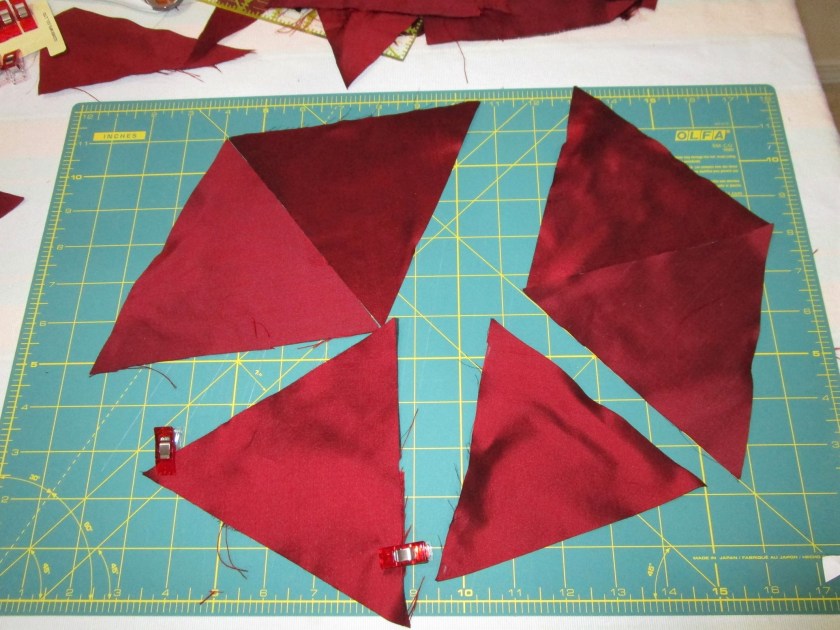
Well, I am keen to resume my making. The Just Trees mini quilt is still unfinished and I would like to get that weaving off the loom soon.

Until next time, keeping making and be well.

Posted in weaving

Weaving Workshop: Lesson 3

DESIGN AND WEAVE A TAPESTRY

LEARNING OBJECTIVE: Students will learn the basic process for designing and making a woven fiber object. Students will practice transferring their designs to scrim, tying knots, and using a tapestry needle to weave various patterns.

VOCABULARY: Tapestry, scrim, cross stitch, subject, background, transfer

MATERIALS AND TOOLS: Paper, pencil, crayons, markers, scissors, yarn, tapestry needle, rug canvas, masking tape. Optional: String-like objects such as ribbon, cord and fleece.

Step One: The design phase. Students will choose two yarns in favorite colors from the yarn bowl. Using a pencil and paper, they will draw a picture of an object or thing that has these colors in it. Place the scrim on top of the drawing to check that the subject of the drawing is within the margins of the scrim. Once students are comfortable with their drawings, they can color the subject using crayons.

Step Two: Transfer the design. Students will lay the scrim over the drawing, centering the design’s main subject. Masking tape can be used to keep the paper and scrim from sliding around. Using matching crayons or markers, students trace the outlines of the subjects’ shapes onto the scrim. Transfer each part of the shape. (see example)

Step Three: Weave the design. First, students will choose any additional yarn colors that will be needed to complete their designs. Starting with the center of the subject area, they will use yarn threaded onto a big-eyed tapestry needle to weave over each area. Students can weave in any direction that works for them – vertically, horizontally, diagonally, or a combination of all. The objective is to cover the entire surface. This example shows diagonal weaving in the black area and a wrapping technique with the blue yarn.

When the subject area is completely woven, the background can be covered in a contrasting color yarn. Alternatively, the background scrim can be left plain or colored using crayon or marker.

In Lesson 4 the class will finish weaving, add additional materials to complete image details and frame the completed weaving.

Posted in recycling, sewing, weaving

Fiber Fun at the Lake House

While I and my family were soaking up the sun and splashing in the water at the Lake House, my daughter proposed that we work on a fiber project together. The family lake house, which was built in the 1950s, contains random pieces of furniture and what nots from several decades. The object of attention is a floor lamp with a silk shade that had disintegrated completely. Used in its present condition, the unshaded light got into everyone’s eyes. She thought we could solve this problem.

Of course, the Lake House Challenge is to make it work with limited materials and tools. After a bit of brainstorming, during which we rejected piecing panels together and shirring or gathering fabric, we came up with a weaving concept. We had on hand a few bed sheets and a ball of cotton blend yarn.

Yarn is left over from the Luna Moth baby dress project.

Fortunately, Daughter had brought her sewing machine.

I took on the task of warping the yarn over the lamp shade frame and she hemmed and turned the strips of white sheet. They were about 2 inches wide. We thought we would need six rounds. Here is the shade with the warp in place and the first round of weft weaving.

It took a few days because it was possible to work only while the baby was sleeping. She sewed together the two ends of each strip and trimmed up the yarn.

FINISHED LAMP SHADE.

We agreed that it was pleasing to the eye in a bohemian kind of way.

Posted in weaving

Button Loom Weaving: Finished Object

I finished up the weaving on the button loom yesterday. Today I spent a fair amount of time making a backdrop for the weaving. I used silk triangles.

After sewing together enough triangles to cover the frame backing, I attached the silk to the backing with spray adhesive. In retrospect, I should have used non-woven interfacing behind the silk before attaching it. Wrinkling was a problem.

And here is the finished object. I call it Escape from the Tower. In case you are wondering about the story behind the title, rest assured that everyone was able to get out. It’s fortunate that the artist thought to attach a coppery rope to the tower. Those on the top floors used it to get to safety by rappelling down the wall.

ESCAPE FROM THE TOWER

Here is a closer view of the top section.

Posted in weaving

Button Loom – Weaving Progress

So I have been weaving on the button loom for the past two days. I thought that I would have finished today, but it is not to be. I did take of photo of my progress after the first day of weaving:

After day one, I was happy with the way the piece looks. I chose a color scheme of dark red, turquoise, pale blue and ivory white. It seems to go well with the black frame and the brass and silver buttons. The weaving pattern is pretty basic, but I did use a basket weave effect with the white yarn, to show off some of the warp threads.

If all goes well, I will have a finished object for you by tomorrow.