Posted in quilting, recycling, sewing

Crazy Out-of-Control Scrap Heap

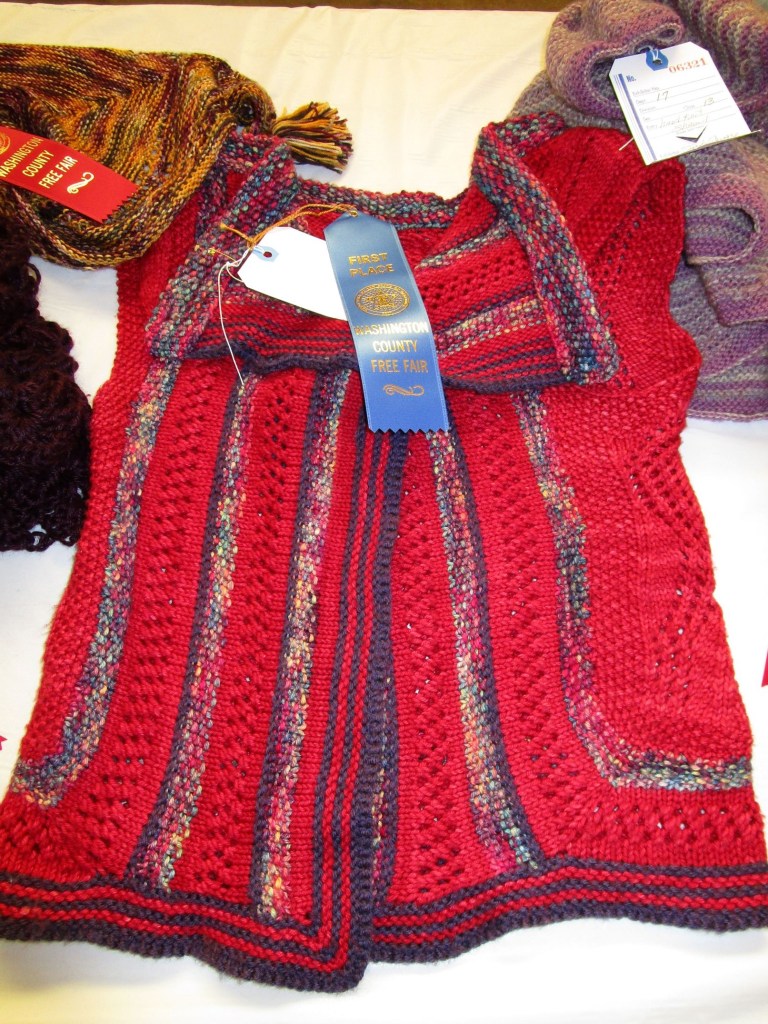
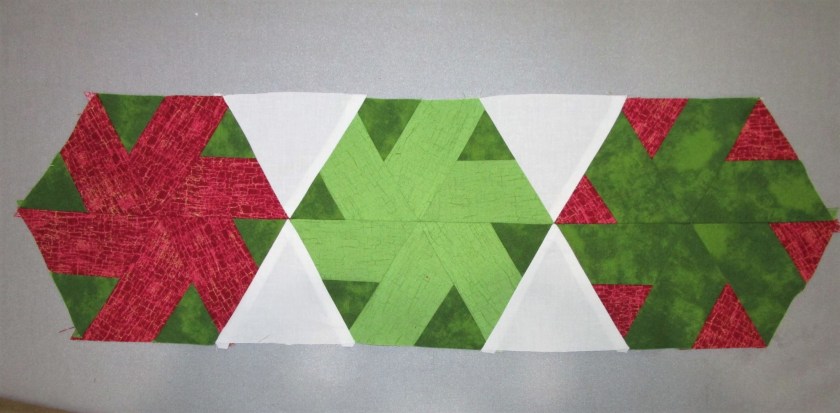
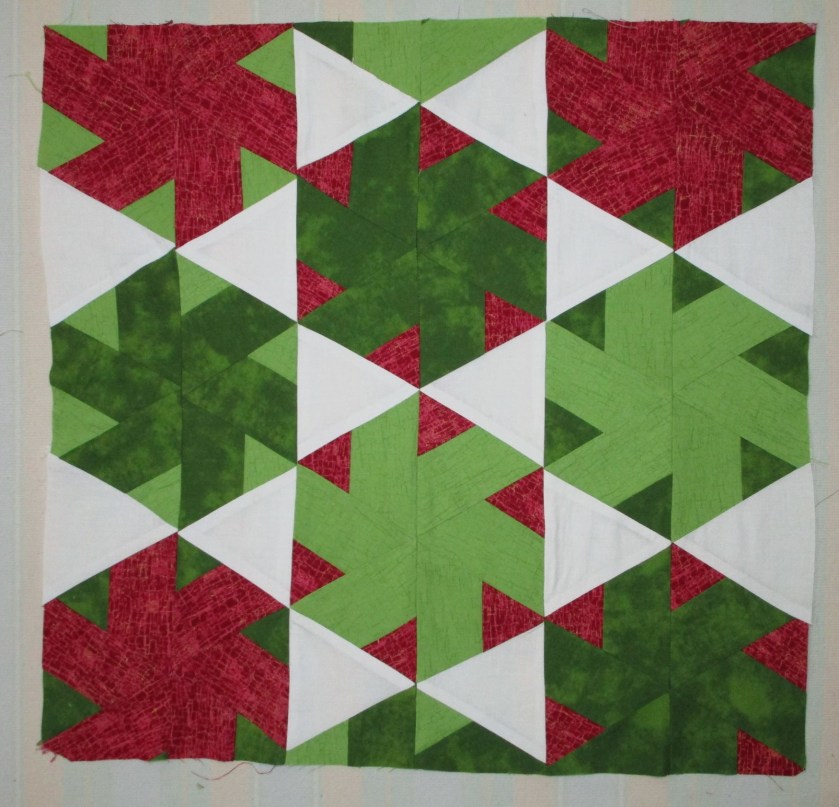
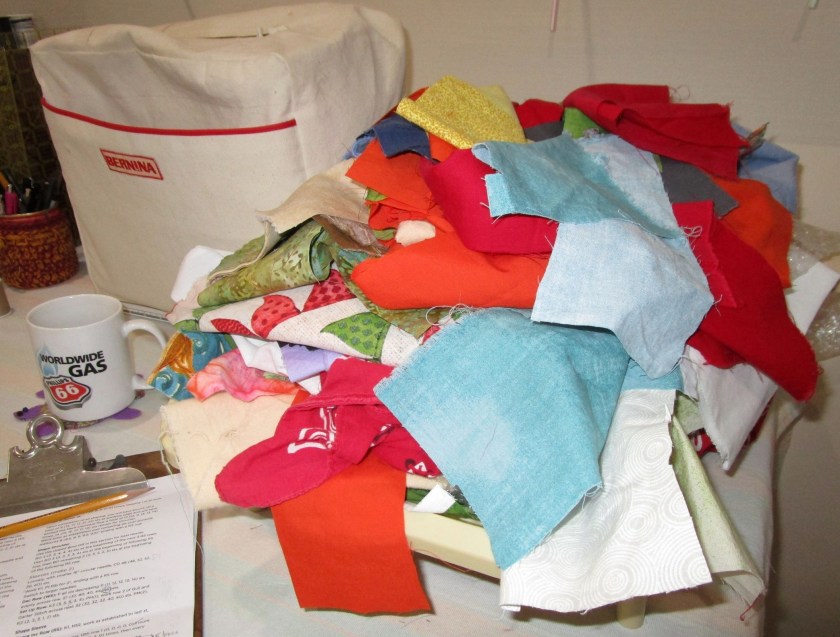
This past summer has been a wonderful time of learning for the fiber artist in me. I have viewed dozens of tutorials, focused primarily on quilting. “Don’t ever throw away your scraps,” is advice that I heard from an art quilter, early in my training. Well, I took her advice, and look where it has got me. I desperately need a system for managing these fabric pieces!

By nature I am not a messy person. I like to make my bed and wash the dishes. When I began my journey with fiber, I organized a space which I believed possessed ample work room and plenty of storage for tools and materials. It was great, as long as I stuck to yarn crafts. But once I ventured into fabric work, things went wonky. (FYI “wonky” is a technical term used by quilters.)

I share my closet with the family’s camping equipment. It also houses the ironing board, a small set of drawers and shelves for my yarn stash. The stash is relatively modest, but it now fills the shelves. My bookcases contain paint, books, tools, my fabric stash and sewing machine. But the scraps have proven recalcitrant. If left tossed in a basket, they are impossible to work with.

So this is my plea: Who of you has solved the Scraps Dilemma, and will you share your solution with me, a frustrated fiber artist?

Posted in hand embroidery, knitting, quilting, sewing

Old-Timey County Fair Fiber Fun

Who loves going to the fair? If today’s attendees are representative, I would say everybody! There’s a lot to see and a lot to do. Our county fair focuses on all things agriculture, but also includes some things that city folk enjoy, like growing flowers and taking photographs. Here is what I did at the fair today.

I checked out all the Fiber Providers:

Some chickens managed to get into the picture.

Oops, NOT fiber providers, just cluckers and layers.

And I got a good look at the various needle arts entries.

Sadly, there were not near as many needle arts entries as there were in past years. Achieving a couple of blue ribbons for my two was not that gratifying.

But I was very pleased to see that some of my fiber arts kids had entered items that they made during our class last year. Here is Gianna’s Blue-Ribbon strip quilt.

Going to the fair felt so nostalgic to me. It made me wonder: How many more years can the county fair tradition continue into the 21st century? Are needle arts as a craft doomed to die out? Or can they be revived in a brave new world?

Here is what my mom says about sewing with a Singer machine back in the 1960s.

I bought a new machine in 1962 as all I had was my Singer Featherweight that my parents had given me when I was 19. Mine looked something like this and had some decorative stitches. I don’t think mine was a Slantomatic. I bought mine right before the Slantomatic came out. I remember sewing you a dark striped dress with a white waistband. I used some of the decorative stitches around the waist and around a white sewn in collar. You liked that dress a lot. Do you remember it? I think you were about nine or ten at the time and I made all your clothes except for the ugly Holy Family uniforms you had to wear to school. I was really pleased with that dress and made a second one from the same pattern, in blue, for a girl who played a part in one of [the local theater groups] many plays.

Thanks to inkyarnandbeer for this blog. To visit go to
https://inkyarnandbeer.wordpress.com/2019/09/02/hotter-than-hell-so-im-gonna-sew/

-N-'s avatarInk, Yarn & Beer

I think it must be about 100F (38C) where I live, so the air conditioning is on and not going out until it is dark.  My dogs aren’t mad, nor am I a Brit, so I am staying indoors, drinking water, and prepping the Maggie Shirt . . . and I am sewing it on my vintage Singer 403a,

I think these machines (the Singer 400 series) date from the mid to late 1950s and into the early 60s.  Mine is like it was never used.  When I bought her, she needed some TLC, heat and oiling, as well as a bit of gear grease, before she was off and sewing.  Unused machines freeze up, but once they have been given the right attention, I think they are the best!  I’ve had my 403a for awhile, and as I cycle through my machines, she hasn’t been out for a spin…

View original post 503 more words

Hotter Than Hell, So I’m Gonna Sew!

Posted in recycling, sewing, weaving

Fiber Fun at the Lake House

While I and my family were soaking up the sun and splashing in the water at the Lake House, my daughter proposed that we work on a fiber project together. The family lake house, which was built in the 1950s, contains random pieces of furniture and what nots from several decades. The object of attention is a floor lamp with a silk shade that had disintegrated completely. Used in its present condition, the unshaded light got into everyone’s eyes. She thought we could solve this problem.

Of course, the Lake House Challenge is to make it work with limited materials and tools. After a bit of brainstorming, during which we rejected piecing panels together and shirring or gathering fabric, we came up with a weaving concept. We had on hand a few bed sheets and a ball of cotton blend yarn.

Yarn is left over from the Luna Moth baby dress project.

Fortunately, Daughter had brought her sewing machine.

I took on the task of warping the yarn over the lamp shade frame and she hemmed and turned the strips of white sheet. They were about 2 inches wide. We thought we would need six rounds. Here is the shade with the warp in place and the first round of weft weaving.

It took a few days because it was possible to work only while the baby was sleeping. She sewed together the two ends of each strip and trimmed up the yarn.

FINISHED LAMP SHADE.

We agreed that it was pleasing to the eye in a bohemian kind of way.

Posted in quilting, sewing

Triangles – the Finale

“When we last saw our heroine, she had cut and sewn all the pieces needed for a triangular quilt sampler. Let’s check in on her now.”

Okay, folks, not quite all the pieces. In reviewing my block cut, it seemed that two more hexes would be necessary if I wanted a complete sampler of the technique. So I cut and sewed two more. Here are my pieces before beginning assembly:

Here is my preliminary layout

This quilt is made up of six rows, grouped in twos. For the middle section, I will use two triangles at each end, to fill in the gaps where my cutting tools are sitting in the photo. Assembling each row is fairly simple. I start at the left and sew the pieces together in the normal fashion. The drama begins when the grouped rows are sewn to each other. Will the white triangle points match up and the hexes join properly?

Row 1 and 2. Not quite a match. I also notice a decided curve in the top edge. Wish I had see that before I proceeded to the next step.
Rows 3 and 4. Better! The edges are straighter also.
Rows 5 and 6. Best! Everything matches and is straight.

And here is my sampler all sewn together. I did a quick trimming of the outer edges, but I don’t have a long enough cutting mat or Omnigrid ruler to properly square it up.

I’m happy with this so far. This view is of the quilt turned sideways. You can see rows one and two on the left, with the decidedly wavy edge. I will probably remove these rows and try to straighten the edges before re-attaching.