Posted in hand embroidery, painting, quilting

Daily Fiber for One Year

Two Daisy Squared

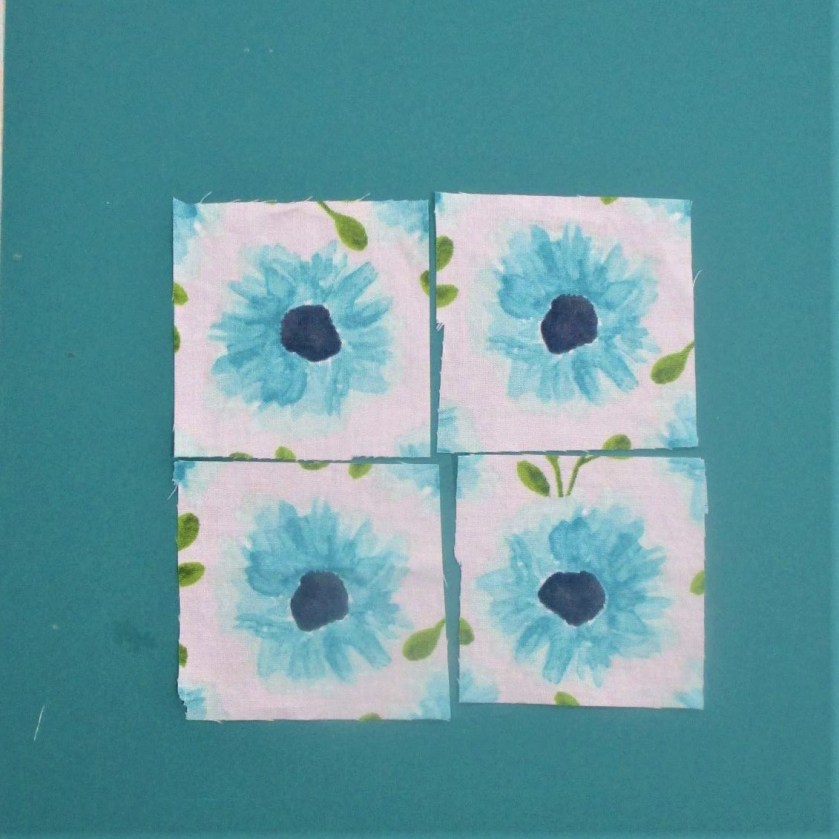
Yes, friends, today marks one year since I started experimenting in the fiber arts and posting the results of my efforts. This mini quilt is my most recent object. It’s quite a fitting testimony to my adventures, because it showcases so many of the techniques that I have learned along the way. I have used fabric paint to tint the daisies, then mixed some of my hand painted fabrics with a few solids and prints to fashion the blocks. The whole thing was ditch stitched. I then hand quilted on top of the blocks with embroidery floss. Lastly, I painted enough fabric to border the whole piece. The completed work is sewn over a 16 inch square of artist canvas.

Let’s take a brief look back on how I got here.

Painting fabric with Dye-Na-Flow acrylic paint. Sun print using marbles and rice.

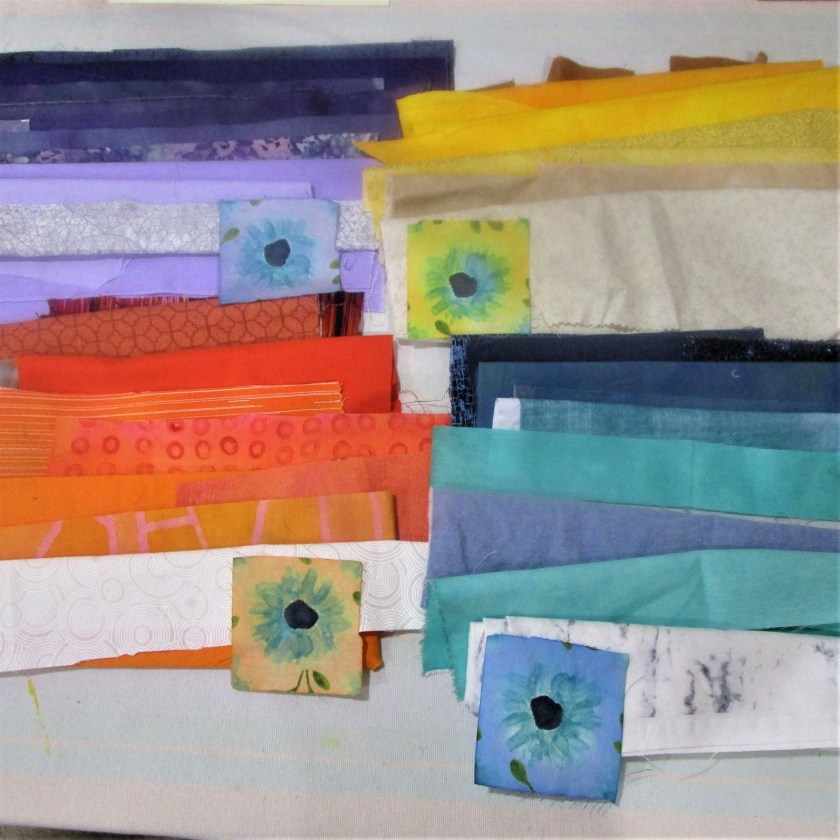
My enthusiasm for hand painting fabric actually started when I took a class on how to do this and then taught a class last spring. It was a big hit with all ages. I continue to experiment and now use this craft as a vital source of uniquely colored fabric.

Embroidered prayer flag.

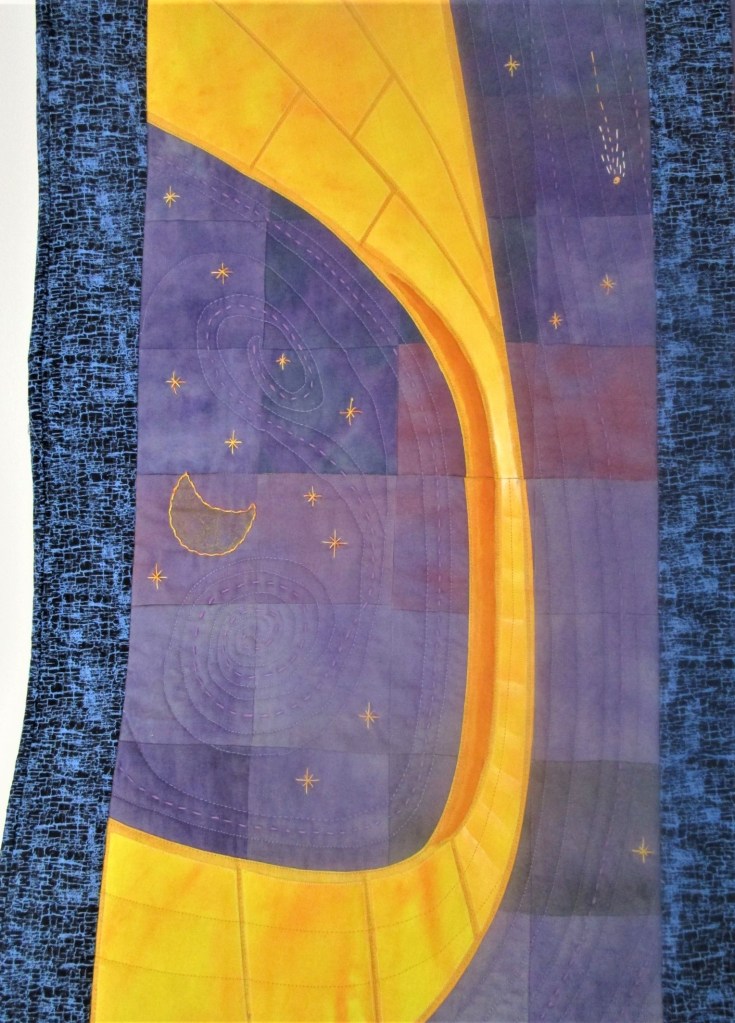
As a girl, I embroidered my share of humdrum tea towels and pillowcase hems. But today – embroidery artists have moved this craft to new heights. I could never be that good. Or could I? I began to practice some basic stitches and decided that embroidery has a place in my work. For this project, I appliqued, embroidered and wrote with fabric markers to make five prayer flags. Here you see the Earth flag.

My first log cabin mini quilt, using hand-painted fabric

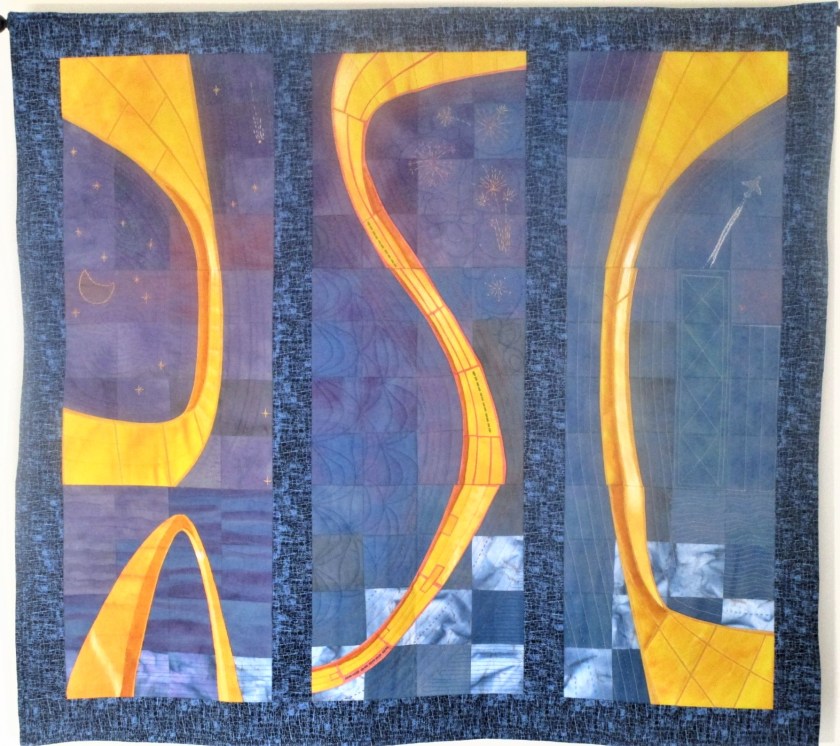
Quilting. Whoa. My mother is the most expert quilter that I know. She generously gave me her Bernina sewing machine. It seemed inevitable that I dip my toe into the venerable art of machine quilting. Any fiber artist worthy of the title needs to have some skill in putting together a quilt. And while I never expect to cover any beds with my quilts, I do see it as a robust art well suited for expressing my ideas.

Improv Mini Quilt with curved piecing.

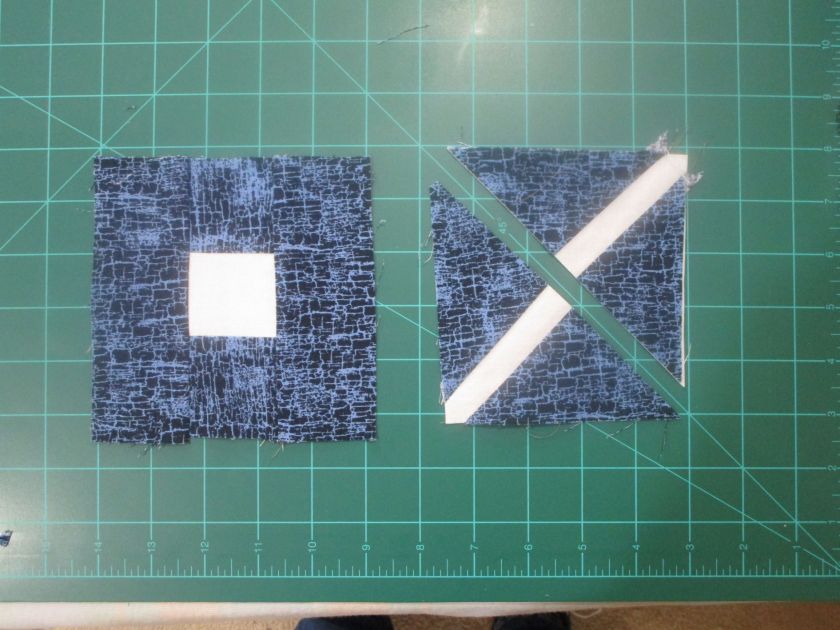
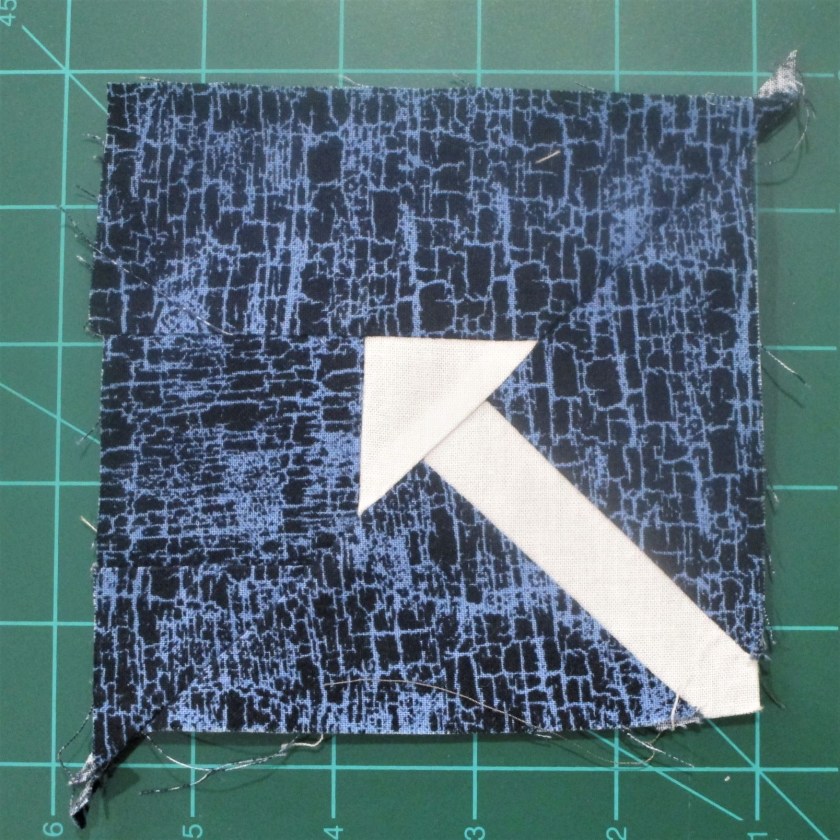
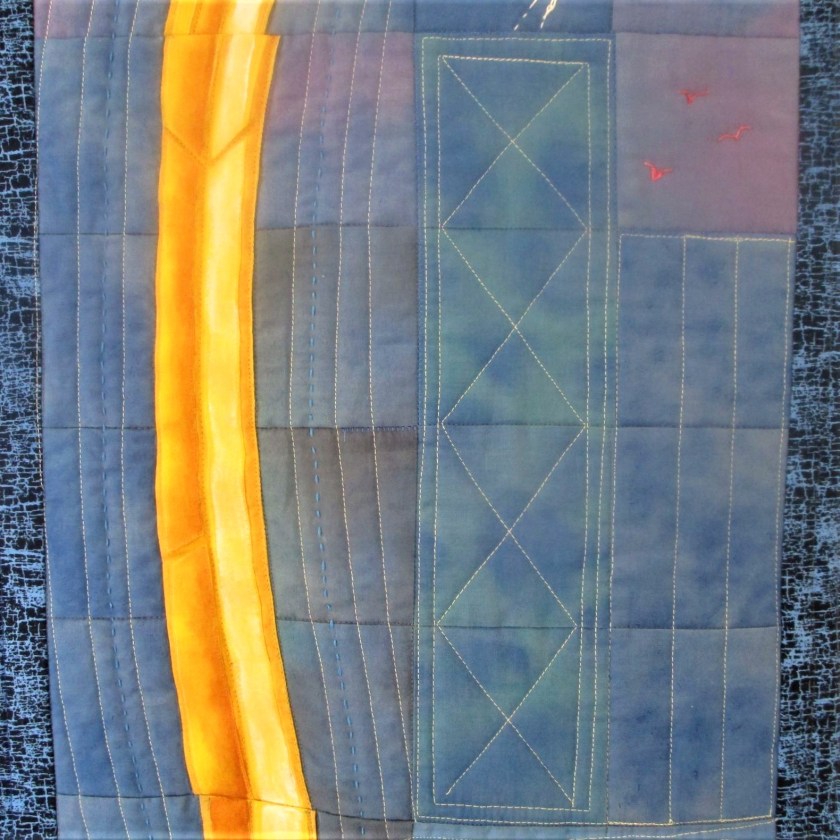
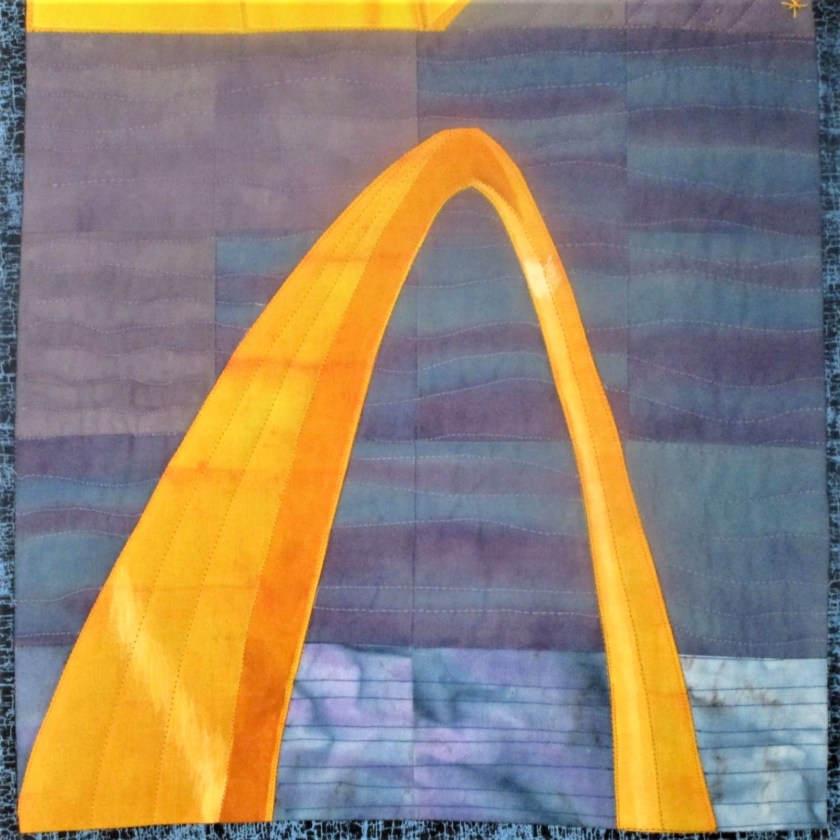
So by mid July, I was experimenting with improvisational mini quilts. These small gems are fun to do and can be completed in a day. In this one, I have combined applique, machine quilting and embroidery. If the machine stitching looks a little bunched up, it’s because I had not found my machine’s walking foot yet. It’s now in active use.

That about sums up my thoughts on a year of fiber objects. When I began this blog, I expected to use the site simply as a personal diary. My goal was to record my work and my thoughts about the work. But then nearly 100 readers found my site. I have such gratitude to those who choose to read and to comment on my humble posts. Your interaction with me has enriched me and my craft in many ways. I thank you for your time and caring attention.

Posted in quilting

Inspired by Tangoes

Actually, this experiment came to mind while I was viewing Cindy Anderson’s blog “Sew Much Fun.” She had made some quilt blocks in the shape of birds. Check it out here:

https://wordpress.com/read/blogs/35439603/posts/27018

After admiring her work, I began to think that it reminded me of the puzzle Tangoes.

This ancient Chinese puzzle started when a man named Tan dropped a 4 inch tile on the floor and it broke into seven pieces. Putting the pieces back together proved more challenging than he expected. Eventually, Tan began to visualize various forms that could be built with the seven shapes – animals, people and abstract forms.

Over the years the puzzle gained a large following, resulting in up to 16,000 possible solutions. The version that I have includes a deck of cards with 54 solutions. I decided to design a quilt block out of one of these images. Here is the one I chose:

To start with, I searched the Internet to see if anyone else has published a quilt block that looks like this arrow. While I found many different forms of arrow shaped blocks, none resembled this design.

Realizing that the design is actually a made from two triangles, I tried to make each triangle and them sew them together. After much cutting, pressing and sewing, I came up with this. It is actually a full inch bigger than the Tango shape.

A good start, but the proportions are wrong and it was very wasteful to make. Hm,

So I slept on it. It finally occurred to me that I could solve the lower triangle by making the stem of the Maple Leaf block. And the upper triangle could be solved by making a nine patch block, with two solid strips and one 3-patch strip then slicing the block on the diagonal. This solution would allow mass production of the block with a lot less waste.

Middle strip of nine-patch which includes the light square
Maple Leaf stem block, after slicing it diagonally.
Nine patch ready to be sliced diagonally and sewn to the stem triangle
The two triangles sewn together.

Here is my solution compared to the Tangoes solution. It’s still not quite right…

But it is close enough to require only tweaking. I would like to narrow the stem and widen the arrowhead. Also, it would be good to make the external block dimension 4 and 1/2 inches square, so that the finished size will end up a 4 inch square. (Sigh) I do believe a little math will be necessary if I hope to use this quilt block in a future fiber object.

Posted in knitting, painting, quilting

Catch-Up Friday

Since I didn’t finish any of my fiber objects this week, I have decided to write a progress report. You see above about ten inches of the Weaver’s Square pattern, which will become a colorful vest for my daughter. This is the back of the garment. The front I have planned will be much more subdued. While working with seven strands of yarn each row has been a challenge, the satisfaction of the work and the excitement of seeing the color emerge has more than compensated for any difficulty. I have chosen to switch out the vertical colors at a rate of two or three for every band of horizontal color. As a result, the pattern has a more vertical effect.

Log Cabin Mini Quilt

Another work in progress is picture above. The quilt sandwich is constructed and some stitch in the ditch took place. At that point, I decided to work some embroidery in the flower squares and add hand quilting to the strips.

Blue block nearly finished.

I also felt that a border was essential to provide balance between the light and the dark sections of the piece. Going further, I plan to hand-paint this border in multiple hues. It will be exciting to see how well that goes, and it will take me more time.

Last week-end I started a tutorial on painting with water color on paper. This class was offered on Bluprint.com. Despite a little trepidation, I am sharing my work today. Keep in mind I am a rank beginner and be kind.

Seascape at daybreak with birds.
Color Block using primary colors, salt, colored pencil and micron pens.
Realistic style chickadee

Such a fun week. Sometimes I have to pinch myself to remind me that this life is real.

Posted in quilting

Arch Leftovers

After a nice long break and trip to visit family, I’m ready to get sewing again. It’s time for another mini quilt. This small gems can be framed and hung as art, or turned into pillows, journal covers or other accessories. I plan to use many of the hand-painted fabrics leftover from making the Gateway Arch quilt. I have so many scraps!

This fiber object starts with four small daisies.

I like this fabric because it has the appearance of a watercolor sketch. I’m going to use these squares as the focal points for some monochromatic log cabin blocks. First I tinted the background with my color choices. Then I gathered matching fabrics in a wide range of values.

What a beautiful picture, with several hand-painted fabrics included!

Starting with the daisy square, I sewed on strips, working from light to dark. It was a relaxing afternoon, listening to the radio, cutting, sewing and pressing. After a few hours I had these four log cabins done. They are roughly seven inches square.

Sometimes you need to turn your fabrics to the wrong side, especially if you find the tonal value needed. Here are the back sides of two of the squares, showing reversed fabrics.

And here are the four log cabins arranged in a pleasing fashion.

In my next blog, I will carry on with joining the squares, making the quilt sandwich and quilting the resulting block. See you then!

Posted in quilting

Gateway Arch: Nine Views

A culmination of six months spent thinking about and working on it, here is the Gateway Arch quilt. I finishing sewing on the binding while watching the Super Bowl (Yay KC Chiefs!) I feel an odd combination of elation, satisfaction and relief. The finished object is largely what I had envisioned.

IMAGE OF UPPER RIGHT PANEL

The colors are wonderful. The curving shapes are a good representation of the real arch. I’m happy with the embroidery.

MIDDLE RIGHT BLOCK REPRESENTING CITY BUILDINGS

The construction flaws bother me a little more that I had expected them to, especially the waviness of the right border. How did that happen?

LOWER RIGHT BLOCK SHOWING ONE TRIANGULAR BASE AND RIVER

The arch shapes were made from hand-painted fabric cut apart into shapes that mirrored the arch’s steel panels and then fused to a solid background. This piece was then cut into the sixteen square background block on the left edge and appliqued on the right edge before being top-stitched in matching thread. Shading was painted on with acrylic paints after the block was finished.

THREE BLOCKS OF CENTER PANEL

I had a lot of fun with free motion quilting. I chose patterns to emulate aspects of the landscape or city-scape. I did a lot of experimenting with thread colors, either matching or contrasting with the background colors as the spirit moved me. Eventually I hand painted some thread to get the colors I needed. The idea for the fireworks came from my memory of a July 4th trip when my family stopped in St. Louis for dinner.

UPPER AND MIDDLE LEFT BLOCKS

This project was a real stretch from the perspective of skills required. Thanks go to Bluprint.com for all the quilting tutorials I accessed. I learned a lot about painting on fabric, matching points, sewing curved shapes and putting the whole thing together. I also learned about the limitations of my current tools and studio space.

LOWER LEFT BLOCK: THE WHOLE ARCH, RIVER AND SKY

What’s next? I have a few ideas. But first I’ll be taking a short break from quilting to focus on painting, knitting and teaching.