Posted in quilting

Improvisational Quilting with Joe

I came to learn quilting almost as an afterthought. As I started to get ideas for making fiber objects, I became aware that I lacked the skills I needed to realize them. Thus started my quilting education. There are some things about quilting I like – choosing fabrics, developing my design, adding surface details and actually doing the quilting. The things I dislike are cutting many identical pieces of fabric, squaring up blocks and especially matching corners.

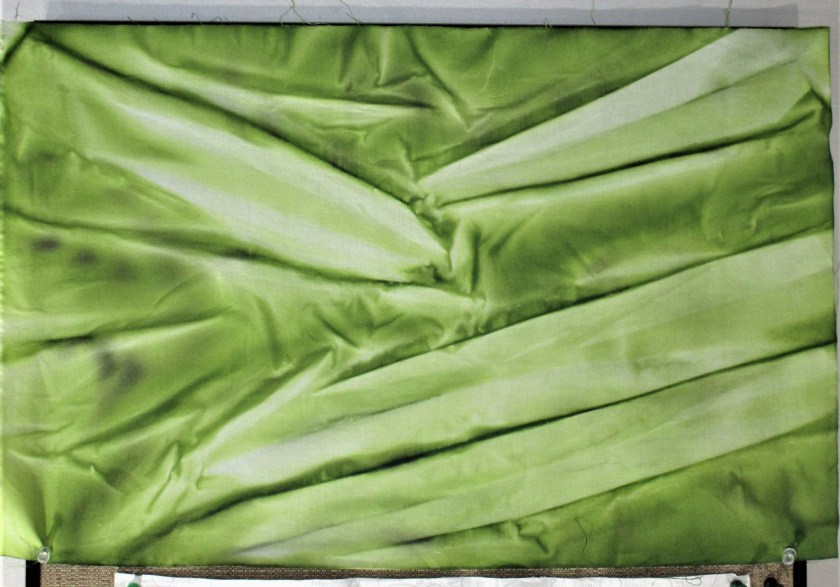
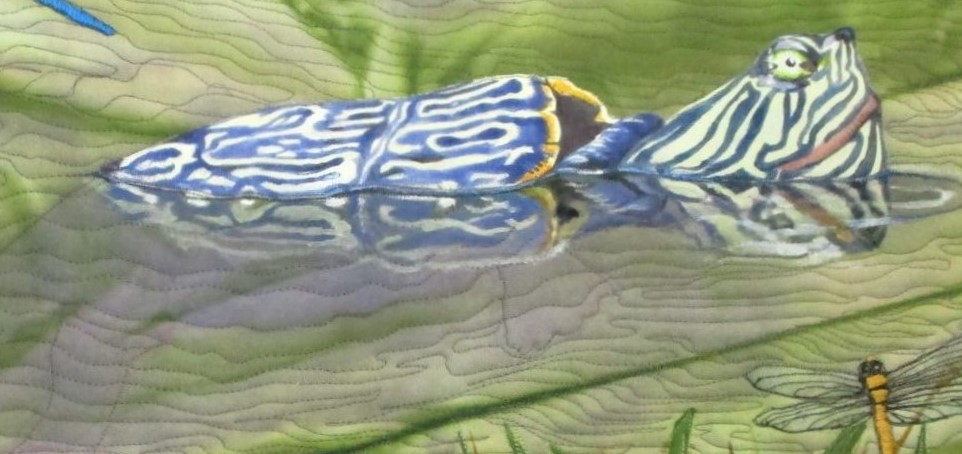
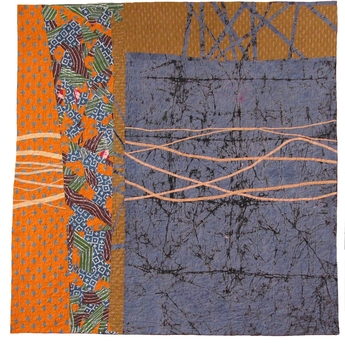
So naturally I am drawn to improvisational piecing. Joe Cunningham (aka Joe the Quilter) and his process were a revelation to me. He offers the promise of freedom. Freedom from all the dull parts of quilting, which leaves more time for fun. The quilt featured at the top of my post is one of his. His website can be found here:

http://www.joethequilter.com/aboutjoe.html

Joe Cunningham has been a professional quilter since 1979. His philosophy is unique. He doesn’t use patterns. He designs out of his head, adjusting things as he goes along. He has no specific end in mind. He explains that as the quilt approaches the finish, he finds out what it will look like. He practices randomness, chance and serendipity. To this end, his method relies on chance from the first cut.

As an example, the class I took with Joe featured a quilt called “Rock the Block.” Here is how to make it:

Step 1: Choose three fabrics. Include one big print. The other two can be prints that don’t necessarily go with the big print. Also choose a solid color that you will cut into narrow strips, which Joe called “sticks.”

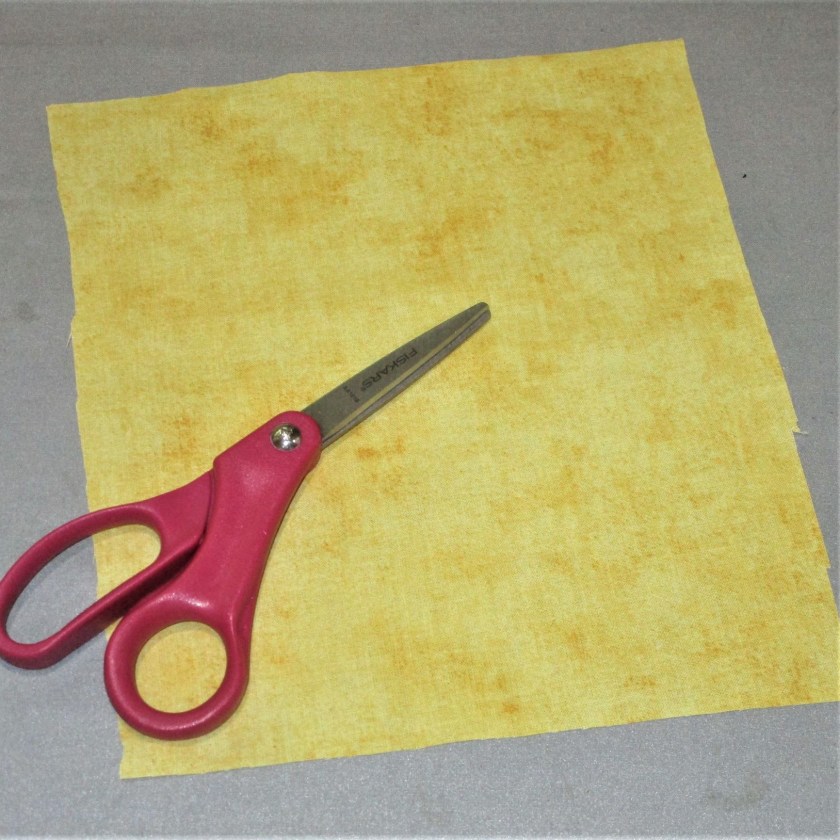
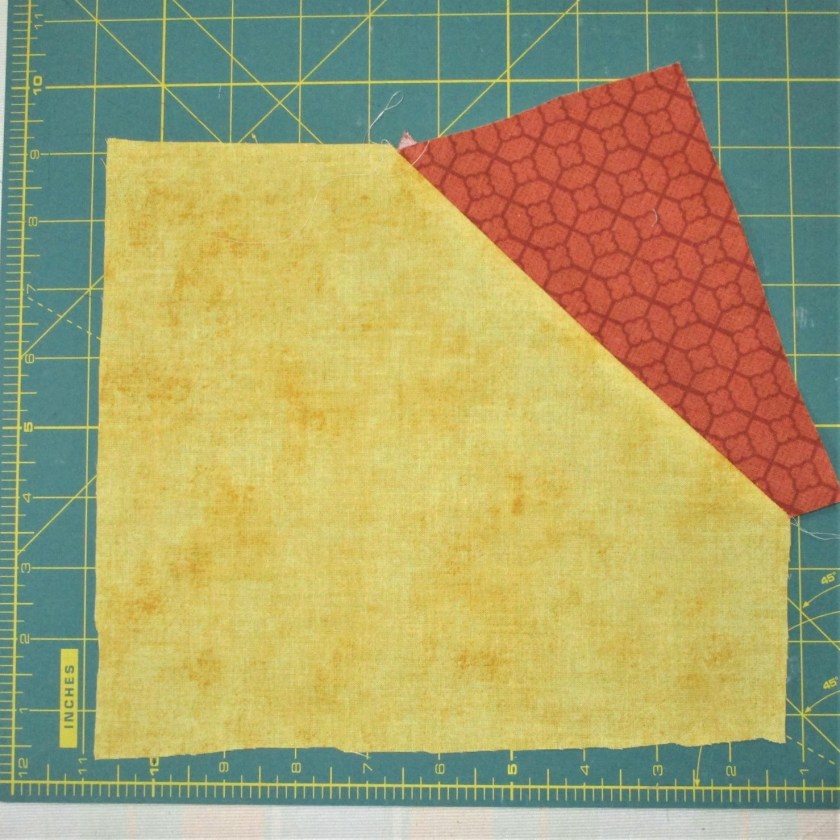
Step 2. Cut out a square. It doesn’t need to be perfect, but does need to be bigger than 7 inches.

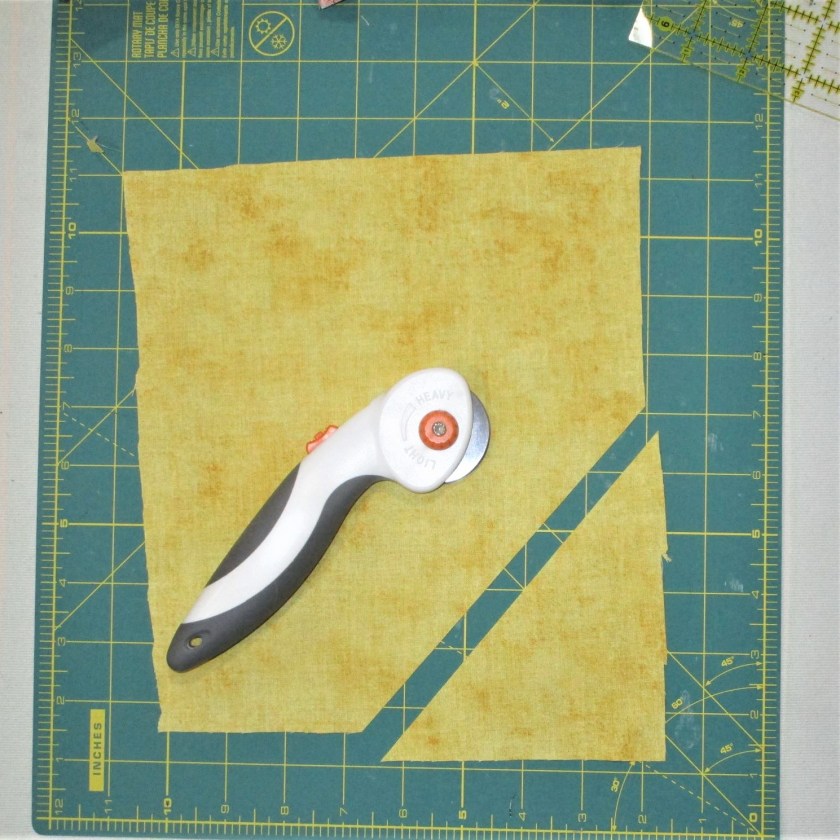
Step 3. Cut off a corner.

Step 4: Cut out a triangle from one of the other fabrics. Sew it to the square at the cut edge.

Step 5: Cut through the square, across both pieces of fabric.

Step 6: Sew in a stick.

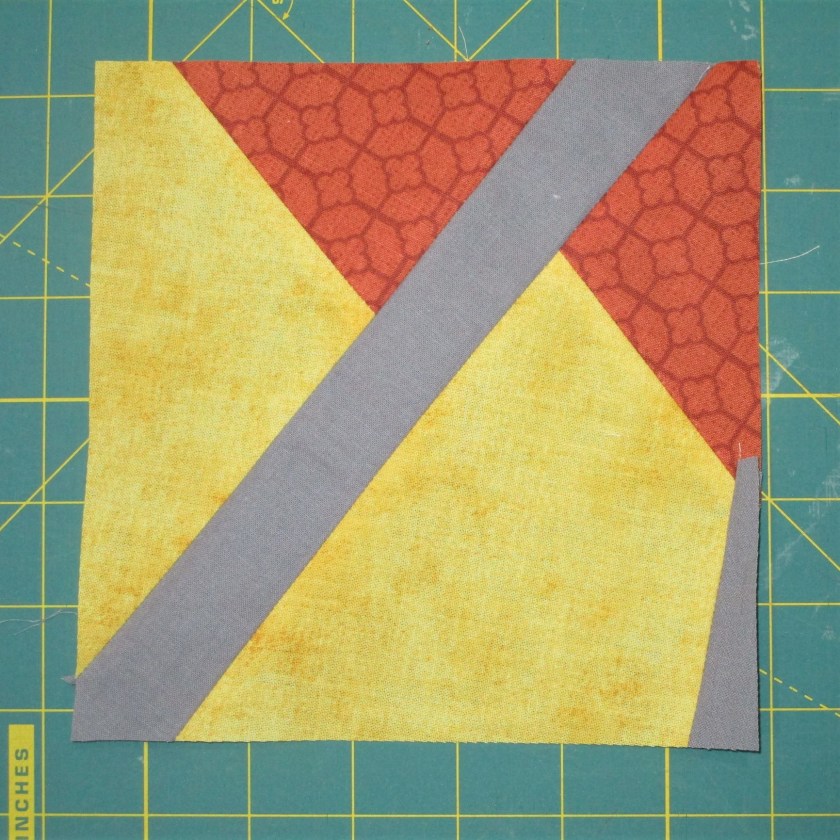
Step 7: Press seams open and trim the block with a 6 and 1/2 inch square ruler.

Repeat steps 2 through 7 until you have enough blocks for the size quilt you want to make. Use all the different combinations of your three fabrics. Your blocks might look like these.

Or they may look entirely un-like these!

Now the fun begins. Lay out your blocks in rows. Move them around, arranging the blocks until they look “pleasing to you.” Lacking a design wall, I laid mine on the floor.

This arrangement is pleasing to me.

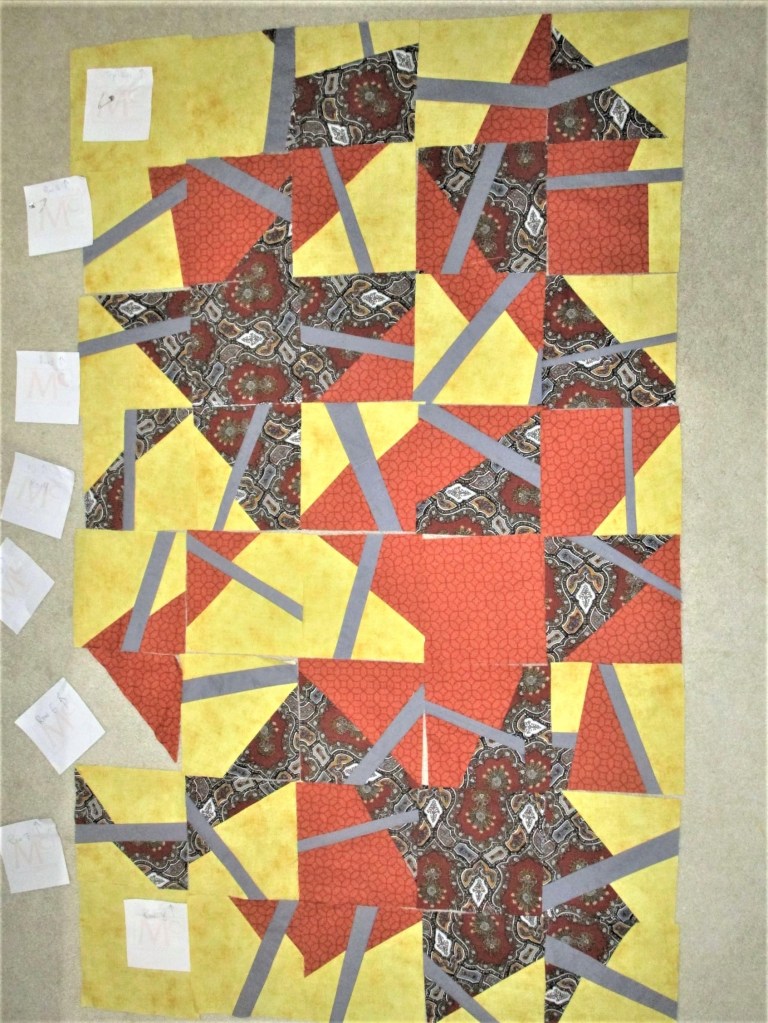
So far, this has been painless. Nay, it has been truly pleasurable. I plan to add more yellow blocks around all sides. Some of them will have patterned fabric crumbs and a few “sticks” sewn into them. Some may not.

While I acknowledge there will be corners to sew, I plan to adopt a laisser-faire attitude about the matching part. If this sort of design process is intriguing to you, I suggest you check out Joe the Quilter’s website to see more of his quilts.

Posted in hand embroidery, painting, quilting

Return to Lake Montgomery

It’s been a while since I shared the turtle in the pond fiber object. As a reminder, it was inspired by a photo taken by Bill on a recent camping trip at Lake Montgomery.

I loved the light, the colors and the texture of this image. I knew right away that I want to create my own version in fabric.

Here is a recap of how I processed this inspiration. First of all, I used fabric paint and the Shibori technique to render the background on cotton fabric.

The piece is about 15 by 20 inches.

After the paint dried, I added another layer to render some shadows. Next I painted the two halves of the turtle onto white fabric…….

……………..… and appliqued them to the background using fusable interfacing.

This is how things stood while I pondered what other elements would enhance the image.

I decided on a few damselflies. More images by Bill were consulted. I picked three beauties, hand embroidered the bodies with floss and machine stitched the wings.

You can see the water plants I added in the foreground using applique and paint.

I sewed on a black border and then paused. This week I finally got around to quilting. My intent was to make the stitch lines look like pond ripples.

How did I do? Are they watery enough?

It took a lot of pondering and a dose of courage to add the turtle’s reflection. The only real option was to hand paint it using opaque Setacolor. So I did.

And here is the finished project.

Springtime at Lake Montgomery
Detail of reflection

This fiber object is now a wonderful reminder of a very special camping trip.

Posted in quilting

Thread Art Mounted on Canvas

Here’s the Thread Art Baby with border and binding complete, mounted on an 18 by 18 artist canvas. It turns out that the finished dimension was Not a perfect 18 by 18 square. The damask napkin alone was shorter by one inch than it was wide. I chose not to square up the piece. So I had to fill in some color on the canvas.

I’m still happy with this one, and glad that it is now on my studio wall.

Posted in colorwork, quilting

Thread Art Baby Portrait F.O.

This is a qualified finish. I still need to quilt the border and bind the edges. But the creative work is essentially done. I chose to use echo lines to quilt the background. The work went swiftly and smoothly.

The cotton damask fabric is a joy to work with. I had the benefit of a fresh needle in my machine, thanks to the delivery of my on-line order from Bluprint.com.

Following the example of Lola Jenkins, I used Prismacolor pencils to color the image. I had never tried this medium on fabric before. But by working slowly and carefully, I managed okay, rendering shadow and highlights modestly. Here she is as of today.

Here is a close-up of the subject.

I noticed that a damask vine landed smack in the middle of her onesie. I didn’t plan that placement, but serendipity happens. So I chose to leave it unpainted and embroidered a running stitch around it.

At 18 inches square, this piece is a good size for framing or mounting on artist canvas. Perhaps the arts supply store will open soon and I can buy what I need. In the meantime, she will be tacked up on one of my foamboard panels, allowing me to admire her on a regular basis.

Posted in quilting

Days of Fine Dining – Damask

How many of you remember a time when fine dining took place on a table set something like this? Okay, don’t answer that. I’d like us all to maintain our youthful appearances. I do remember that time – perhaps 30 or so years ago. Back then I went to the extent of buying crystal glassware. But the silverplate and the damask linens were given to me by the generation ahead of me. Every once in a while I get out the silver. The pale pink damask napkins you see in the photo were a gift from my mother-in-law. I’ve never found a use for them that fits my current lifestyle. They have been in the back of the linen closet, unused, for almost twenty years.

But that ended this week, thanks to Lola Jenkins and Thread Art. While stashing away some other fabric, one of the napkins fell out onto the floor. Timing is everything! It came to me that I could sew a portrait on this pale pink piece of fabric.

The subject I have in mind is my grand-daughter, from this photo taken at four weeks.

Awww!

I decided to overlay this image onto one of a daylily. How about this one?

In the thread art process, the photographs are manipulated to size, and then the contour lines of the image parts are marked up. Here is the baby photo after marking.

I enlarged the flower until the baby could settle comfortably into the center of it. Oops, the baby is missing a foot. I manipulated one of the daylily petals to cover the place where the foot should be. After more fiddling, I came up with this.

Bill thinks this looks like an Anne Geddes photograph. I don’t care.

Now to transfer the lines to the fabric. This proved a little trickier than I expected. I first tried the chalky transfer paper used in traditional embroidery transfers. The lines were way too faint and uneven. Then I found, in the deep recesses of my sewing cabinet, an Aunt Martha’s transfer pencil. Using this tool, you mark up the back side of the image, lay the marked side against the fabric and press with a hot iron.

You get bright pink marks that ARE PERMANENT. But I am living by Lola’s slogan today – and Going For It! I will be covering all the pink lines with black thread.

For the best results, the quilt sandwich should include interfacing fused to the quilt top. I did that and then I cut the batting and backing, pin basted and started quilting.

Here she is at close of business yesterday ……………………

…………….And here is the image with all the contour lines stitched.

So far, making this fiber object has been challenging and fun! I’m so happy to have found a use for the damask napkins.

The next steps are to quilt the background and then add color to the subject. Lola Jenkins uses colored pencil. I will start with that medium, but I may experiment also with some fabric markers. After all, it’s time to go for it.