Posted in painting, quilting

Artful Santa

Ho, ho ho – I must have been a good girl. Santa left me some wonderful art supplies this Christmas. He knows that I am playing around with color these days.

True confession: Santa was working from my list. This set of 36 watercolors is made by Arteza. The first thing I did after unwrapping them was swatch each color. The Prismacolor pencils are the erasable type. I’ve been told these are very useful in sketching, specifically the line drawing used to start a water color.

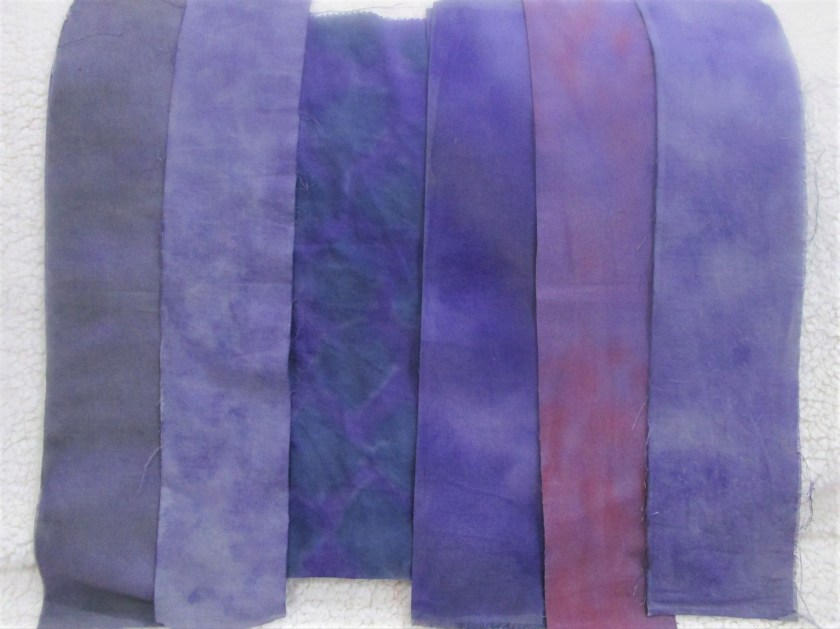
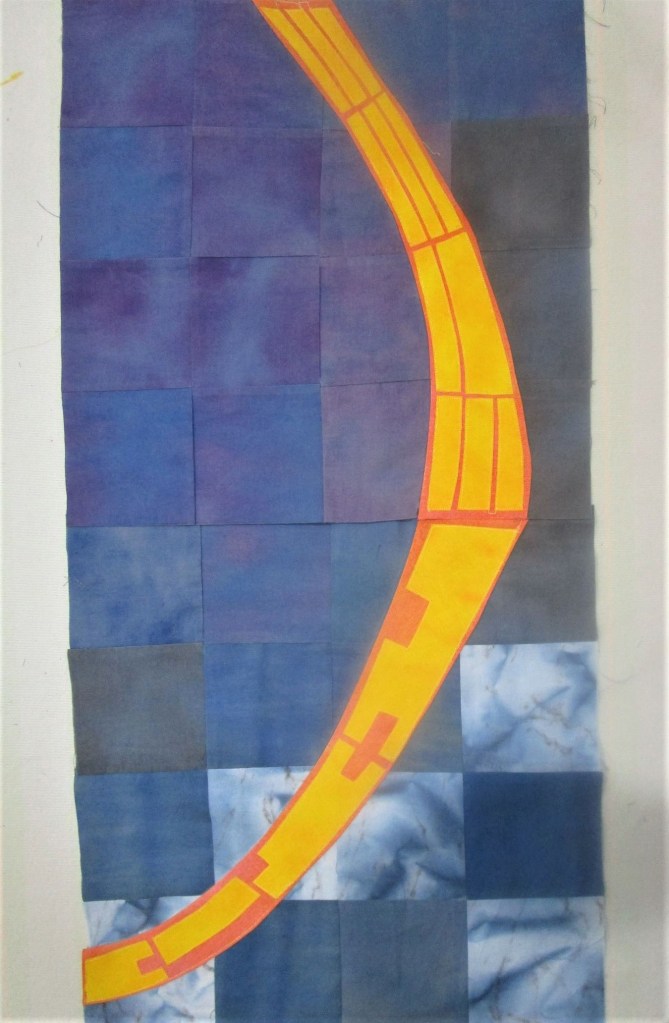
Since Christmas day I have been working fairly steadily on the Arches quilt. I’m pleased that I have finished assembling the hand painted backgrounds of the16 blocks that make up the quilt design.

Block C1 (Center top) The chalk line indicates where the arch starts.
Final Block – L3 Bottom left. I’m so proud that I matched all the corners.

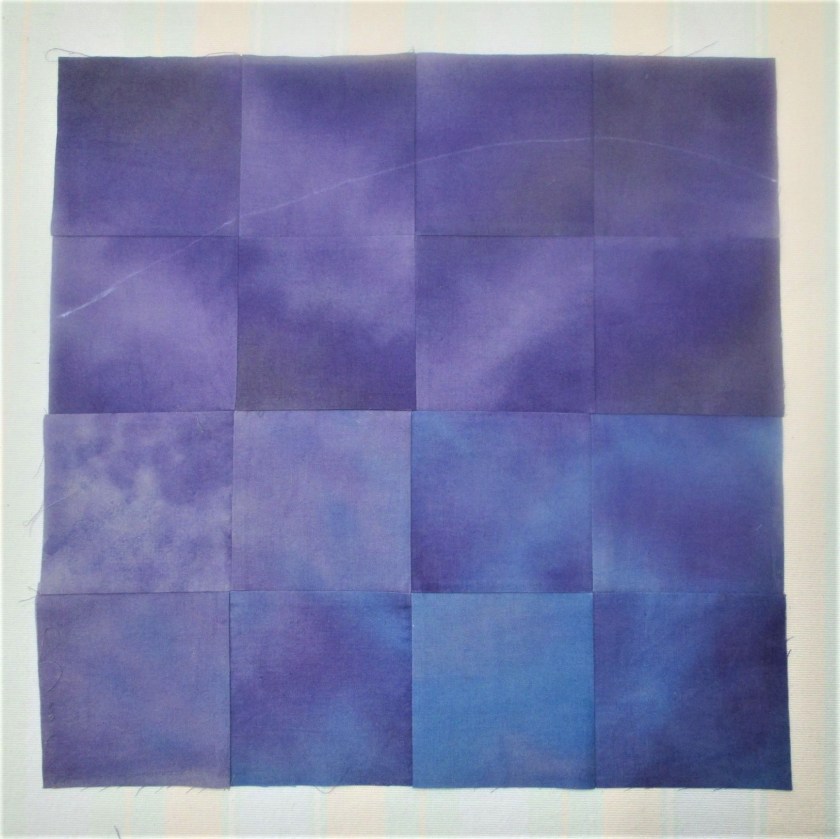
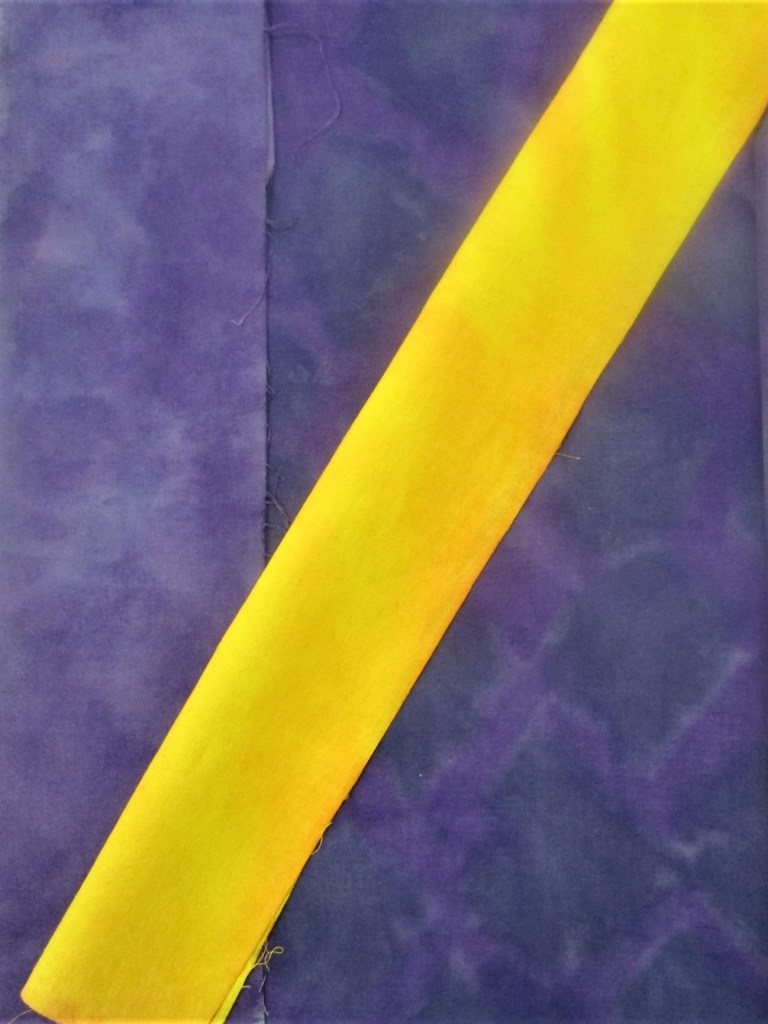
The images below show a few completed blocks compared to the reference photos I worked from. Here is the upper right block.

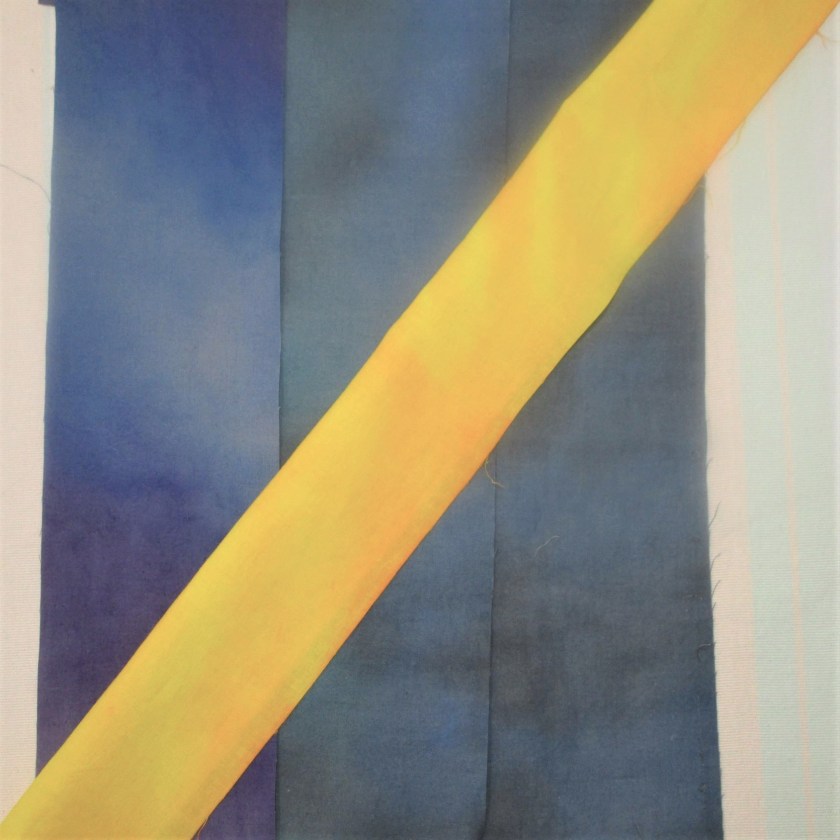
This photo shows two blocks, representing the slender upper sections of the Arch.

I’m on a roll now. My hope is to finish the quilt top before the new year.

On a shopping trip to Tulsa I found the backing fabric – a purple-black color with a graffiti style print on it. I still need to choose border fabric. But what color? I am considering something lighter, just to provide separation from the dark blue and purple of the background. But I don’t want the border to compete with the bright yellow-gold of the subject fabric. Suggestions would be welcome.

Posted in painting, quilting

Update on Arches Quilt

I last wrote about this project on November 16th – almost a month ago. In that post I made a list of next steps. While I have completed all but a few of those steps, I started to lose enthusiasm for the project while painting my fabric. It seems that all of my fabrics began to look alike. I told myself that the background fabrics SHOULD look alike, otherwise they wouldn’t retreat into the background. But I still wanted more texture and movement in the colors. So I decided to go back to Cindy Walter’s fabric painting class, to review my technique and discover what I’m missing.

https://shop.mybluprint.com/quilting/classes/fun-techniques-with-fabric-paints/35491

That did the trick. I worked a few variations on color washing and finished painting the background fabric. I now have enough fabric to start building the quilt blocks.

Looking at all the difference in the fabrics, it’s clear to me that I need to organize them in a way that illustrates the scene I want to paint. The solution came to me while I was in the shower. (Why do I get my best ideas while washing my hair?) The Arch stretches itself across three different backdrops.

Water.

City.

And sky

I have my design, my structure, my fabric and my pattern. Now I can begin to sew.

Posted in drawing, knitting, painting

Life in the Studio

As much as I enjoyed our little trip to visit family, it’s nice to be back into my routine. Just as an aside, the faux suede baby booties, while slightly too big, were well accepted by little L. In the meantime, she had also acquired two other items of footwear – a pair of sneakers and a pair of snow boots. She did a brief baby runway show, modeling all of the above. It was so funny to watch her toddle around the house awkwardly, although looking quite pleased with herself and her ability to work the crowd.

Back at home, I have picked up where I left off on various fiber projects.

First of all, I’m knitting a birthday surprise for my daughter. (A big clue to the surprise is found in the sketch above.)

Secondly, I’ve resumed efforts toward making the Arches quilt. It’s amazing how just writing down the next steps motivated me to work. I have finished drawing the full-size patterns for each block. And by completing this step, I have been able to determine exactly how may squares of each color will be required. Over the past two days I have been painting the background fabric. I chose to paint the background squares on a gray fabric, in order to keep the background looking like the night sky.

Next up will be the fabric for the quilt subject.


Posted in knitting, painting

A Hunker-Down kind of day

The wind howled all night and by 8 am this morning, the temperatures were in the lower 30s. I’m told that this is today’s high. The temperature is still dropping and the wind continues to blow. It’s a good thing that I have plenty of fiber objects and other creative endeavors on hand. No need to change out of my comfy yoga pants.

Yesterday I began to learn watercolor painting on paper. It’s been a long-time goal of mine to study this art form. I signed up for Lindsay Weirich’s introductory course Hand-painted Holiday, which can be found at https://lindsayweirich.teachable.com/p/hand-painted-holiday

During an overly-optimistic moment several years ago I had purchased a water color set. I dug it out of a drawer and retrieved several tubes of paint. It took some muttering and a dull yarn needle to pierce some of the foil seals, but eventually I had small quantities of paint laid down onto a cheap plastic palette.

First the tags. Lindsey called these a warm-up exercise. After a few hours I had completed six or so gift tags. Here are some of my favorites:

Next came the cards. I worked the first of the series, stopping when I realized that the afternoon had flown the coop, it was 5 pm and time to cook dinner.

Taking a break from painting, I moved on to knitting. At this point, all of the holiday gifts that I wanted to make were finished and ready to be wrapped. (Mmm maybe I will attach some of those gift tags!) I suddenly remembered that daughter had requested a pair of mittens for her son. She specifically wanted stranded knitting, so the mittens would be extra warm. I found the perfect pattern on Ravelry. It will only require a few adjustments, including the insertion of a thumb gusset for better fit.

Here is my progress so far.

With the weather so brutal outside, there is a chance I can finish these mittens and another watercolor card before the sun comes up tomorrow.

Posted in hand embroidery, painting

Hydrangea in my Rearview Mirror

Before I say farewell to my study of the oakleaf hydrangea plant, I want to share the little study I made of the blooms. Above is a reference photo for the plant. The “flowers” open pure white, changing over times into shades of rose, rust and green. I say flowers in quotes, because the part of plant that most people identify as a flower – it has petals, after all – is really a bract, or sterile flower. The real flowers are in the tight little buds that you see at the top of the panicle. Here is a specimen, much dried up, that I took from my hydrangea.

Interestingly, there are some bracts with four petals and some with five. I did a drawing in colored pencil before I started making the fiber object, which depicts the rusty pink color of late summer.

My first thought was to make corner blocks for my quilt with images of the flower panicles. But after I had assembled the quilt and laid out the border, I decided corner blocks would not improve the quilt at all and might even detract from the focus. By then I had already started a sample block.

It is a sweet little object, just 4 by 4 inches. Made with hand painted cotton, block printed and embroidered. Perhaps I can use it in another project.