I continue to work through Shari Blaukopf’s tutorials.
This week’s sketches focus on painting shadows of three dimensional objects. Shari chose three rather pedestrian objects. And yet they offer all the elements an aspiring watercolorist would need for practicing shadow painting.
Fire Hydrant
Waste receptacles, also known as bins or trash cans.
Car parked in bright sunlight.
I find that if I take sufficient time to make a good pencil sketch, the process of applying paint goes pretty easily.
If you are interested in Shari’s tutorials, you can find them here:
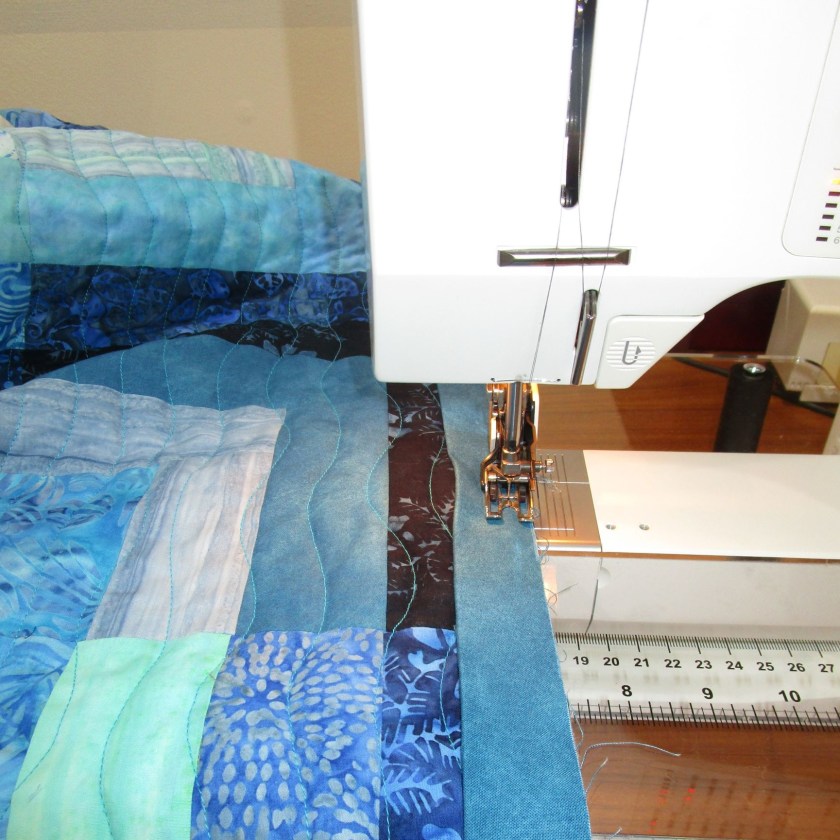
For the past week, my head has been buried in this project:
Under the Sea Quilt – applying binding
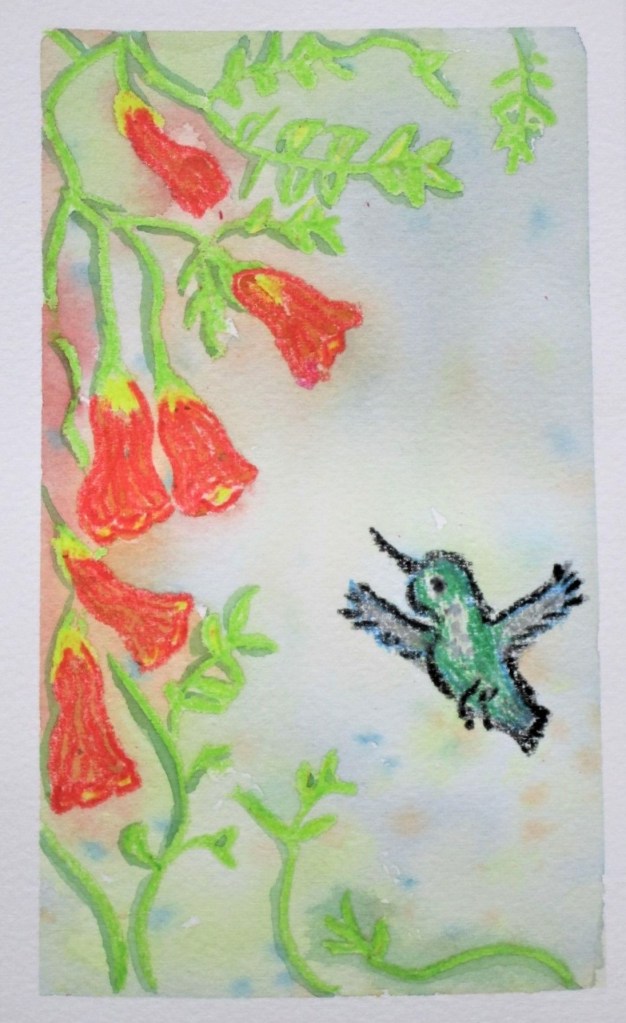
Well, today I finally finished it. The big reveal will happen on Friday. You will have to check my post then if you want to see final pictures. As a little break from all the sewing, I took inspiration from Jennell Willey, of “In the Artroom” Check out her blog about using crayons with water color paint as a form of resist.
Because I have been watching hummingbirds whiz back and forth in my backyard, I decided to feature one in this little warm-up exercise. She is approaching a group of tumbling down trumpet vine blossoms.
Next comes a wash of color. I chose turquoise, orange, yellow and blue, to pick up on the crayons I used in the drawing.
A little splatter won’t hurt this painting.
After it was mostly dry, I added a bit of darker green to outline the vines.
And here is the finished painting, dried and with tape removed.
It took all of twenty minutes to make and was very relaxing. If I wanted to explore this technique further, I would sharpen my crayons a bit to get a more precise line. This would be a great technique to use in making greeting cards.
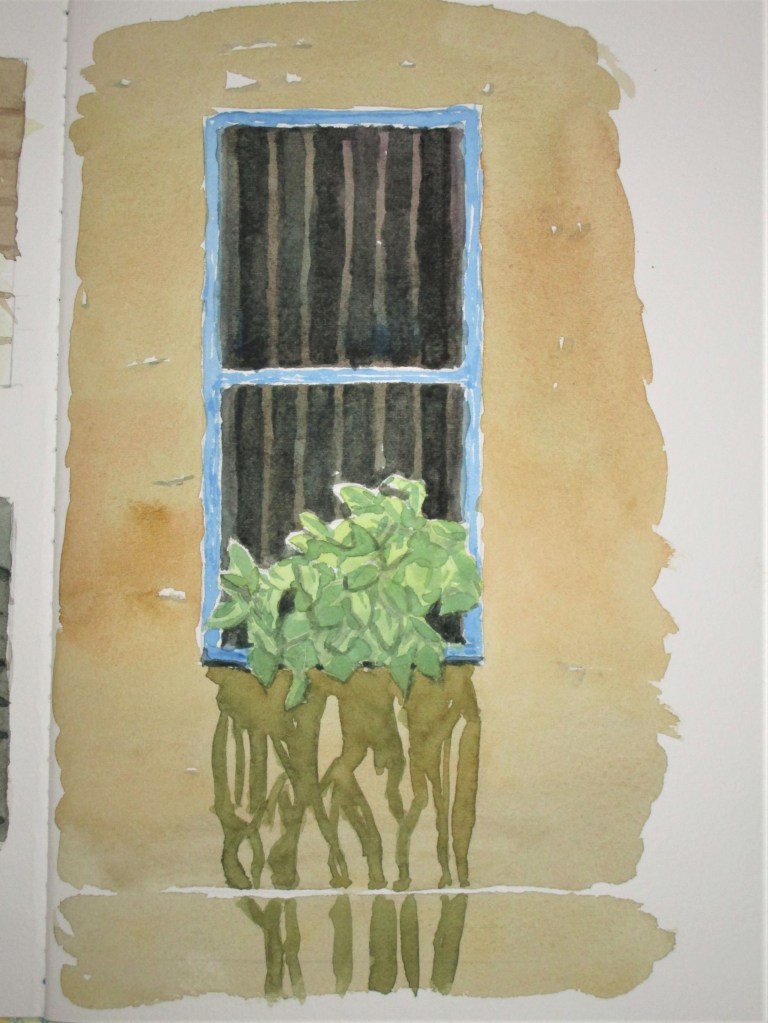
This blog is about my first watercolor on-line tutorial from Shari Blaukopf. She is a Montreal-based artist who specializes in urban sketching. First let me say, I enjoyed it. The reference photo is of a barn wood clad schoolhouse relocated to an urban garden somewhere in the Pacific Northwest.
My first challenge was to draw and ink the essential lines of the image. I took my time over this step, since it is critical in setting up the rest of the painting.
By the way, I’m working on Arches cold-press watercolor paper for the first time. This premier paper is much beloved by watercolorists.
Next I completed the preliminary washes for the sky, building and flowers.
After letting these dry thoroughly, I went to work on the shrubbery and trees. Shari gave instructions on how to mix eight different greens using various blue and yellow paint. This part was really hard for me, partly because I didn’t have all of the paints that she used in her mixes. I had to substitute.
To me, the various green areas look like they don’t belong together.
I let the paper dry for almost a week before I got around to adding the final details. First the lawn went in, then dark green for underpainting the brighter greens. The barn wood got more shading before all final details were added using a small round brush. After drying, I dabbed some white opaque paint onto the flowers to give a little sparkle to the scene. Here is my finished painting.
This is the first time I successfully painted a mass of foliage. I also learned how to paint a lawn and the order to use in painting flowering plants. I’m betting that I will use these techniques in many future paintings.
Yesterday and today I took a break from sewing to paint with watercolor. I have been following a tutorial by Montreal artist Shari Blaukopf called Sketching Landscapes in Pen, Ink and Watercolor. My goal for this painting was to practice skies. I chose a reference photo that had a very nice sunset and featured clean, simple shapes. This would allow me to make a finished painting but focus on the sky. The photograph also featured a reflected sky (another good subject for practice.) After making a pencil sketch, I jumped right in on the sky and reflection. Next came a few pen marks to guide the rest of the work.
After drying over night I added the other washes – mountains, meadow and trees. Once these had dried, I used my brush to give texture to the trees and shadows to the pond.
So far I’m liking this. But I felt that the painting did not really show the warm glow of morning light that I saw in the photograph. To correct this, I made a wash of burnt sienna and quinacridone red and stroked it fairly evenly over the grass.
Ahh that’s better. I used a dry brush technique to give a little texture to the grass and let the painting dry. For the last step, I followed Shari’s instructions and added pen marks to the trees, grass and pond edge.
This painting gave me a great deal of pleasure. I avoided most of the miss-steps with the watercolor paint and achieved the look I was after. I guess it’s worth signing.
I will put in the link to Shari’s class, but it’s on Bluprint.com Unless you are already a subscriber, you may not be able to open it.