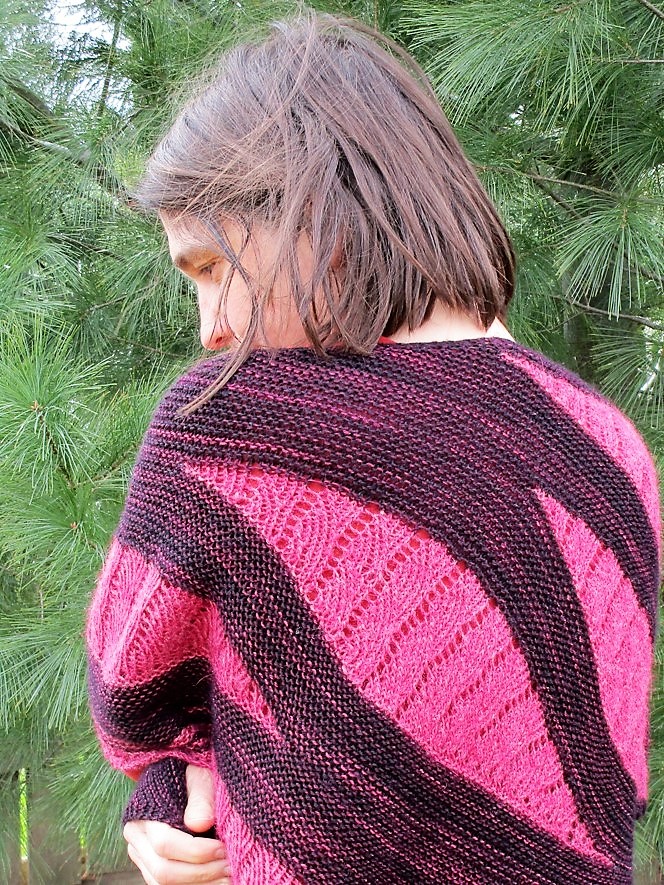
I’m interested in doing a few watercolor portraits. Today I am studying this photograph that I took of my daughter wearing a shawl I knit.
I chose this because of the variety of textures and contrasting values. Her pose is also very interesting to me.
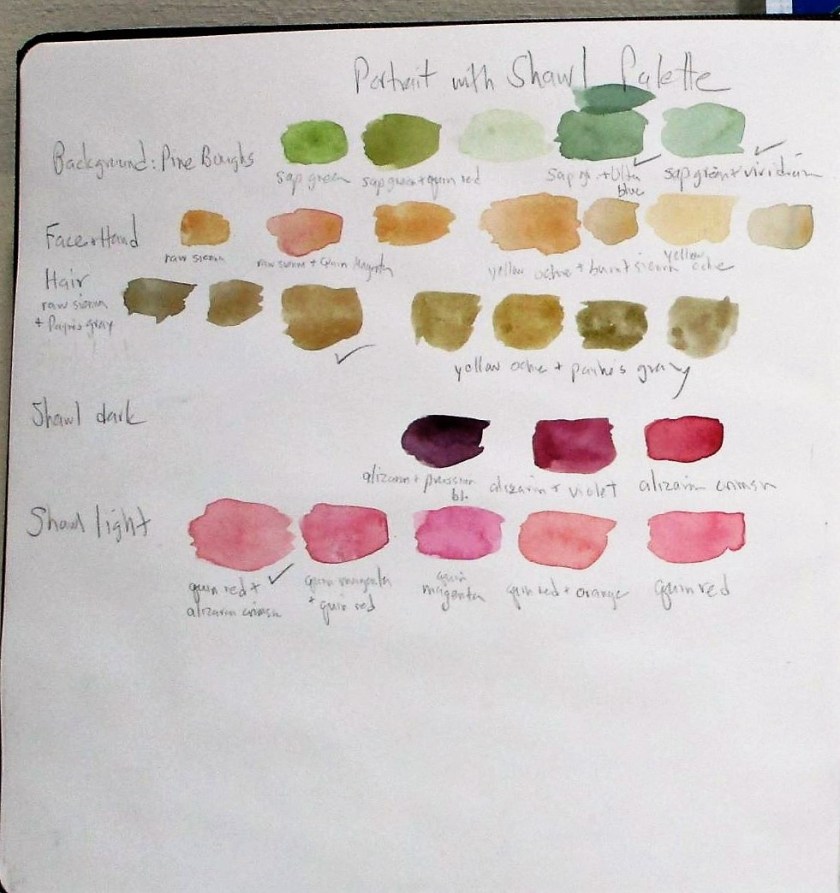
So far, I have cropped the image and penciled the shapes onto watercolor paper. But before jumping into painting, I thought I would test out a few color selections in my sketchbook.
Some good options
A good start. The background is not dark enough, but I like the shawl colors. I can add more layers of paint to the background. That hair is too orange! It will be useful to attempt another study of the head before I move on.
8-05-22
Today I corrected values, added detail to the background and refined the face.
While perusing available art quilt technique tutorials, I discovered another use for my hand-painted fabrics. Carol Ann Waugh teaches a modern take on reverse applique in her class on Craftsy. She calls it Stitch and Slash. It was inspired by the traditional molas made by the Kuna women of Panama.
In Carol’s interpretation of the mola, four pieces of fabric are selected and layered together. Then a design is chosen, marked on the back of the pile and stitched into layers. The similarity with the traditional molas stops here, when Carol gets out her seam ripper and slashes away at the assembled fabric Instead of nice, neatly stitched edges, she ends up with frayed, textured ones.
Okay, I thought, I have the perfect set of fabrics to try this out.
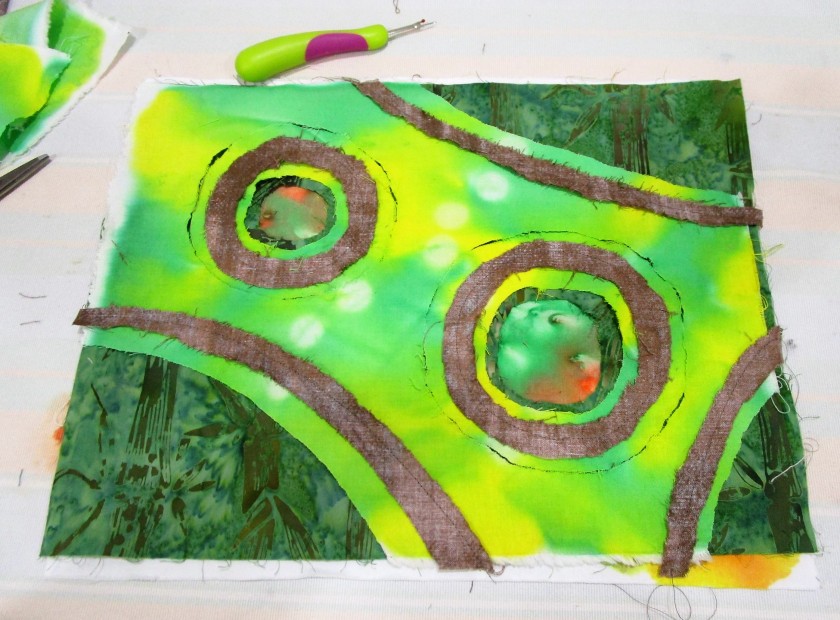
The two painted pieces are layered with a dark green batik print and a brown textured print. You see here the back side of the brown fabric, which I will be using for the top layer. Nearly all of the this layer will be cut (or torn) away.
Here is the back of my piece, showing marks stitched through.
Getting started with the slashing: You see in this photo all the top layer is gone, part of layer two gone, and the center of the circles showing the bottom layer.
This ripping took more time and was a little trickier than I expected.
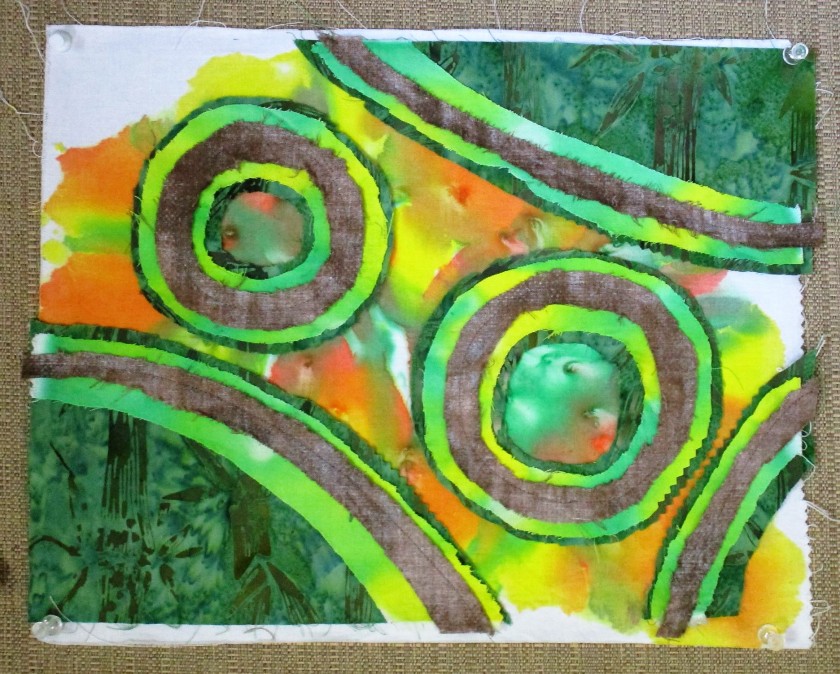
All the excess fabric is now removed.
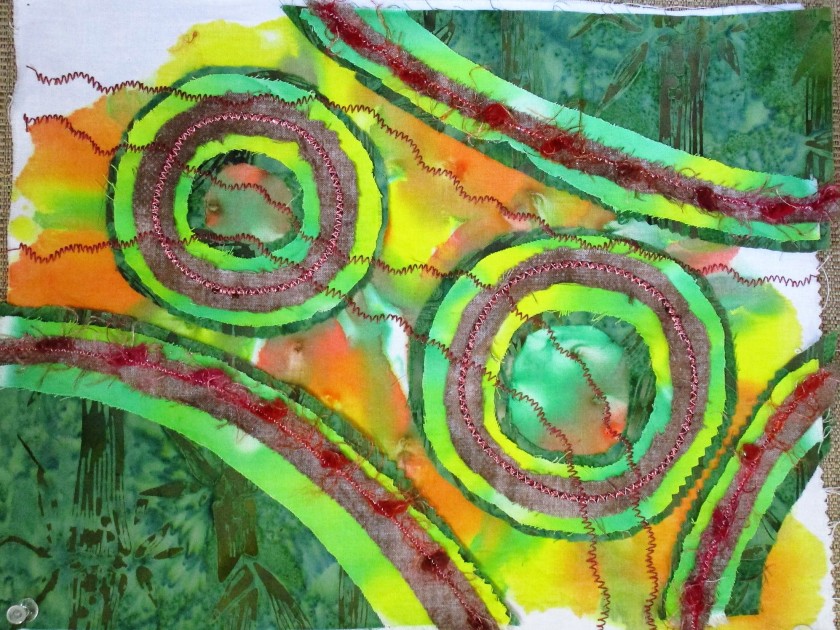
I was excited by how well the painted design is showcased.
The next steps are really just embellishments. To start, various ribbons and yarns are couched down over the seams. (Couching is just a zig-zag stitch worked over the ribbon/yarn/cord.) After that, it’s time to explore thread and machine embroidery options. I went with metallic yarns and threads in warm colors and dark shades.
To finish up, I made a quilt sandwich with batting and backing and stitched it together using free motion quilting.
My Stitch and Slash sample suggests to me how much the trees are suffering from drought and temperatures above 100 degrees. I will call it Heat Wave.
It’s been a very long time since I have seen one of these in the wild:
Photograph by Mitch Zeissler
When I was a child roaming the woods in Ohio, we called this plant Jack-in-the-pulpit. This very wonderful photograph brought back memories and enticed me to try a watercolor version of it.
Sketch and initial wash on the background.
Finished painting
Most of the paints were Daniel Smith, a few Winsor & Newton. I used yellow ochre, green-gold, Winsor green, ultramarine blue, carbazole violet, alizarin crimson and quinacridone red. I also placed a few dabs of white gouache. Paper is Fabriano Studio cold press.
Last Saturday, I was wanting to just mess around with mark-making in my sketchbook. As I opened my pen case, I spied a dip pen that I had purchased, but never really used. Grabbing a bottle of Sumi ink, I got busy. It was fun! After I had marked up the paper quite a bit, I added some watercolor crayon for color, and spritzed water on sections.
That exercise left me warmed up and wanting to do more. I turned to this photograph of Mogadore reservoir that I had taken while visiting Ohio in November of 2020.
After blocking the scene in pencil, I used watercolors to paint the background. The dip pen and ink came into use for the foreground branches.
This little 4 x 6 painting will be a nice postcard to send home.
Last month at Open Studio, expert watercolorist Cheryl Bryan presented this example to our group. The lesson was about painting in shadows.
I wanted to do this lesson, but felt that painting five cherries was not enough subject matter to keep my interest. So I chose this reference photograph, to supplement Cheryl’s example.
Initial sketch:
Lots of masking fluid added:
First washes, background and beginning to paint the subject.
To get this subject to work, each cherry must be painted individually, with multiple colors of paint worked in.
Most of the painting is finished, masking fluid removed.
Finished:
The cherries look luscious, but my favorite thing is the bowl. What a dreamy color!