Posted in knitting

Sweater Weather?

Well, not really. The morning started as sunny, breezy and temps in the 70s. But I am encouraged to think about cooler times with the arrival of the last day of September.

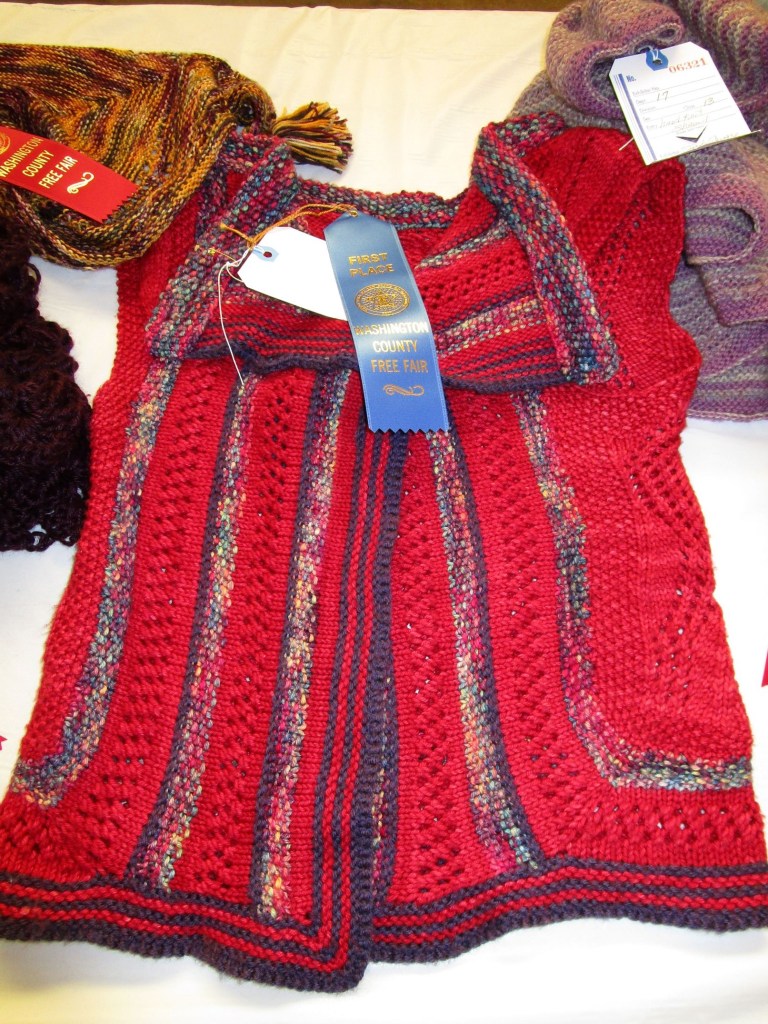
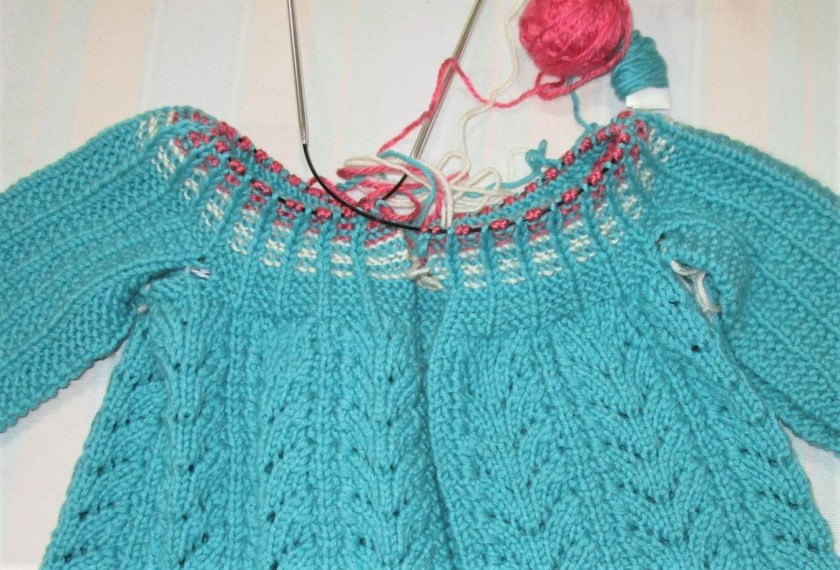
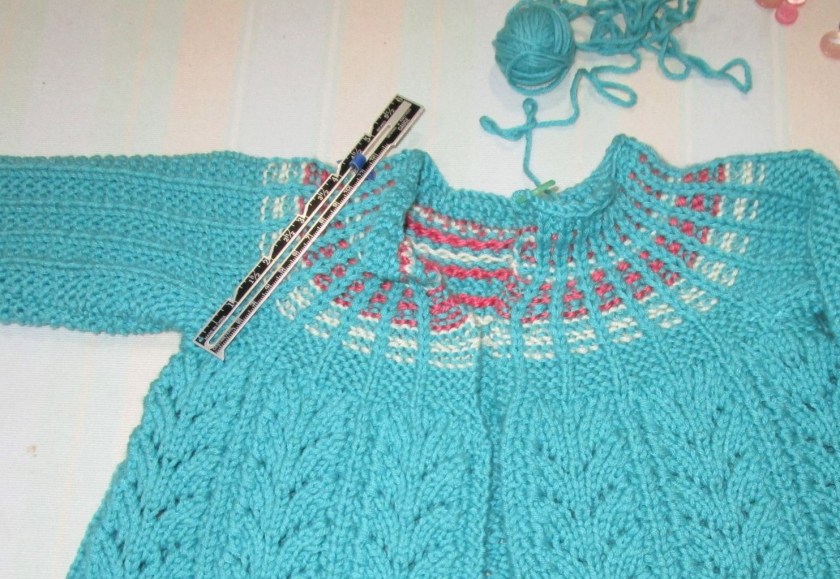
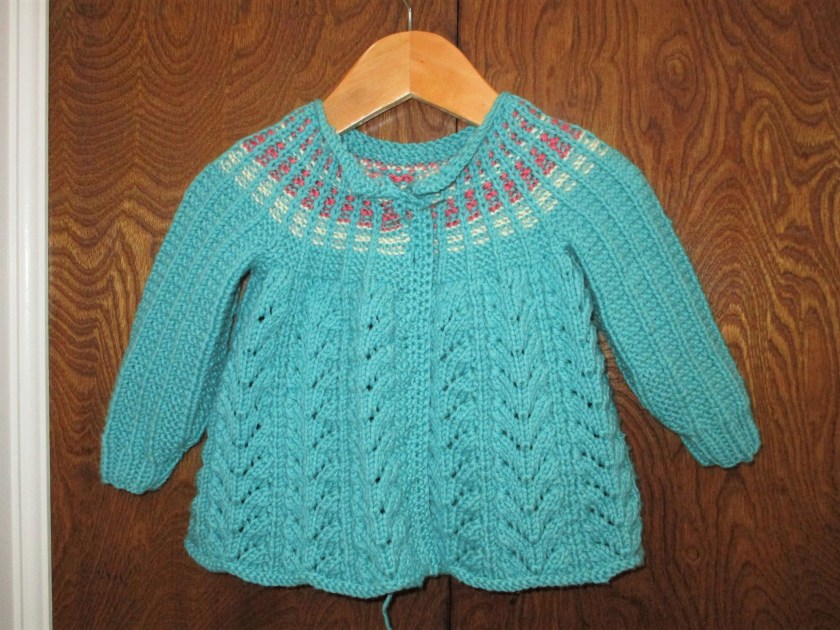
I’m also encouraged by the fact that I’ve moved to the blocking stage a cardigan that has been on my needles all summer long. Here she is, drying under a ceiling fan.

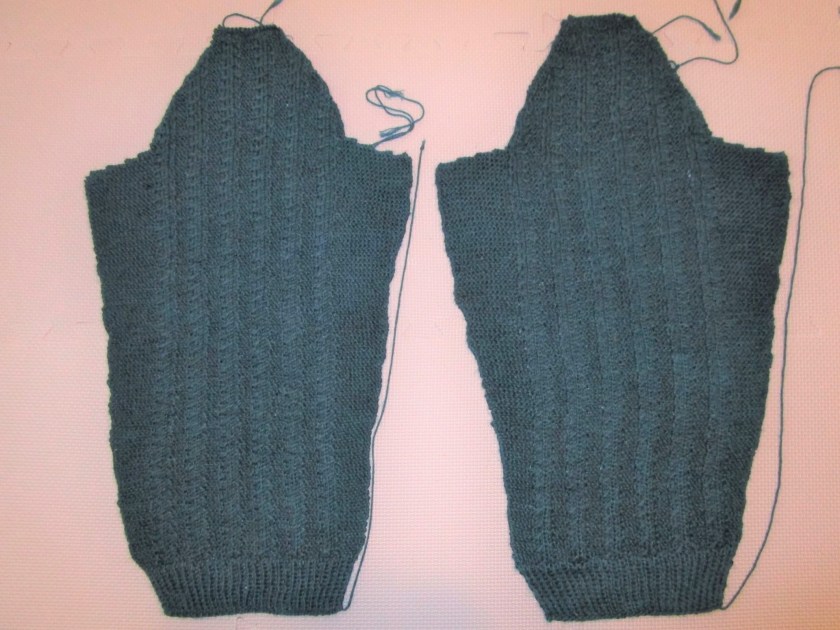
The pattern is called Passages and is from Knit Picks. I purchased it for my daughter over a year ago. She was unable to make a lot of progress on it with the new baby and all. So I thought I would try it.

The stitch pattern, called Gull and Garter, is an easy stockinette variable over five stitches and four rows. Row 1: Bring yarn to front, slip five stitches. Row 2: Purl. Row 3: Knit two stitches. Insert right needle under loose strand and into next stitch. Knit normally then bring the new stitch out from under the strand. The loose strand is caught up behind the third stitch. Row 4: Purl. This Gull pattern is interspersed with three garter stitches. Here is a link to the sweater pattern on KnitPicks.

https://www.knitpicks.com/passage-cardigan/g/52475220

The only adjustments I made to were to gauge for a thinner yarn and add some waist shaping. After sewing up the shoulder seams I will knit on a 2 inch button band-collar and sew on the sleeves. This WIP will be DONE.

Posted in hand embroidery, knitting, quilting, sewing

Old-Timey County Fair Fiber Fun

Who loves going to the fair? If today’s attendees are representative, I would say everybody! There’s a lot to see and a lot to do. Our county fair focuses on all things agriculture, but also includes some things that city folk enjoy, like growing flowers and taking photographs. Here is what I did at the fair today.

I checked out all the Fiber Providers:

Some chickens managed to get into the picture.

Oops, NOT fiber providers, just cluckers and layers.

And I got a good look at the various needle arts entries.

Sadly, there were not near as many needle arts entries as there were in past years. Achieving a couple of blue ribbons for my two was not that gratifying.

But I was very pleased to see that some of my fiber arts kids had entered items that they made during our class last year. Here is Gianna’s Blue-Ribbon strip quilt.

Going to the fair felt so nostalgic to me. It made me wonder: How many more years can the county fair tradition continue into the 21st century? Are needle arts as a craft doomed to die out? Or can they be revived in a brave new world?

Posted in knitting

Finishing the Baby Fern Sweater

I had stopped working on this project until I could verify the baby’s arm length. My original design allowed for an 8 inch sleeve. To learn the truth I took a tape measure to the lake house. While she attempted to evade measurement by considerable wriggling, I won the battle, and determined her arms were 7 inches long. In the interests of planning for growth, I made the sleeves 7 1/2.

Finally moving on to the yoke. Remember, Elizabeth Zimmerman’s battle cry: Knit body to underarm, sleeves to underarm, unite! Here is the sweater after the yoke was worked as far as the first round of decrease.

My plan to keep the stockinette stripes evenly spaced worked out well. As I began to run out of yarn I added the white and pink stripes. The blue ribs were carried through by slipping those stitches in the white and pink stripes.

Yoke worked to 4 inches in depth. Per the EZ method, three rounds of decrease happen at 1/2hf, 3/4th and 4/4th of the yoke, or in this case, 2, 3 and 4 inches.

After sewing up the sleeve seams and grafting the underarm seams, I decided to use single crochet to finish the front edge including six button holes – 2 in the yoke, 4 in the body. Here is the sweater, knitting complete.

Now I’m off to my LYS to buy the buttons.

Posted in knitting

From the Design Idea folder

Dear Fellow Makers,

Over the past few days I have been engaged in work on fiber objects that take a lot of time to complete, such as painting the hydrangea leaves for a wall hanging and knitting a sweater. So I don’t have anything new to share on the blog today.

In perusing my design book, I was reminded of a project that I made in 2013. It has an interesting story which involves knitting sweaters for a little boy.

Have you ever worked hard on a hand-made gift, only to have it rejected on the spot by the recipient? I have! As a new grandmother, I was joyfully knitting sweaters annually for my grandson. One year it was an Elizabeth Zimmerman design (the modular Tomten Jacket described in The Opinionated Knitter.) After unwrapping it, said grandson simply cast it aside. (sigh.) I resolved never to let that happen again. For his birthday sweater the following year, I chose soft, brightly colored acrylic yarn and came up with a design that no little boy could resist.

Like all boys, my grandson loved trucks – BIG trucks and BIG earth-moving equipment. I decided to make a rugby style sweater with the image of a John Deere digging machine on the back. This project required a custom chart and my husband gleefully helped me to create it.

The picture was downloaded from the JD website, but the grid required a little adjustment. In knitting, the number of stitches per inch almost never matches up with the number of rows per inch. To avoid compressing the image, the squares of the grid need to be fatter than they are tall. I gave husband my gauge (stitches per inch and rows per inch.) He calculated the ratio and used spreadsheet software to adjust the grid to match. From this chart it was relatively simple to knit using a combination of stranded and intarsia techniques.

Upon receiving his gift the following birthday, my grandson jumped for joy.

“It’s an excavator, it’s an excavator!!”

This sweater was happily worn for several years in all kinds of weather.

One final note: If you try this technique, you may find it helpful to outline the details of the image in black yarn. This will help the image come together.

Posted in knitting, recycling

A Little Remake

In March my daughter gave me three garments that were in need of a remake. I have already dealt with the silk blouse and the brown cardigan. The third was a blue wool baby sweater which got machine washed in hot water by mistake. The consequence was that it thoroughly felted and shrank down to the size of a doll’s coat.

I had been mulling over what I can make from a felted sweater. No ideas came forth. Then I shifted my thinking and considered what could be done with the felt itself? Remembering a conversation that I had with my grandson, about the poor performance of hand-knitted mittens in wet snow, I hit upon the idea of felt mittens. Melting snow will rarely, if ever, penetrate a heavy felt garment. Could I make mittens for the baby with this felt?

To start with, I cut off the sleeves. They looked vaguely mitten-like.

Using a crewel needle and sock yarn, I blanket-stitched around the lower edges of the sleeves. Then I picked up and knit into the blanket stitches and joined for knitting in the round. I knitted the cuff downward in rounds. After a few rounds, I started 2×2 ribbing for about an inch. Then I decreased, knitting another five rounds and bound off loosely.

Cuff finished. Beginning thumb for right hand mitten.

The process for the thumb was similar, except I had to slice a one-inch gash in the heavy felt. About eight rounds of knitting later, I decreased with k2tog, pulled the yarn through the remaining loops and fastened off.

Here comes the fun part. I cut down the top edge, making the total length of the mitten 5 inches. The upper edge was closed with running stitch and then sewn with blanket stitch all around. Using pink and red yarn, I embroidered a heart on the back of the mitten.

The letter R is for Right Hand Mitten!

Right hand mitten is done. I do hope that this will be a workable mitten. Now to make the left hand mitten to match.

Rainbow Beanie Baby, holding the mitten for me while I make the second one.
Right-Hand Mitten’s buddy has arrived.