Completing the front of the vest didn’t take very long. I chose to use a 1 by 2 rib which matched the edge rib of the vest back. The front hem carries on the same stitch and colors of the back hem – brown with a purple stripe – to provide more unity to the garment. The neckline is a wide V and the button placket is garter stitch. The only hiccup I encountered was that the garter rows proved to be tighter than the rib rows, (naturally) and I had to throw in a few short rows to compensate. Here are the front pieces on the blocking mats.
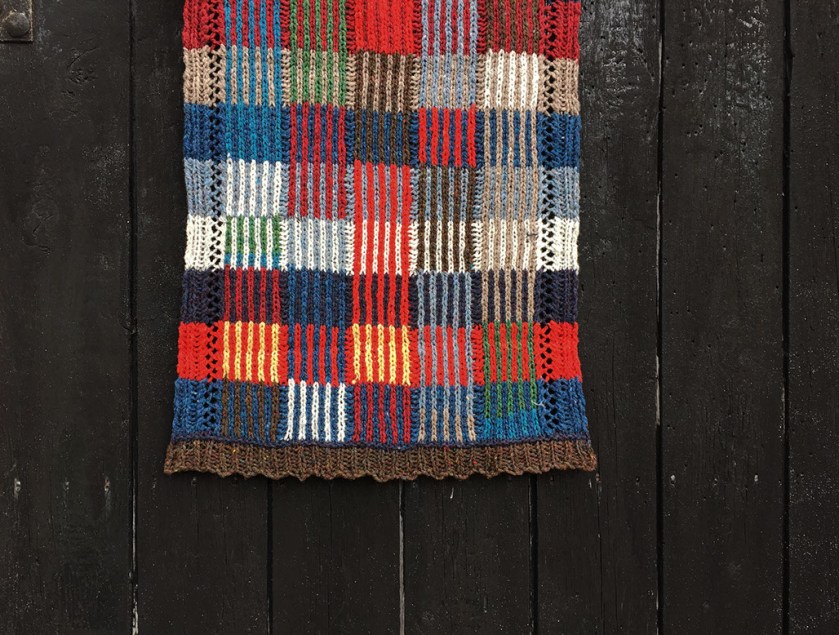
And here is the finished vest.
I’m pleased with how it turned out. And here I am turned around.
The side seams were sewn with mattress stitch. I like that the vest shows both the serious side and the fun side of the wearer’s personality.
All yarn is from KnitPicks. Thank you to Kieran Foley and knit/lab for creating the Weaver’s Square design.
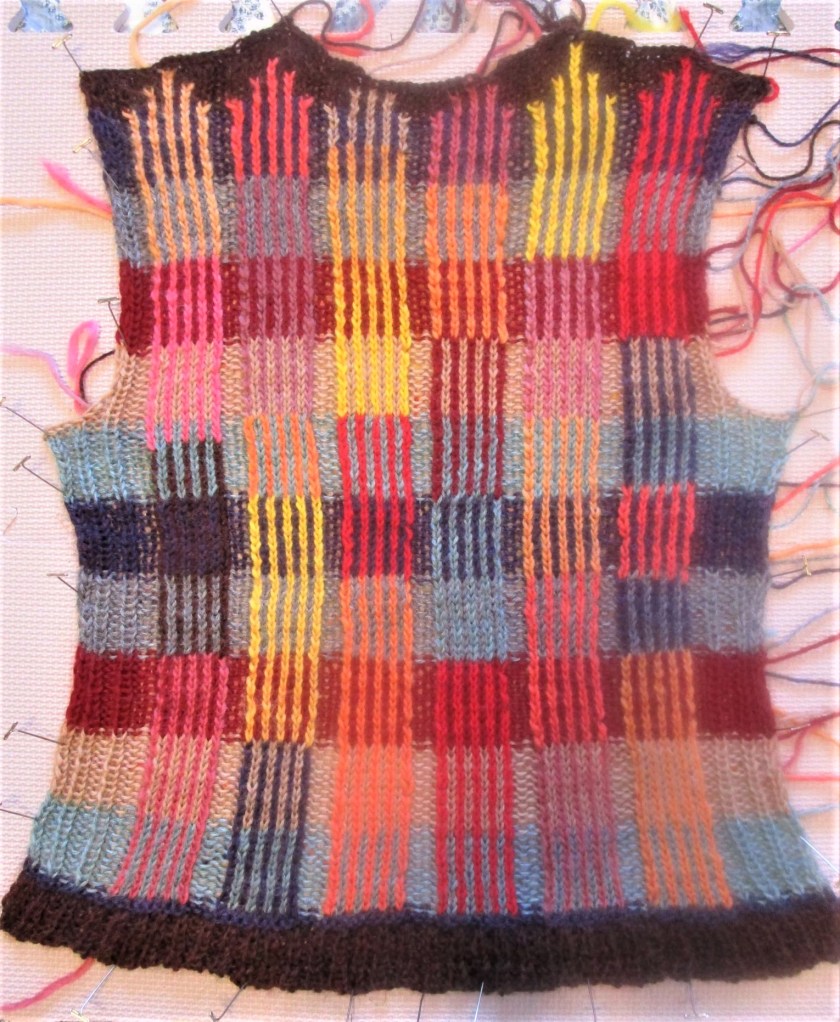
I bound off the back of the vest last night. Today it is drying on my blocking mat. Despite the fact that it looked Very Small and Narrow the whole time I was knitting, it turned out to match the gauge of my blocked swatch. Hooray! As all knitters will surmise by looking at the photo, there are a gazillion ends to weave in. That will occupy me for a few hours.
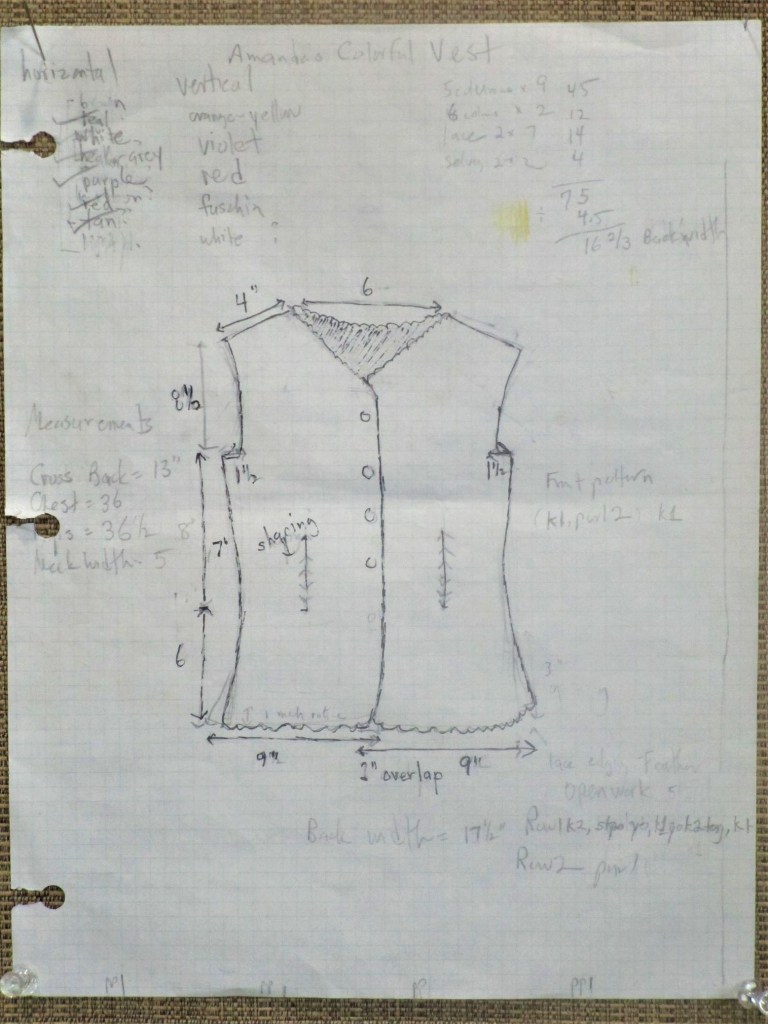
Here is the schematic I drew for the making the vest front.
I will be using a superwash Peruvian wool yarn from Knit Picks called Merlot Heather. To make the vest fit close to the body, the stitch pattern will be a broken rib stitch and there will be waist shaping decrease-increase stitches near the natural waist. Buttons?
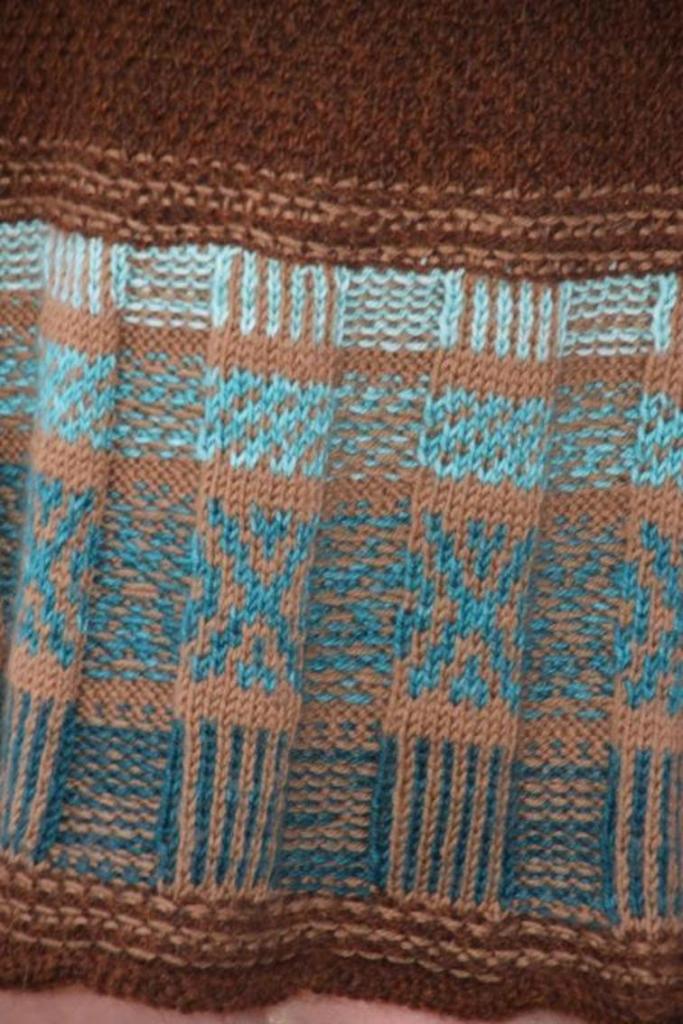
Since I didn’t finish any of my fiber objects this week, I have decided to write a progress report. You see above about ten inches of the Weaver’s Square pattern, which will become a colorful vest for my daughter. This is the back of the garment. The front I have planned will be much more subdued. While working with seven strands of yarn each row has been a challenge, the satisfaction of the work and the excitement of seeing the color emerge has more than compensated for any difficulty. I have chosen to switch out the vertical colors at a rate of two or three for every band of horizontal color. As a result, the pattern has a more vertical effect.
Log Cabin Mini Quilt
Another work in progress is picture above. The quilt sandwich is constructed and some stitch in the ditch took place. At that point, I decided to work some embroidery in the flower squares and add hand quilting to the strips.
Blue block nearly finished.
I also felt that a border was essential to provide balance between the light and the dark sections of the piece. Going further, I plan to hand-paint this border in multiple hues. It will be exciting to see how well that goes, and it will take me more time.
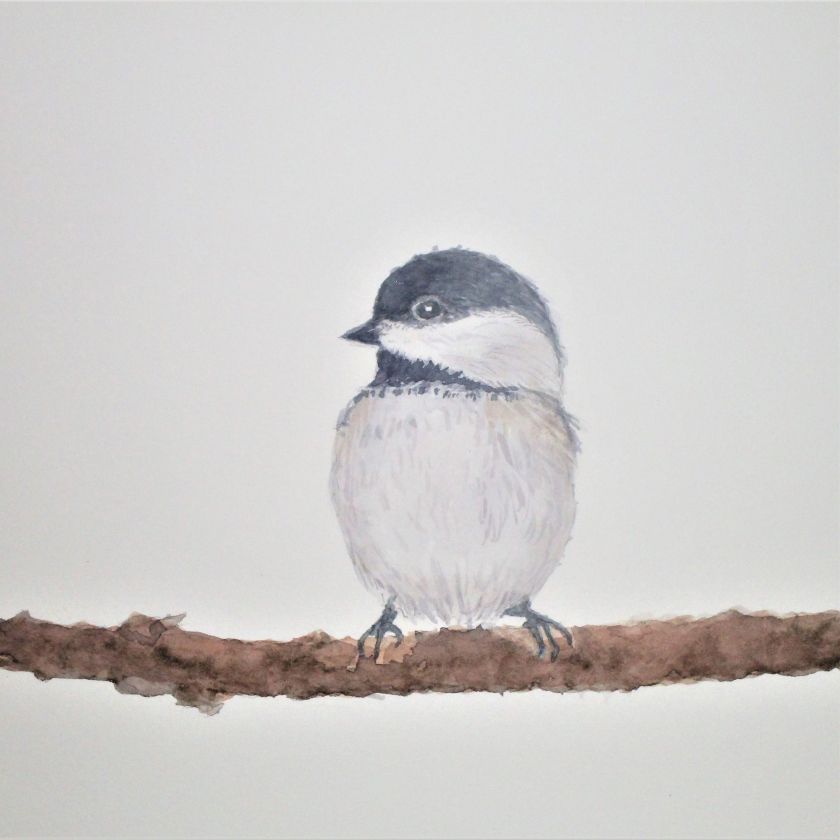
Last week-end I started a tutorial on painting with water color on paper. This class was offered on Bluprint.com. Despite a little trepidation, I am sharing my work today. Keep in mind I am a rank beginner and be kind.
Seascape at daybreak with birds.Color Block using primary colors, salt, colored pencil and micron pens.Realistic style chickadee
Such a fun week. Sometimes I have to pinch myself to remind me that this life is real.
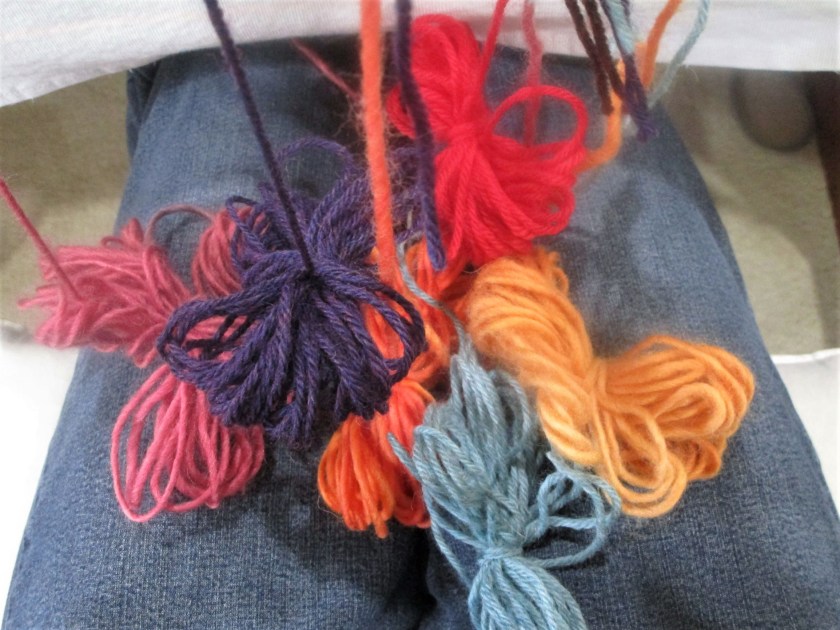
Not the usual place one finds butterflies. These little twisted pieces of yarn are called butterflies, wound up in pursuit of knitting multiple colors at once. I am attempting to make a colorful vest for my daughter. Here is what I have so far:
This is the start for the back of the vest. The concept is to create a riot of color while keeping the front very plain. Back interest is a tactic that I use frequently in my knitting designs. Sometimes I use a dramatic over-sized cable, sometimes a fancy lace panel. I like to make a good impression both entering and leaving the room.
In the picture above you can see a chart that I made for this project. The actual concept, however, isn’t mine. I have to give credit to Irishman Kieren Foley, the creative force behind knit/lab.
I have been a fan for years. The first project I made inspired by his work was a skirt. I incorporated one of his fair isle designs into the hem area. Completing this project really helped me to gain confidence as a knitwear designer.
The next project I made was men’s scarf. I actually made two of them – one for my dad and one for my husband. The pattern, available for free on Ravelry, is called Fair Isle Rapids. Here it is on the knit/lab site.
The design I am aspiring to follow for daughter’s vest is called Weaver’s Square. Here is how it looks on the Knit/Lab site.
My version omits the lace trim and adds another vertical band of color, so that I can achieve the width I need.
Foley’s website offers detailed charts of his beautiful designs in the form of pdf files, for a very reasonable price. If you like color work, I encourage you to visit knit/lab.
The message came in over the week-end, with a tone of some urgency. It seems that the baby toddler girl had outgrown her hats, and the carefully saved wool hat of #1 grandchild was no where to be found. With the onset of cold weather, there was no time to waste in meeting the need.
The criteria was pretty simple. Earflaps were desired and a cord to tie the hat under the chin. Consulting my stash I found an almost full ball of Cascade 220 Superwash in a pale yellow color. I had purchased this yarn two years ago when I first learned of the baby’s expected arrival. I was excited to try out some stranded patterns using this yarn and various bits and bobs left over from other projects.
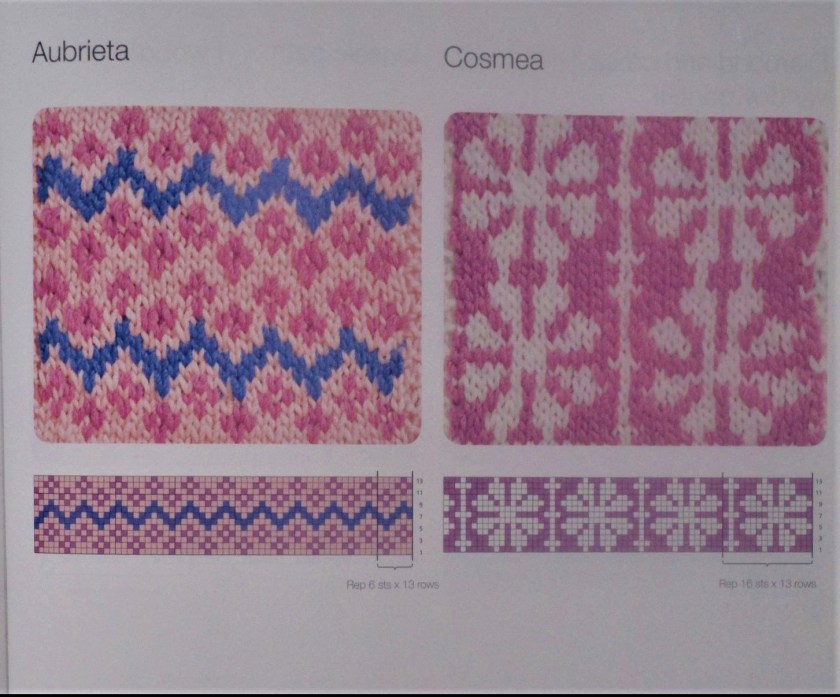
First I consulted my knitting stitch dictionary (750 Knitting Stitches – The Ultimate Knitting Bible.) For this project I needed a pattern with a fairly short repeat. I also needed a motif that would fit on the ear flaps.
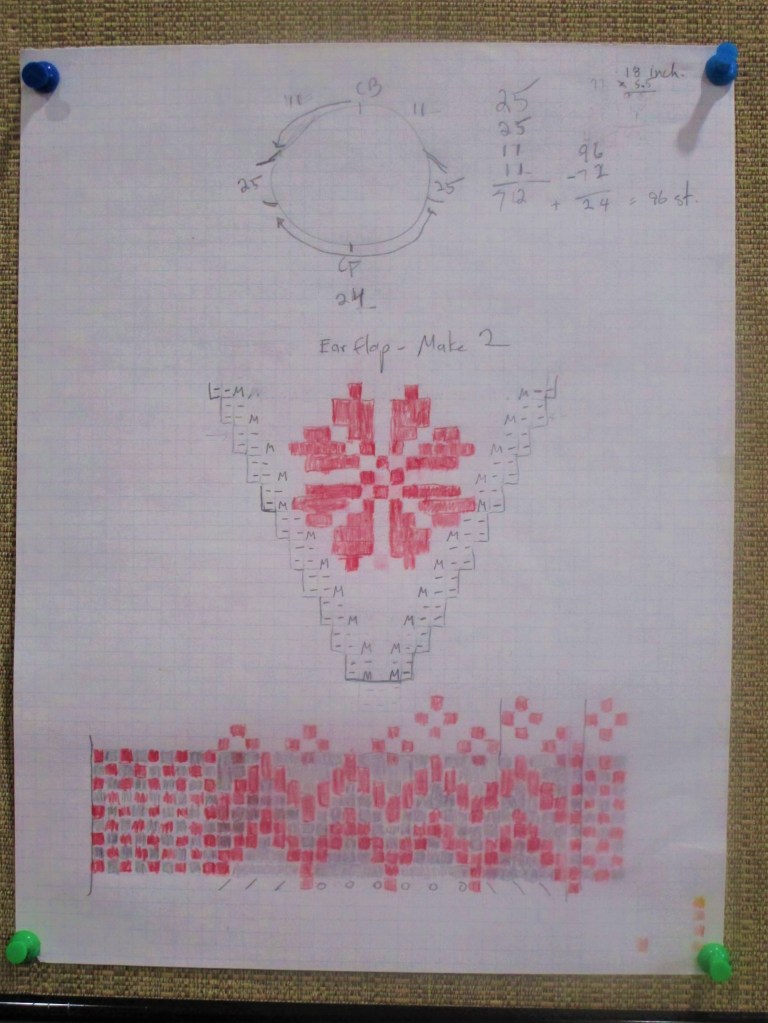
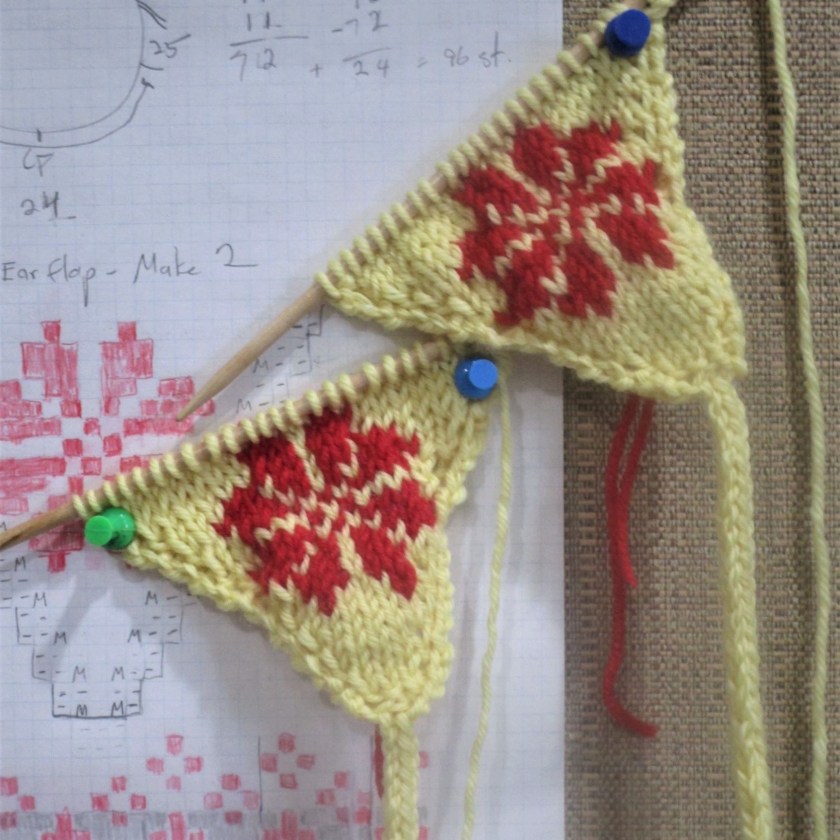
These two will do nicely. Cosmea will work for the earflaps and Aubrieta can circle the body of the hat. I also liked that the pattern repeat was six stitches. With my gauge of 5.5 stitches, a multiple of six will help me achieve the 18 inch diameter I needed. Here is my chart for the earflap and body, and my calculation for the cast on. I came up with a total of 96 stitches, which is divisible by six.
Ear Flaps done.
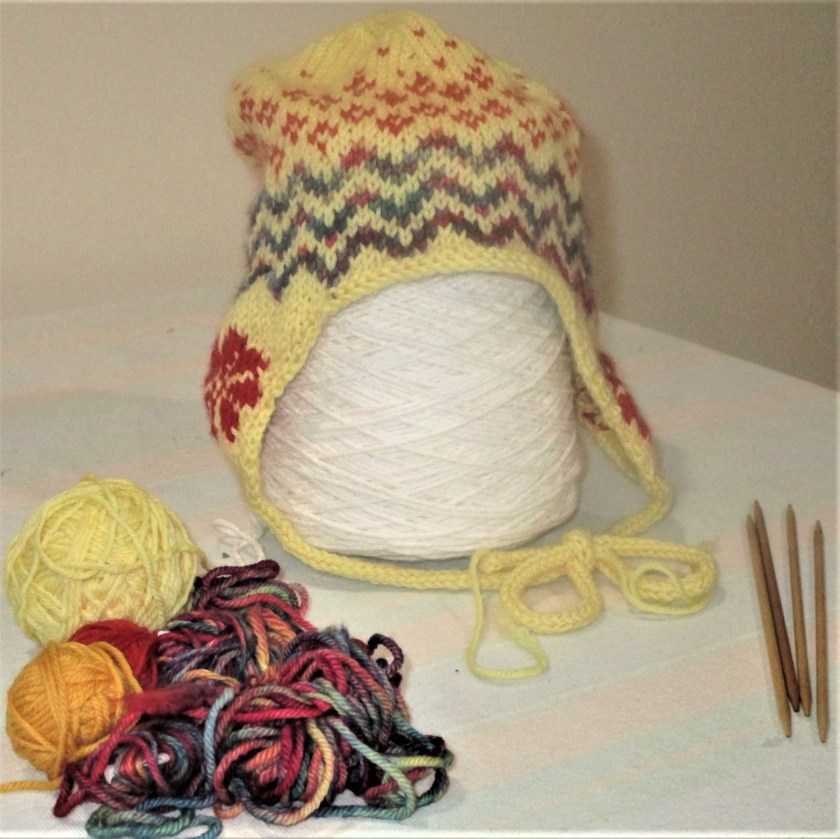
After casting on, I completed a modified version of Aubrieta, stopping when the hat body was 4 and 3/4 inches tall from cast on. Next I consulted the pattern I had used ten years ago for grandchild #1’s hat to figure out the crown decrease rate. I added a few rows of dots in the first three rounds of decrease, then completed the rest of the decrease in the solid yellow yarn.
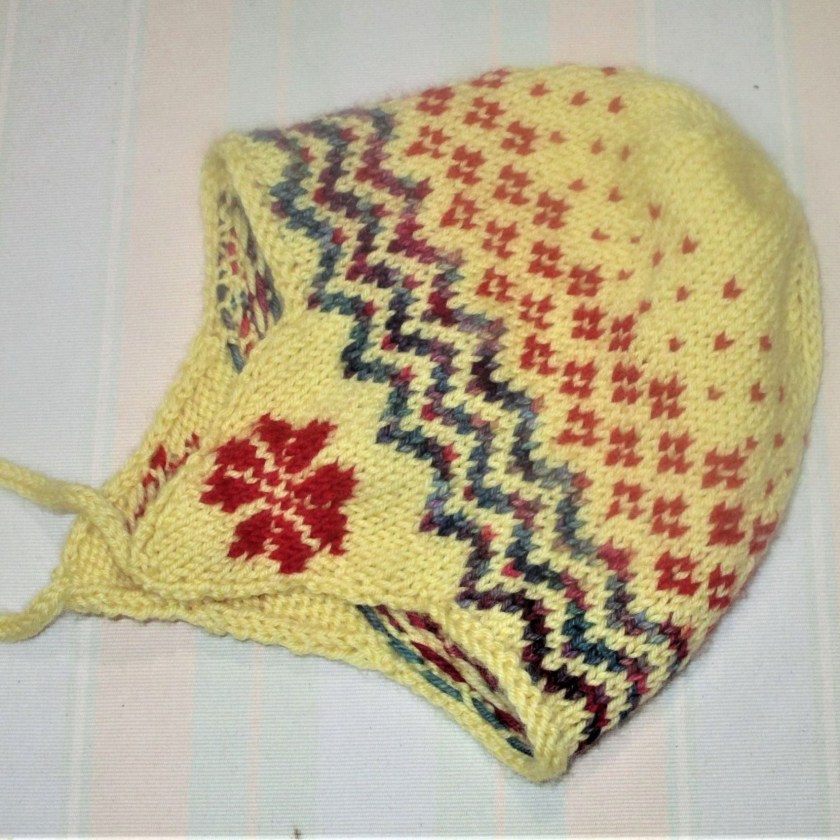
Ear Flap hat in the blocking stage.All Done.
This was a fun and quick project to make from one’s stash. I was pleased that I could use up some yarn scraps of a beautiful Malibrigo yarn that was left over from my blue ribbon vest.
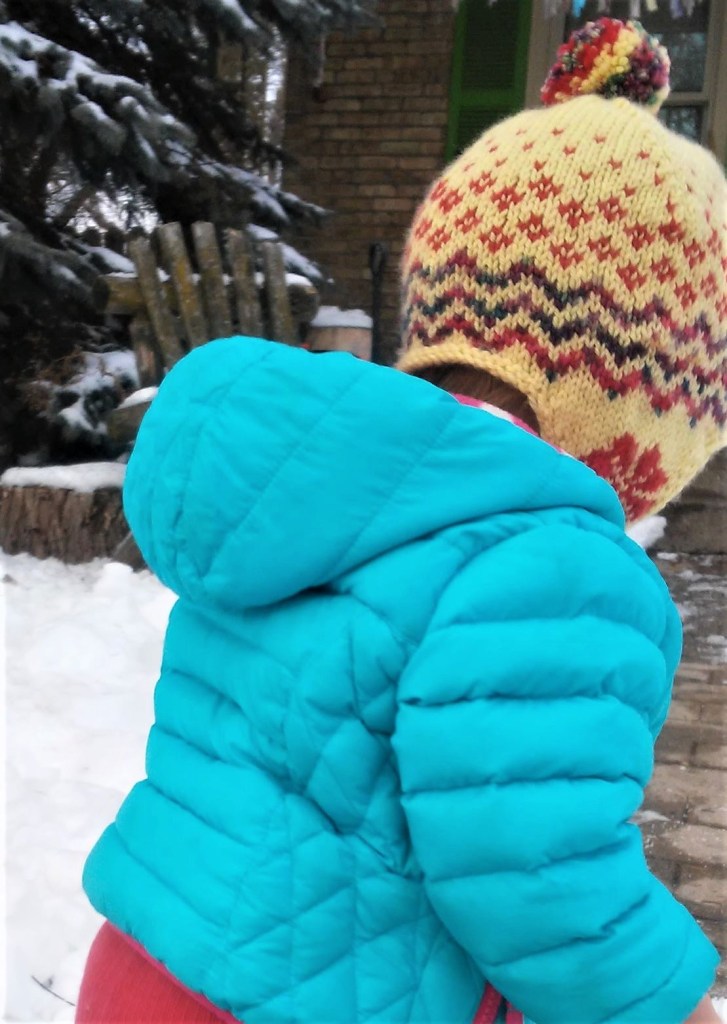
UPDATE: Hat was received, and put into use quickly. Not only does it cover the ears, it covers the cheeks as well. It’s so big that it will still fit her next winter.