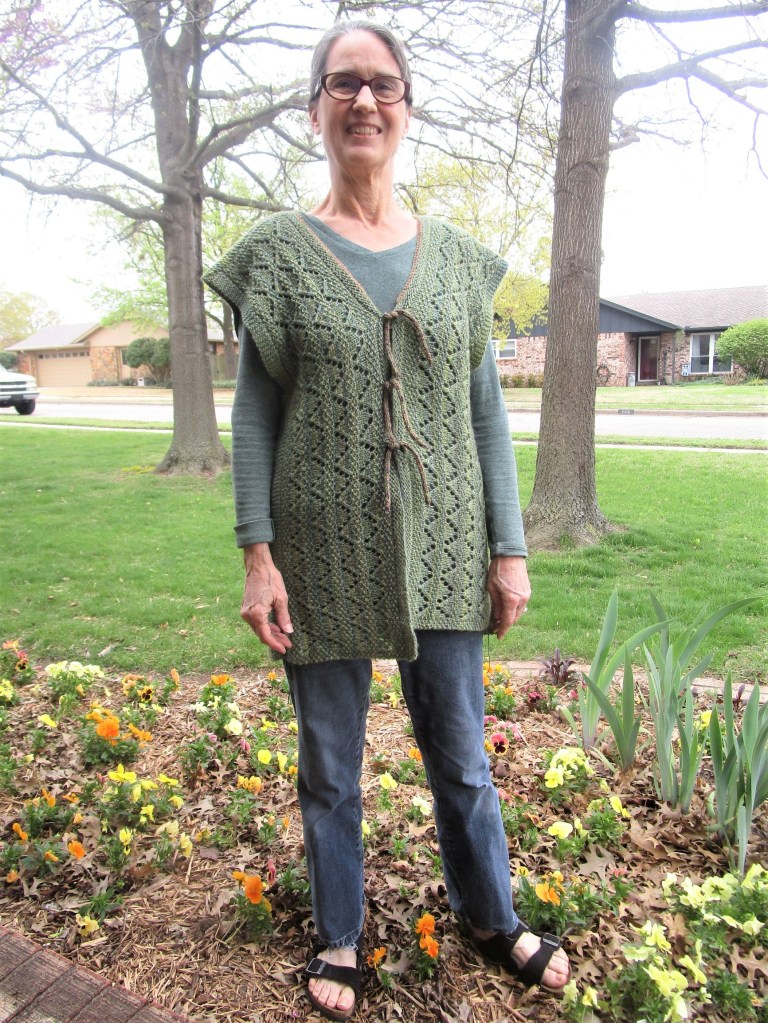
Those of you who follow me may be a bit surprised at my choice. It looks nothing like the color-filled fiber objects I usually post on my site. This color is a subdued neutral and the style rather conservative. What makes me happy about this sweater is that I chose every aspect of the design. I worked out the pattern details on graph paper and knitted it up.
It turned out exactly as I imagined and fits like a glove.
Schematic and specifications of my design
I can’t say enough about the quality of the Patons DK Superwash yarn. It is soft, but not a merino. Therefore the sweater has not pilled. The yarn has a heathery tone and a beautiful hand when knit. I used a twisted stockinette for the main body which makes a tighter fabric and plays up the variations in tone.
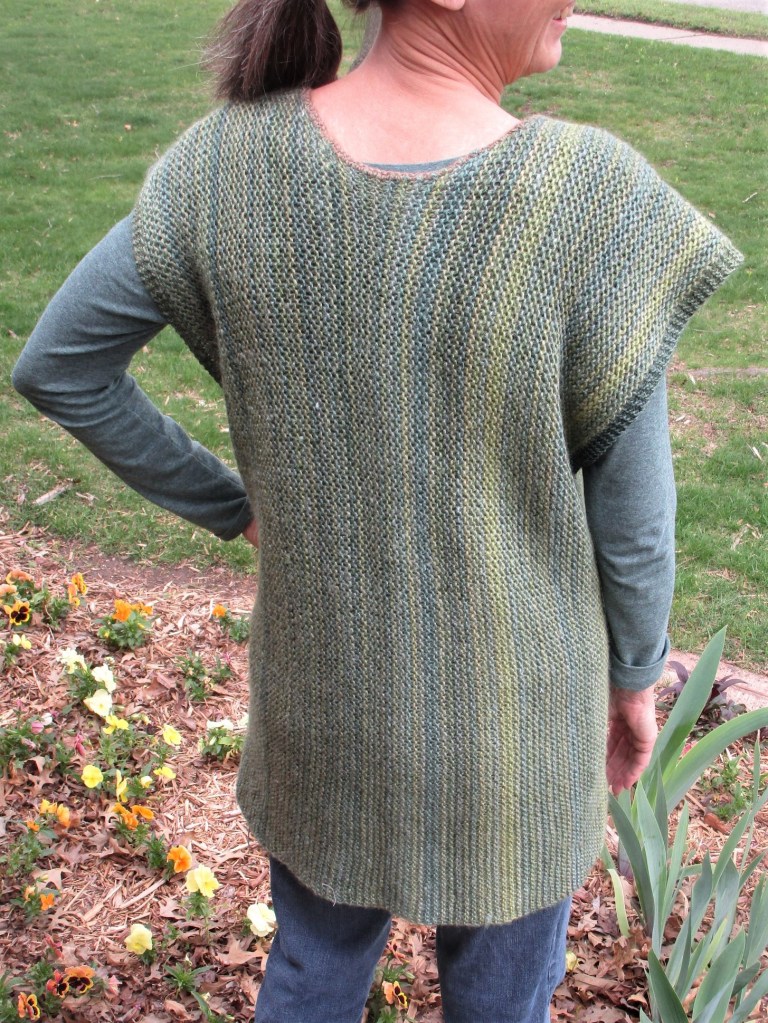
Back view showing pleat and waist shaping
The hem, cuffs and collar feature a cable-style stitch called Repeated Circles from 750 Knitting Stitches – The Ultimate Knit Stitch Bible. The vintage buttons, which I found on Etsy, mirror the oval centers of the cable. Love it!
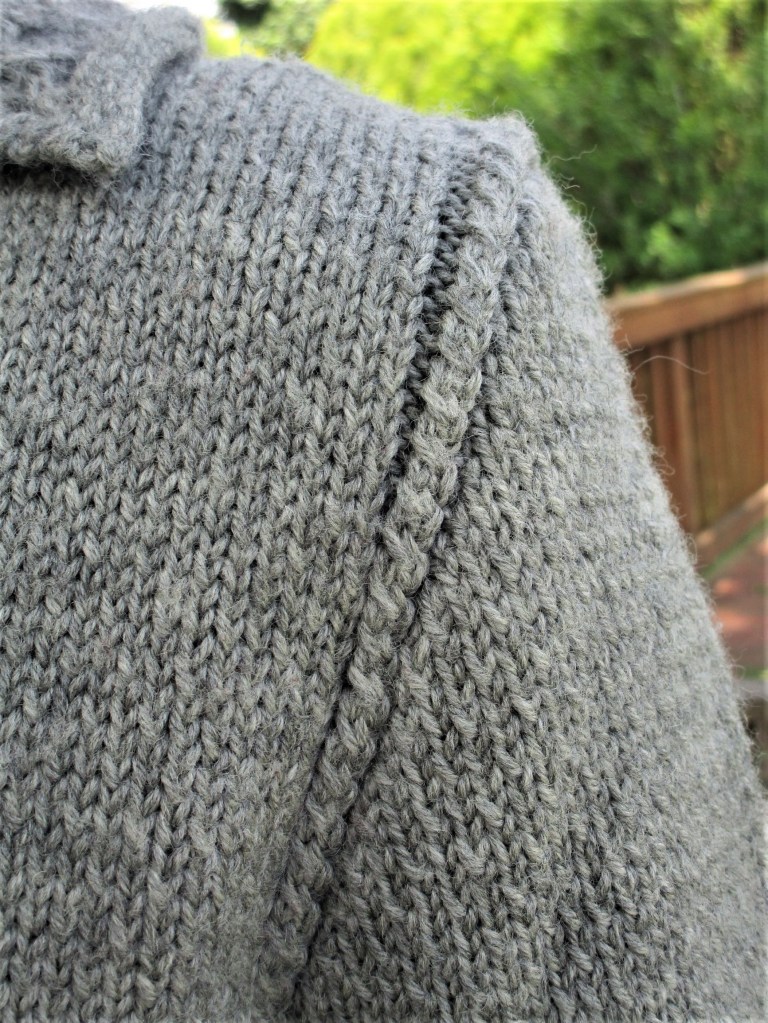
Another detail that worked out well is the skinny cable at the shoulder edges. The few stitches worked on the outside edge of the cable made a perfect road map for setting in the sleeves.
Well, that’s about all I have to say about this project. Every time I see it in my closet I long for cooler weather, so that I can wear it again.
Keeping with my self-imposed deadline, I managed to finish off another UFO. This is the be-ribboned and beaded water bottle carrier that I started over five years ago.
The part that had stumped me was how to finish out the top edge and strap. I found a solution by Melanie Smith on Ravelry. She simply divided the stitches in half, working each half in stockinette, gradually decreasing until five stitches remained. Then she worked I-cord about 15 inches each side and grafted the sides together.
I tried to make the strap long enough to sling it over a shoulder. Here I show it knotted so it can be carried over the wrist. The yarn is a bamboo blend purchased from the hobby store. Hopefully it will prove strong enough. I worked the middle section side-ways, knitting a metallic ribbon in. The top section is beaded.
This is a standard 16 oz. bottle. The piece is actually big enough to hold a taller bottle.
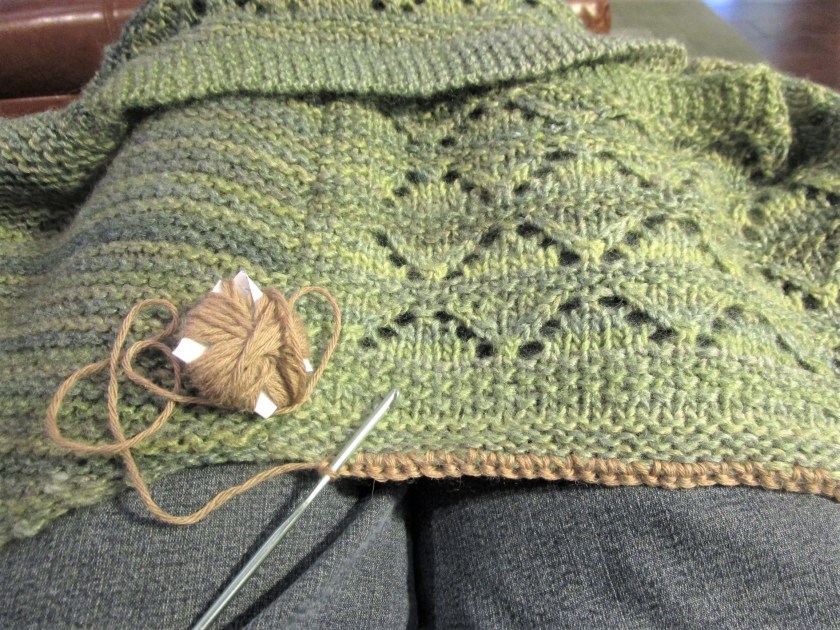
After recovering from the shock of UFO discovery, I came up with a plan. I made a promise to myself to finish one each week. At that pace, I will feel like I am dealing with the problem while still allowing plenty of time during the week for creative play. Above you see the first finish: the Northwoods Serape.
I had purchased this self striping yarn for another project, then rejected it as inappropriate. On one of our road trips last year, I brought it along for mindless travel knitting. As you can see, I ended up knitting three basic rectangles: a wide one in garter for the back and two narrower ones in a lace pattern for the front.
All knitting was done from side to side – this gives a vertical line to the stripes. Edges were picked up and knitted in garter stitch from bottom edge to top.
After that the piece languished for months. In a moment of carelessness I gave away all the extra yarn to a student. The finishing bits will have to be added in another yarn.
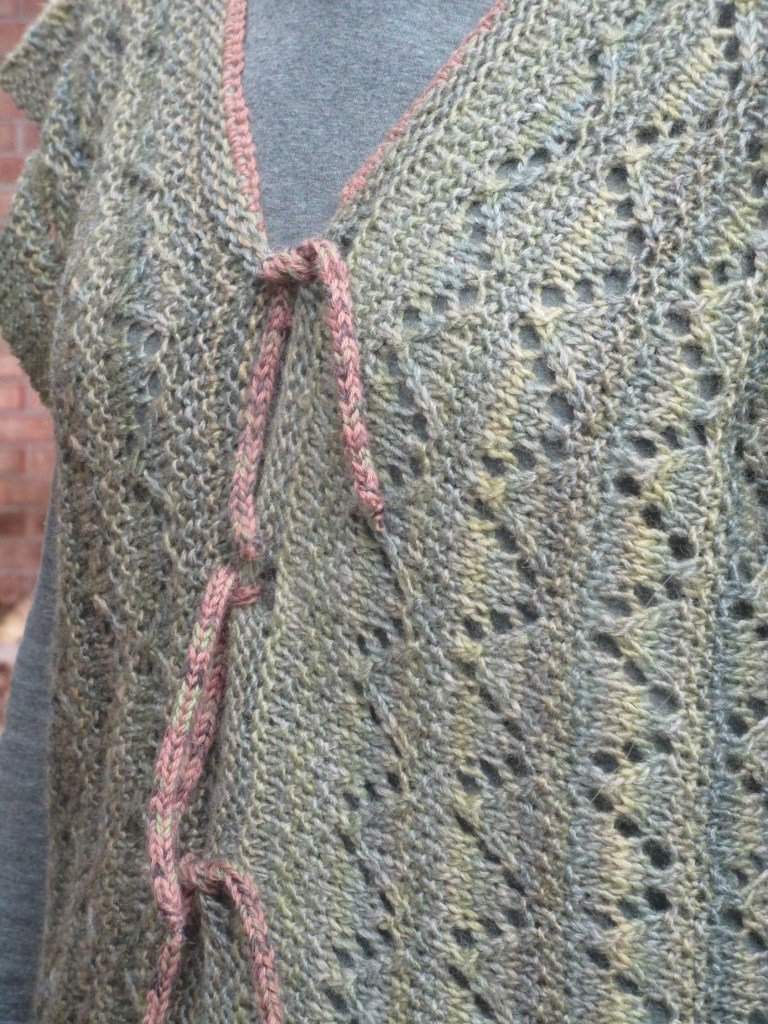
I thought I would use this blog to show more specifically how I finished up the serape.
First I blocked all the pieces. This is an essential step for any knitted garment larger than a hat, but especially so for lace knitting. Give it a quick dip in soapy water, rinse, wrap in a towel and squeeze out excess water before laying flat and pulling it into shape. I have 12 x 12 interlocking blocks and U-pins for the pulling into shape part. For this garment the finished size ended up 44 inches in diameter and about 30 inches long.
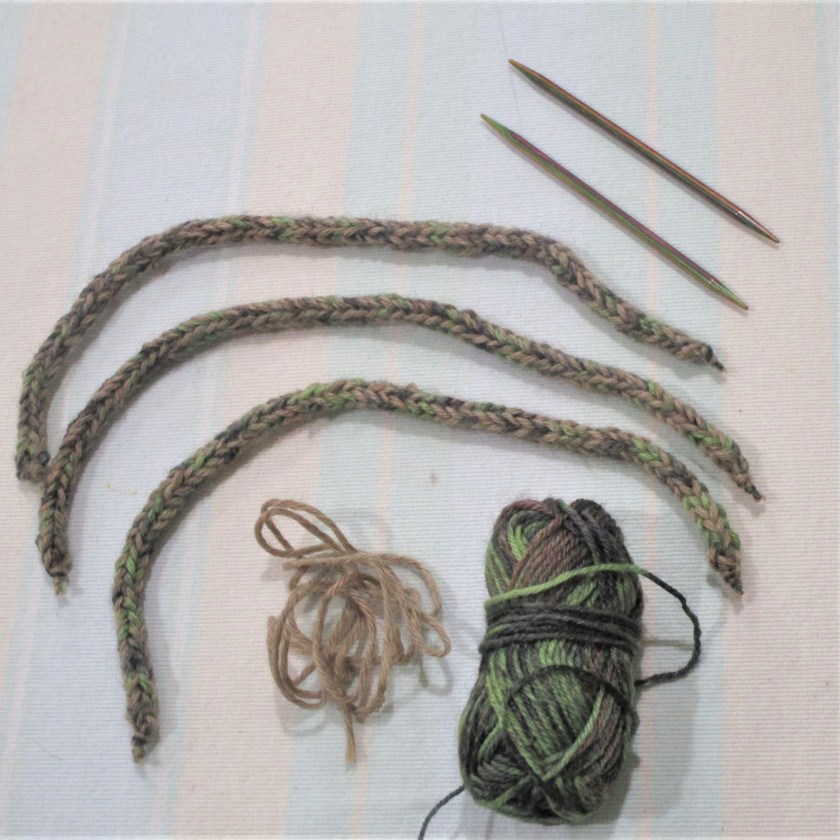
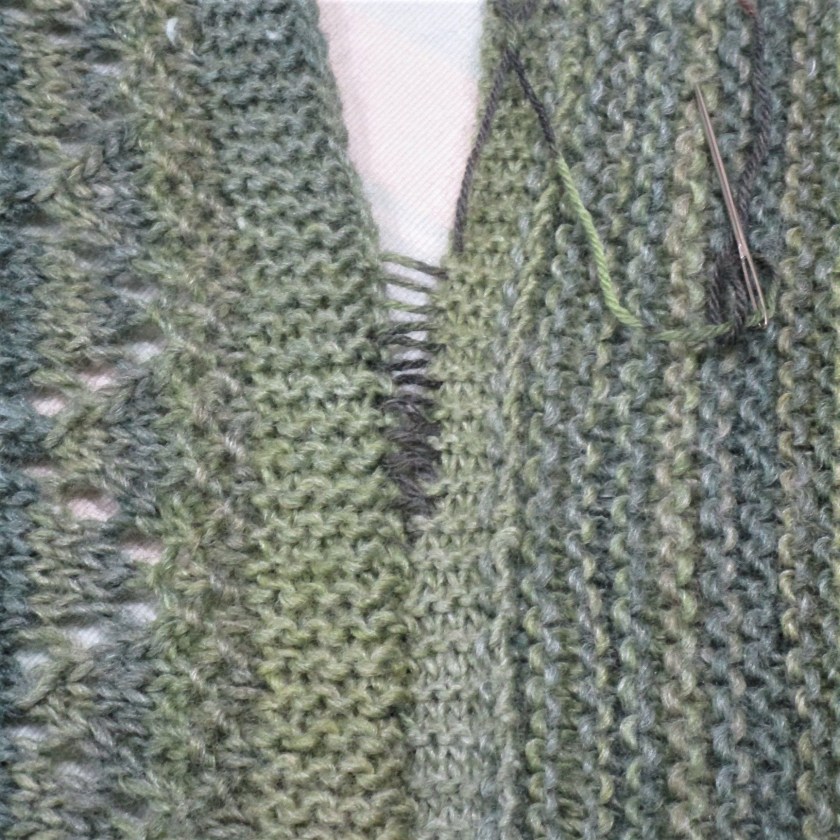
Since I had prudently worked buttonholes into one garter edge, I decided I-cords would make a good closure.
Fingering weight yarn, size 4 needles
You see the tools and materials above. These yarns were odds bits found in my stash. I held two colors together to make nice, fat I-cords. Using short double point needles, cast on three stitches. Knit them. Slide all the stitches to the other end of the needle and knit. Repeat this step until you get the length of cord you need. Mine are ten inches.
The back neck edge looked very ugly, so I decided to use a row of single crochet to finish off the entire neckline. There are lots of resources for learning to crochet, so I won’t go into it here. I will suggest a few things for this particular application. Work from the front of the garment and draw up a loop from right edge of the neckline. Leave about a three inch tail. If you are clever, you can hide this tail while you work the row. I just left it until I finished and then wove it under the first few crochet stitches. Work UNDER the next stitch to the left. It’s important to have both yarns of the stitch you are working over top of your hook. This keeps the crochet row straight and tidy.
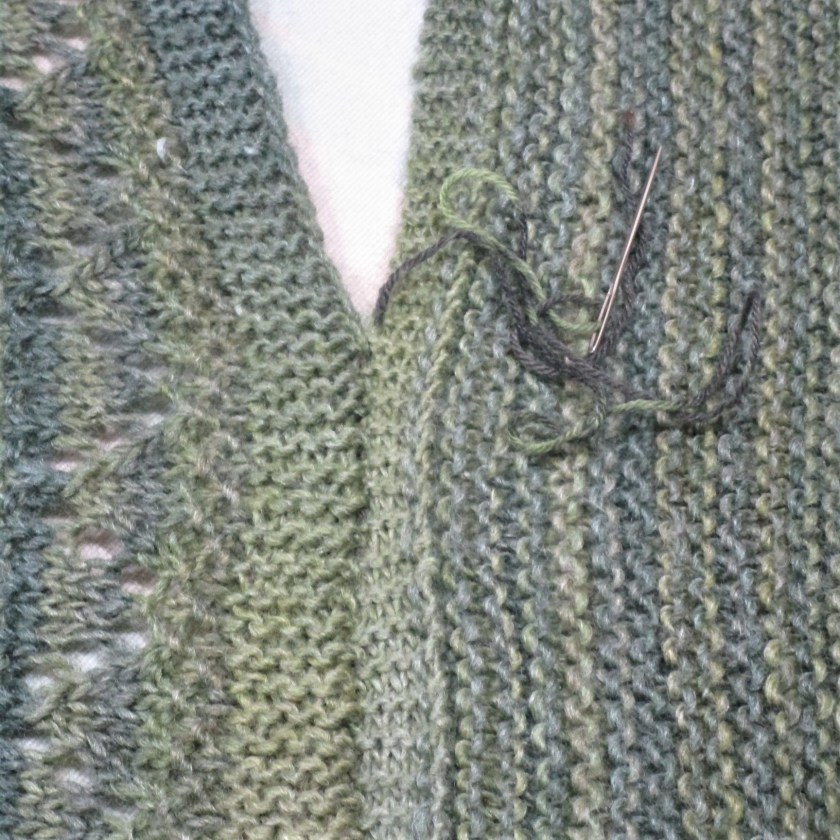
Next is the side seams. I used mattress stitch. Align the front and back edges with the right sides of the garment facing you. Thread a tapestry needle with yarn and fasten the end to one edge. When working mattress stitch into garter ridges, you will insert your tapestry needle into the “knotted” looking part of the garter ridge. Work back and forth from edge to edge like this, keeping your stitches loose.
My work here is a bit slip-shod. I knew that my knitted pieces were already quite irregular. Perfect seams won’t improve the end results.
After running the stitch up the seam about three inches, snug the seam closed as thus: Hold the lower end with one hand and pull firmly and smoothly on the working yarn. The seam should close up. As a side benefit, you will find that your sewing yarn is totally invisible.
Continue sewing until you reach the top, then fasten yarn on the wrong side. Cut yarn and weave in ends.
The last step is to sew the I-cords opposite to the button holes and it’s Done!
I have to admit, now that it’s finished I am suddenly in love with the yarn and the garment. By the way, this lace stitch is called seed stitch lace diamonds. I found it in 750 Knitting Stitches: The Ultimate Stitch Bible.
Did you ever decide to organize your yarn closet, and in the process discover an overwhelming number of Unfinished Objects: I have!
I have clearly been in denial about the quantitiy of UFOs piling up on my watch. To be honest, I knew about a few of them. Some are over five years old. They were slumbering quite peacefully until disturbed today in my zeal to clear out the yarn cabinet. They are the dirty dozen, plus one. Here is a brief run down.
From the top, left to right:
Cabled gloves in dark green yarn. Pattern by Brooklyn Tweed, from Vogue Knitting magazine Winter 2009. I started with great enthusiasm, but lost steam when I fully understood the complexity of making cables up Each Finger. Tossed the pattern about six months ago.
Sparkly and beaded water bottle purse. I was making it for a former boss as a gift about six years ago. I couldn’t decide how to make the closure and strap.
Granny Square whimsical bird house. This was an experiment to see what Else could be done with granny squares.
Ladies’ woolen slacks. Frustrated with my inability to buy wool trousers that fit I decided to re-fashion a pair of men’s wool trousers. Purchased the pants at Goodwill, the pattern for $1.00 at Hobby Lobby.
Made the mistake of buying extra fine alpaca lace weight yarn. Tried to knit it held two strands together into a shawl. It’s not going well.
This is almost done. It is a serape-style poncho knit in a Northern Woods colorway yarn. Today I blocked it and expect to finish it soon.
This collection of yarn is set aside to make fingerless gloves. Still working on a design.
This is the pattern and fabric for making quilted baskets. I’ve made two so far. Eventually I will have enough little baskets to organize and store all my fabric.
This is a piece that I knit from Icelandic wool received from my daughter. I intend to felt it into a little purse – at some point in the future.
This shawl kit, designed by Laura Nelkins, includes beads. Someday it will be done.
Here is the 8 by 10 inch weaving that I made as an example for my fiber arts students. It’s nearly finished. But I ask – what do I do with it when it is?
And finally, I recently started a triangular cardi-vest designed by Melody Johnson. I thought it would be a good way to use up the odd balls of yarn.
Oh yes, I did say a dozen plus one. The last UFO is a felt coat.
It needs to be altered. I removed the first sleeve and then hid it in the back of my closet. It will likely stay there until next winter.
So, my fellow fiber artist – which UFO looks the most appealing to you?
Yesterday we arrived home after spending a week in Wisconsin. The trip was undertaken to help our daughter and her family prepare for a move. It was a weird and wonderful trip. With constant changes implemented by the authorities in the states we traveled through, we never knew what to expect from day to day. Thankfully, many businesses on the interstate highways remained open to provide for the necessities of travelers. All the staff we encountered along the way were both kind and helpful.
The trip was a success. While we stayed with the kids, daughter and son-in-law found and put an offer in on a suitable house in Madison. That’s a big hurdle accomplished.
I discovered a new travel craft – weaving on the little 8 by 10 artists’ canvas loom. All the materials fit into an average size project bag, and the motions of the fiber artist do not ever distract the driver. You see in the photo above my attempt to create an S-curve out of two colors of yarn.
I received two items from daughter that will inspire future fiber objects:
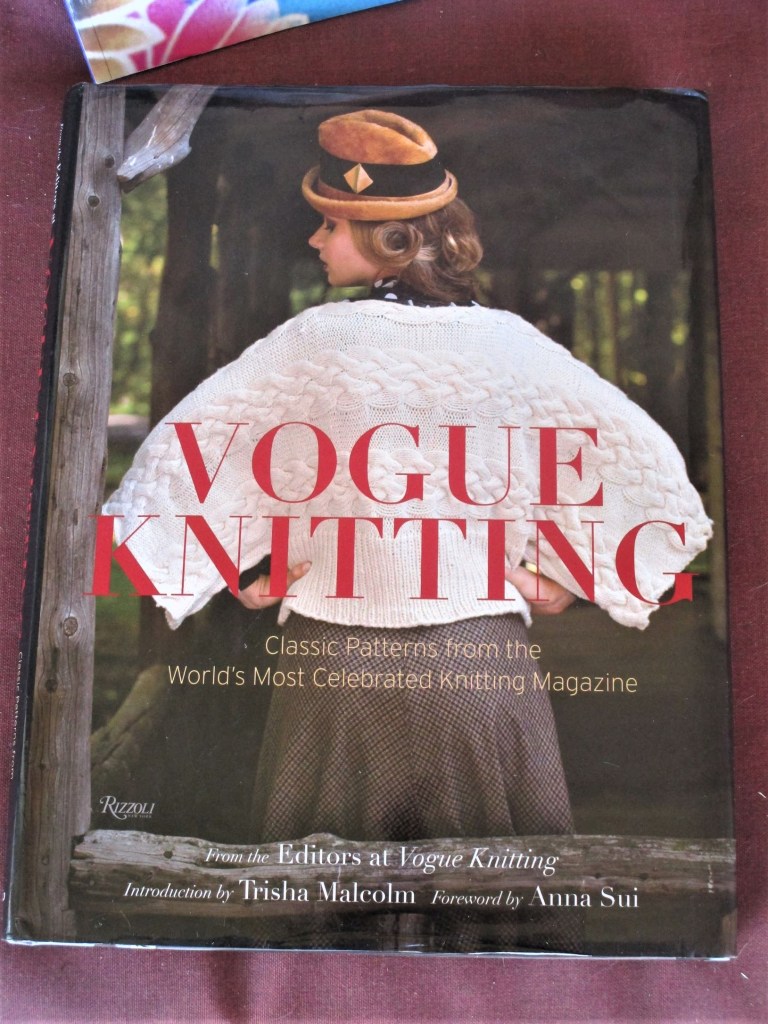
The Vogue Knitting book is a delightful compilation of the best of the Vogue Knitting magazine, from the 1980s through to 2011. Lots of inspiration is here. I have my eye on a couple of patterns found within. Of most value to me are the charts of various lace stitches.
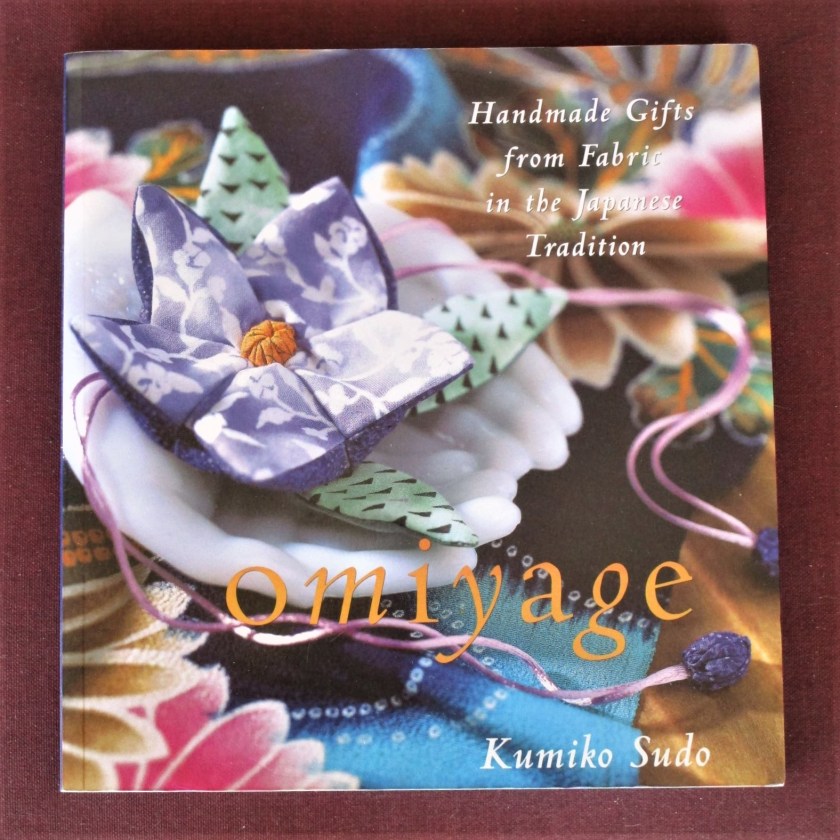
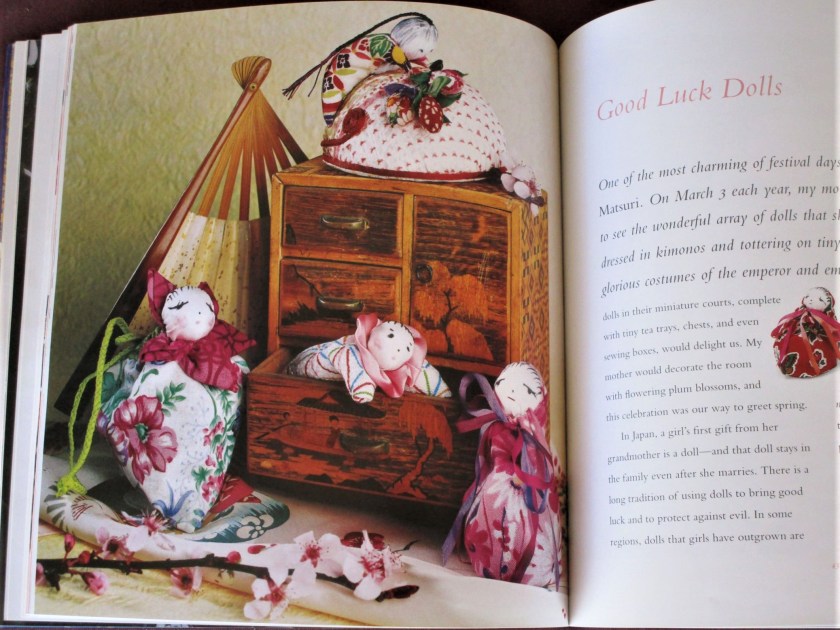
This little book is called omiyage, by Kumiko Sudo. It was purchased by my mom, who passed it to daughter, who gave it to me. The Japanese have a thousand-year-old practice of making and giving small gifts. Back then there were strict rules and a great deal of formality surrounding this ritual. The author re-interprets omiyage for modern times, using fabrics both traditional and modern. As she is a quilter, she pulls fabrics from her stash of quilting cotton, and incorporates bits of silk and wool as well. I plan to try making some Good Luck dolls.
Traditionally these dolls were the focal point for a festival called Girl’s Day. I think they would be wonderful made from some of my hand-painted fabrics. Because they are small, making one should be a fun, inexpensive and quick project.
Well, I am keen to resume my making. The Just Trees mini quilt is still unfinished and I would like to get that weaving off the loom soon.