One of six children, I was raised by a busy mom, who instilled in me a love of fabric. Though I learned to sew and knit at a young age, it was the arrival of my first grandchild that pushed me into action. A long-time knitter, I am now ready to explore all things fiber.
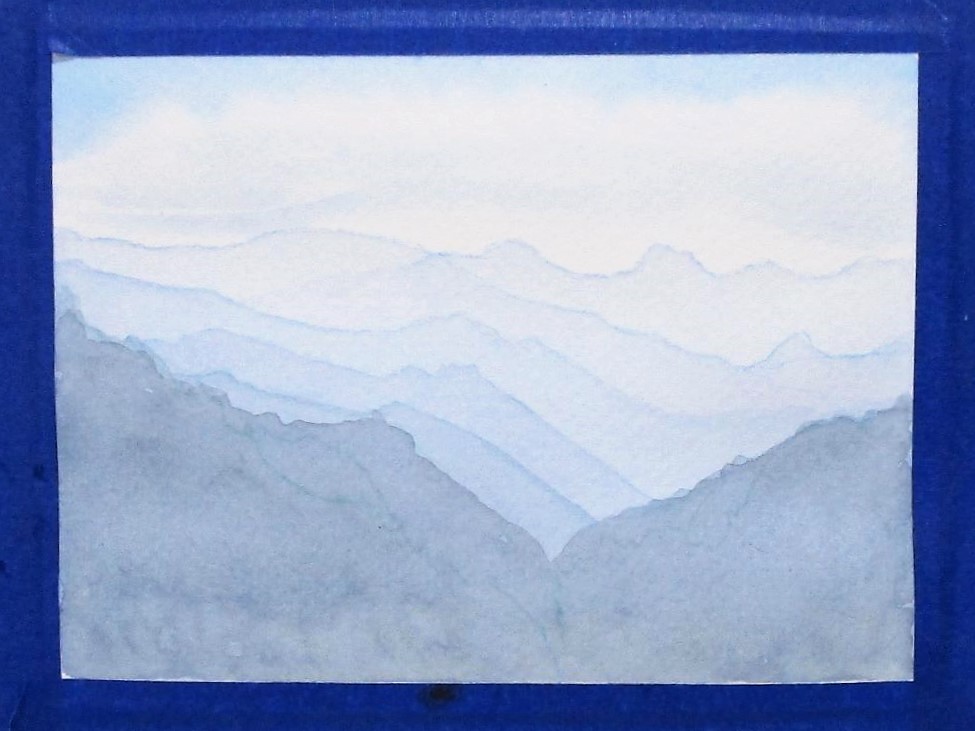
I was experimenting with an ombre effect. This took a lot of patience because I had to wait for each layer to dry fully before continuing on to the next.
This postcard featured a lot of blues including prussian, Thalo, and Payne’s grey, with burnt sienna added in the final layer.
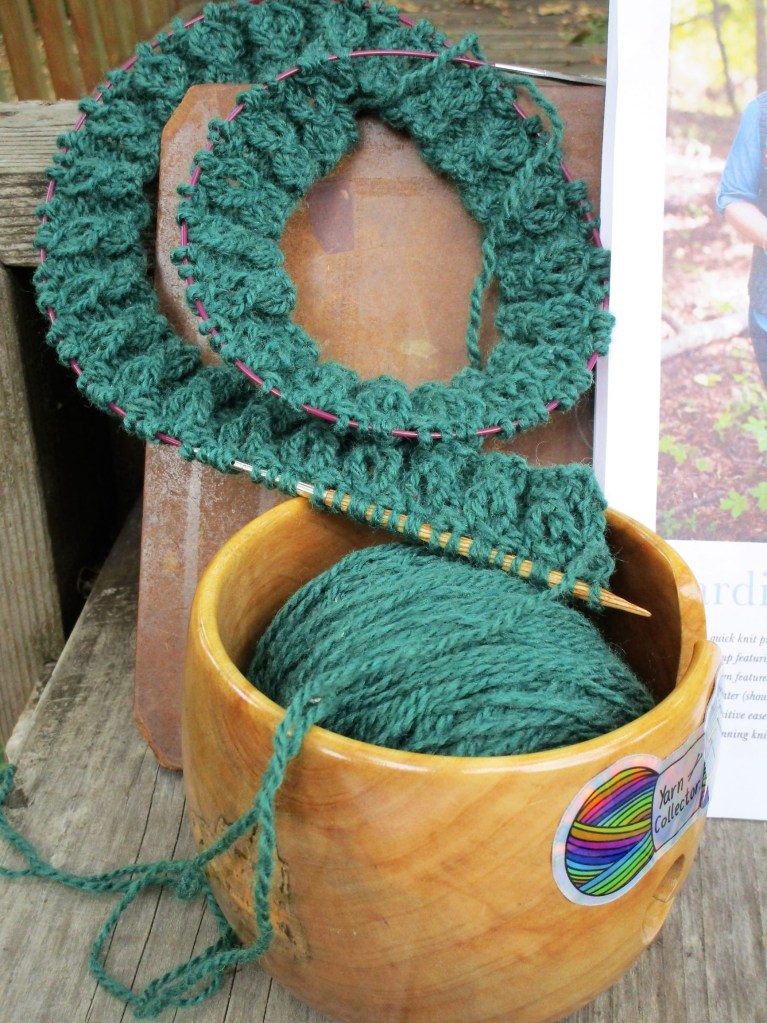
While awaiting the arrival of a set of sock needles, I decided to cast on something for myself. This decision was made to find a use for some green worsted weight wool that I received from my daughter in September.
The yard is by Ewetopia and it’s called Potluck. The maker gave no description of fiber content. I’m assuming it is made of spinning leftovers. The company promises that Potluck yarn is “all good.” I have four skeins of 180 yards, giving me 720 yards.
Considering the type of yarn, the quantity and the color, I chose to knit a hooded vest. Perusing Ravelry, I came across this delightful design by Kate Oates.
Of course, I had to make my own adjustments – you know how I work. In this case I wanted to substitute a favored rib pattern for the twisted rib used in the pattern: eyelet mock cable ribbing. The pattern is found in my stitch bible published by Interweave, Knit and Purl: 250 Stitches to Knit.
My substitution derailed the swatching process, making the gauge I got unreliable. After working about ten rows, I concluded that the piece would be too small. I frogged it and started over with ten more stitches on smaller needles.
The knitting is going okay now. Potluck seems to be embedded with straw, so I need to stop every ten stitches or so to pull out tiny pieces. And I have yet to decide on colors for the stranded section.
This past week, I completed the sewing phase of Badlands art quilt. All segments are sewn in, and all but one is quilted.
Quilt lines are not visible in this photo.
The next step in my workplan has me using textile paint to add shading and lines. I learned the technique from a tutorial by Annette Kennedy through Craftsy. Annette is known for her realistic landscape quilts. She is an award-winning fiber artist.
So, I have a lot of trepidation about slathering a perfectly nice quilt with paint.
The paints I use are Jacquard Textile Color. I will mix them with a floating medium recommended by Annette. It dilutes the paint, making it lighter and keeping it from drying too fast.
Before painting:
In this photo, I have started shading the large mountains in the foreground. You will also see the applique I have made for my focal point, painted and ready for fusing.
I’m still nervous, but I am trusting that everything will come together in the end.
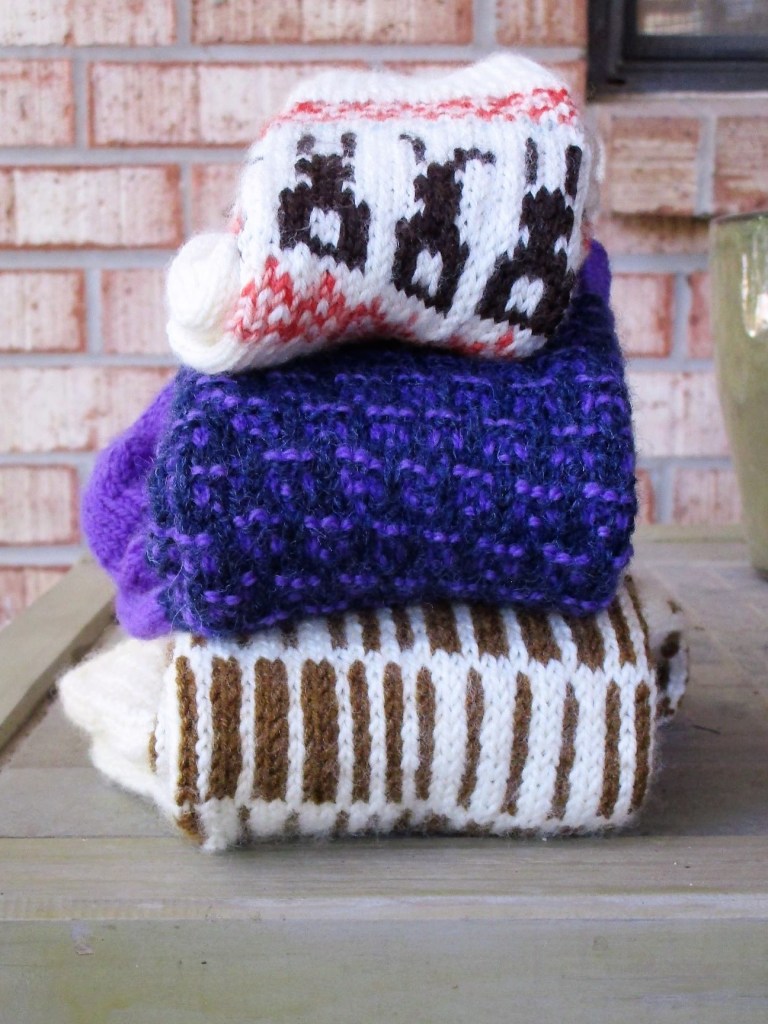
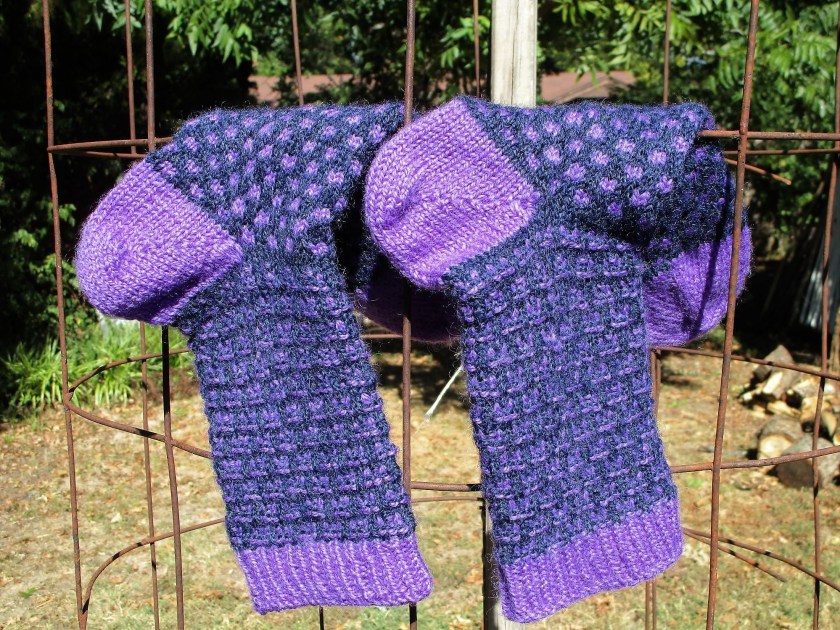
As of today, the completion rate on my sock challenge is 75%. Newly added to the sock pile is a pair I am calling Dots and Dashes.
This is the largest pair of the challenge, with a foot length of 10 1/2 inches. I used 100% natural wool in two colors and a pattern from Berroco called Fairlee. I would rate the skill level for this pattern as intermediate, which matches the rating assigned by the Berroco designer. They are described as slipper socks – I’m assuming that’s due to the fact they are written for dk weight yarn.
Modifications that I made include the two-color pattern on the foot, which came from Barbara Walker’s Treasury of Knitting Patterns. It’s in Chapter Four, Two-Stitch Check, version 1.
The second modification is the bind-off. The pattern calls for a sewn tubular bind-off. That looked like a hassle to me, so I worked Jeny’s Surprisingly Stretchy bind-off for one-by-one rib instead.
You can find the original Berroco pattern on Ravelry, or visit my post dated October 3rd for the embedded link.
One more to go. I had to order some needles, so I won’t be casting-on the last pair yet. Tune in on Monday to see what goes on my needles next.
My class on knitting I-cord jewelry starts Saturday October 22nd, at my local art association. So today, I am reposting my blog on this topic from earlier this year.
——- Laura Kate———
Last week I was recruited to teach a class at my local art association. I said yes, but I was at a loss on what to present. The introductory knitting classes which I taught last year were very lightly attended. I had to do some recruiting just to get a minimum number of students.
Thinking about possible roadblocks to knitting, I came face to face with certain inalienable facts about the craft:
The learning curve is steep.
Projects take a long time to finish.
What if I narrowed the number of skills required to a minimum, and what if I used these few techniques to make quick-to-complete projects? ……………..
The answer is I-Cord! This little add-on is used for strings for tying knitted hats and other decorative frou-frou. All it takes is a few yards, a cast-on, and repeated knit stitches over a very short row.
So today I am researching and stitching up all kinds of I-cord accessories. These projects will include jewelry so I will need a selection of beads.
The two strings in the left of the photo were purchased today. All the others I had acquired in the past 3 or 4 four years.
I also perused my stash for left-over fingering weight yarn. (No shortage here.)
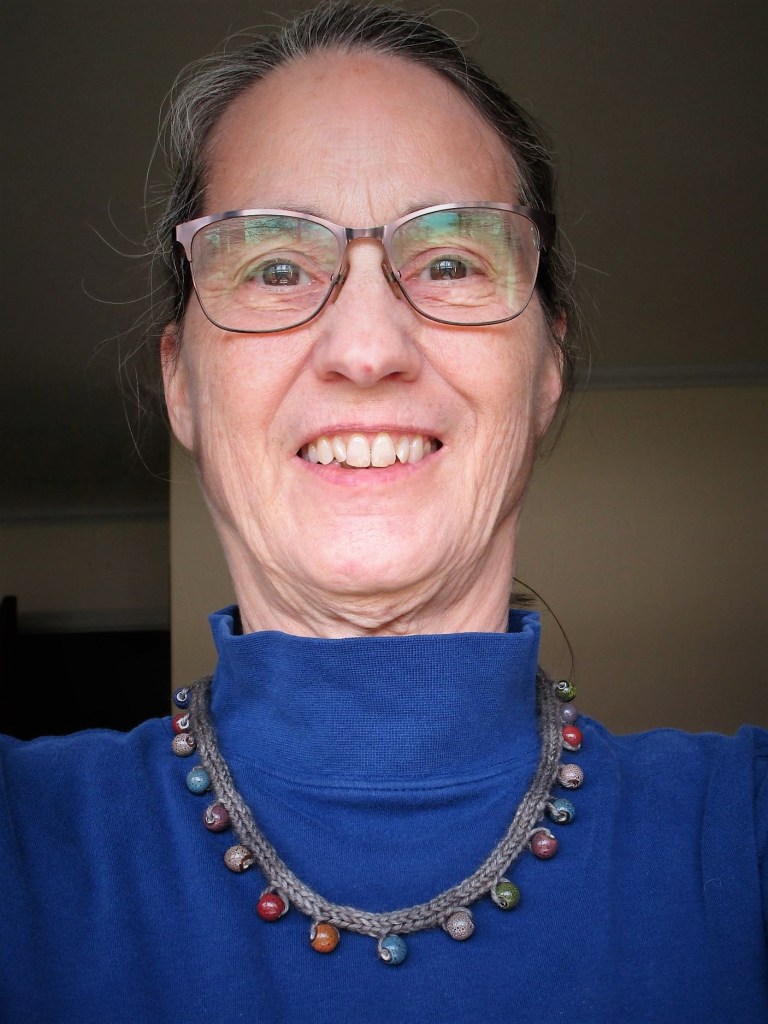
To kick things off I worked up this 18-necklace using tonally dyed merino wool and some porcelain beads.
My version is made with just one strand because I had only 24 beads. I love how each bead dangles below the cord. I am wearing it over a shirt, but this necklace would also be soft against bare skin.
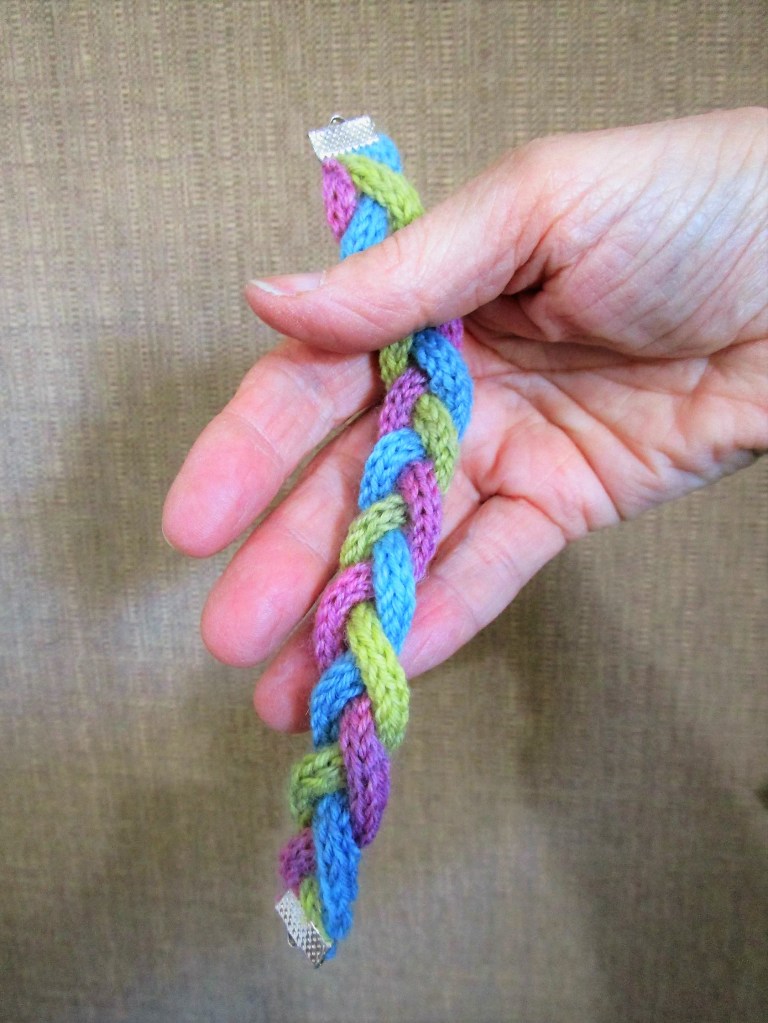
I sewed one end of the three strands together, braided them and then sewed the other end. The crimping finial is designed for holding ribbons so that they don’t fray.
For my third item, I switched to worsted weight yarn and move up to a size 5 needle. I was so happy to use up the left-overs of this lovely variegated Malibrigo merino.
This necklace doesn’t use a pattern. It will be made to my own specifications.
And here are my three I cord samples as of dinner time.
This should be enough material to work up a class proposal. I will also try making a headband and a multi-strand necklace.