Posted in hand embroidery, recycling, sewing

Japanese Knot Bag

Having recently finished a wall quilt, I found myself with various pieces of fabrics left over. Instead of stuffing them into a box and shoving the box under a bed, I decided to cut the fabric into strips for the purpose of sewing them into a project bag.

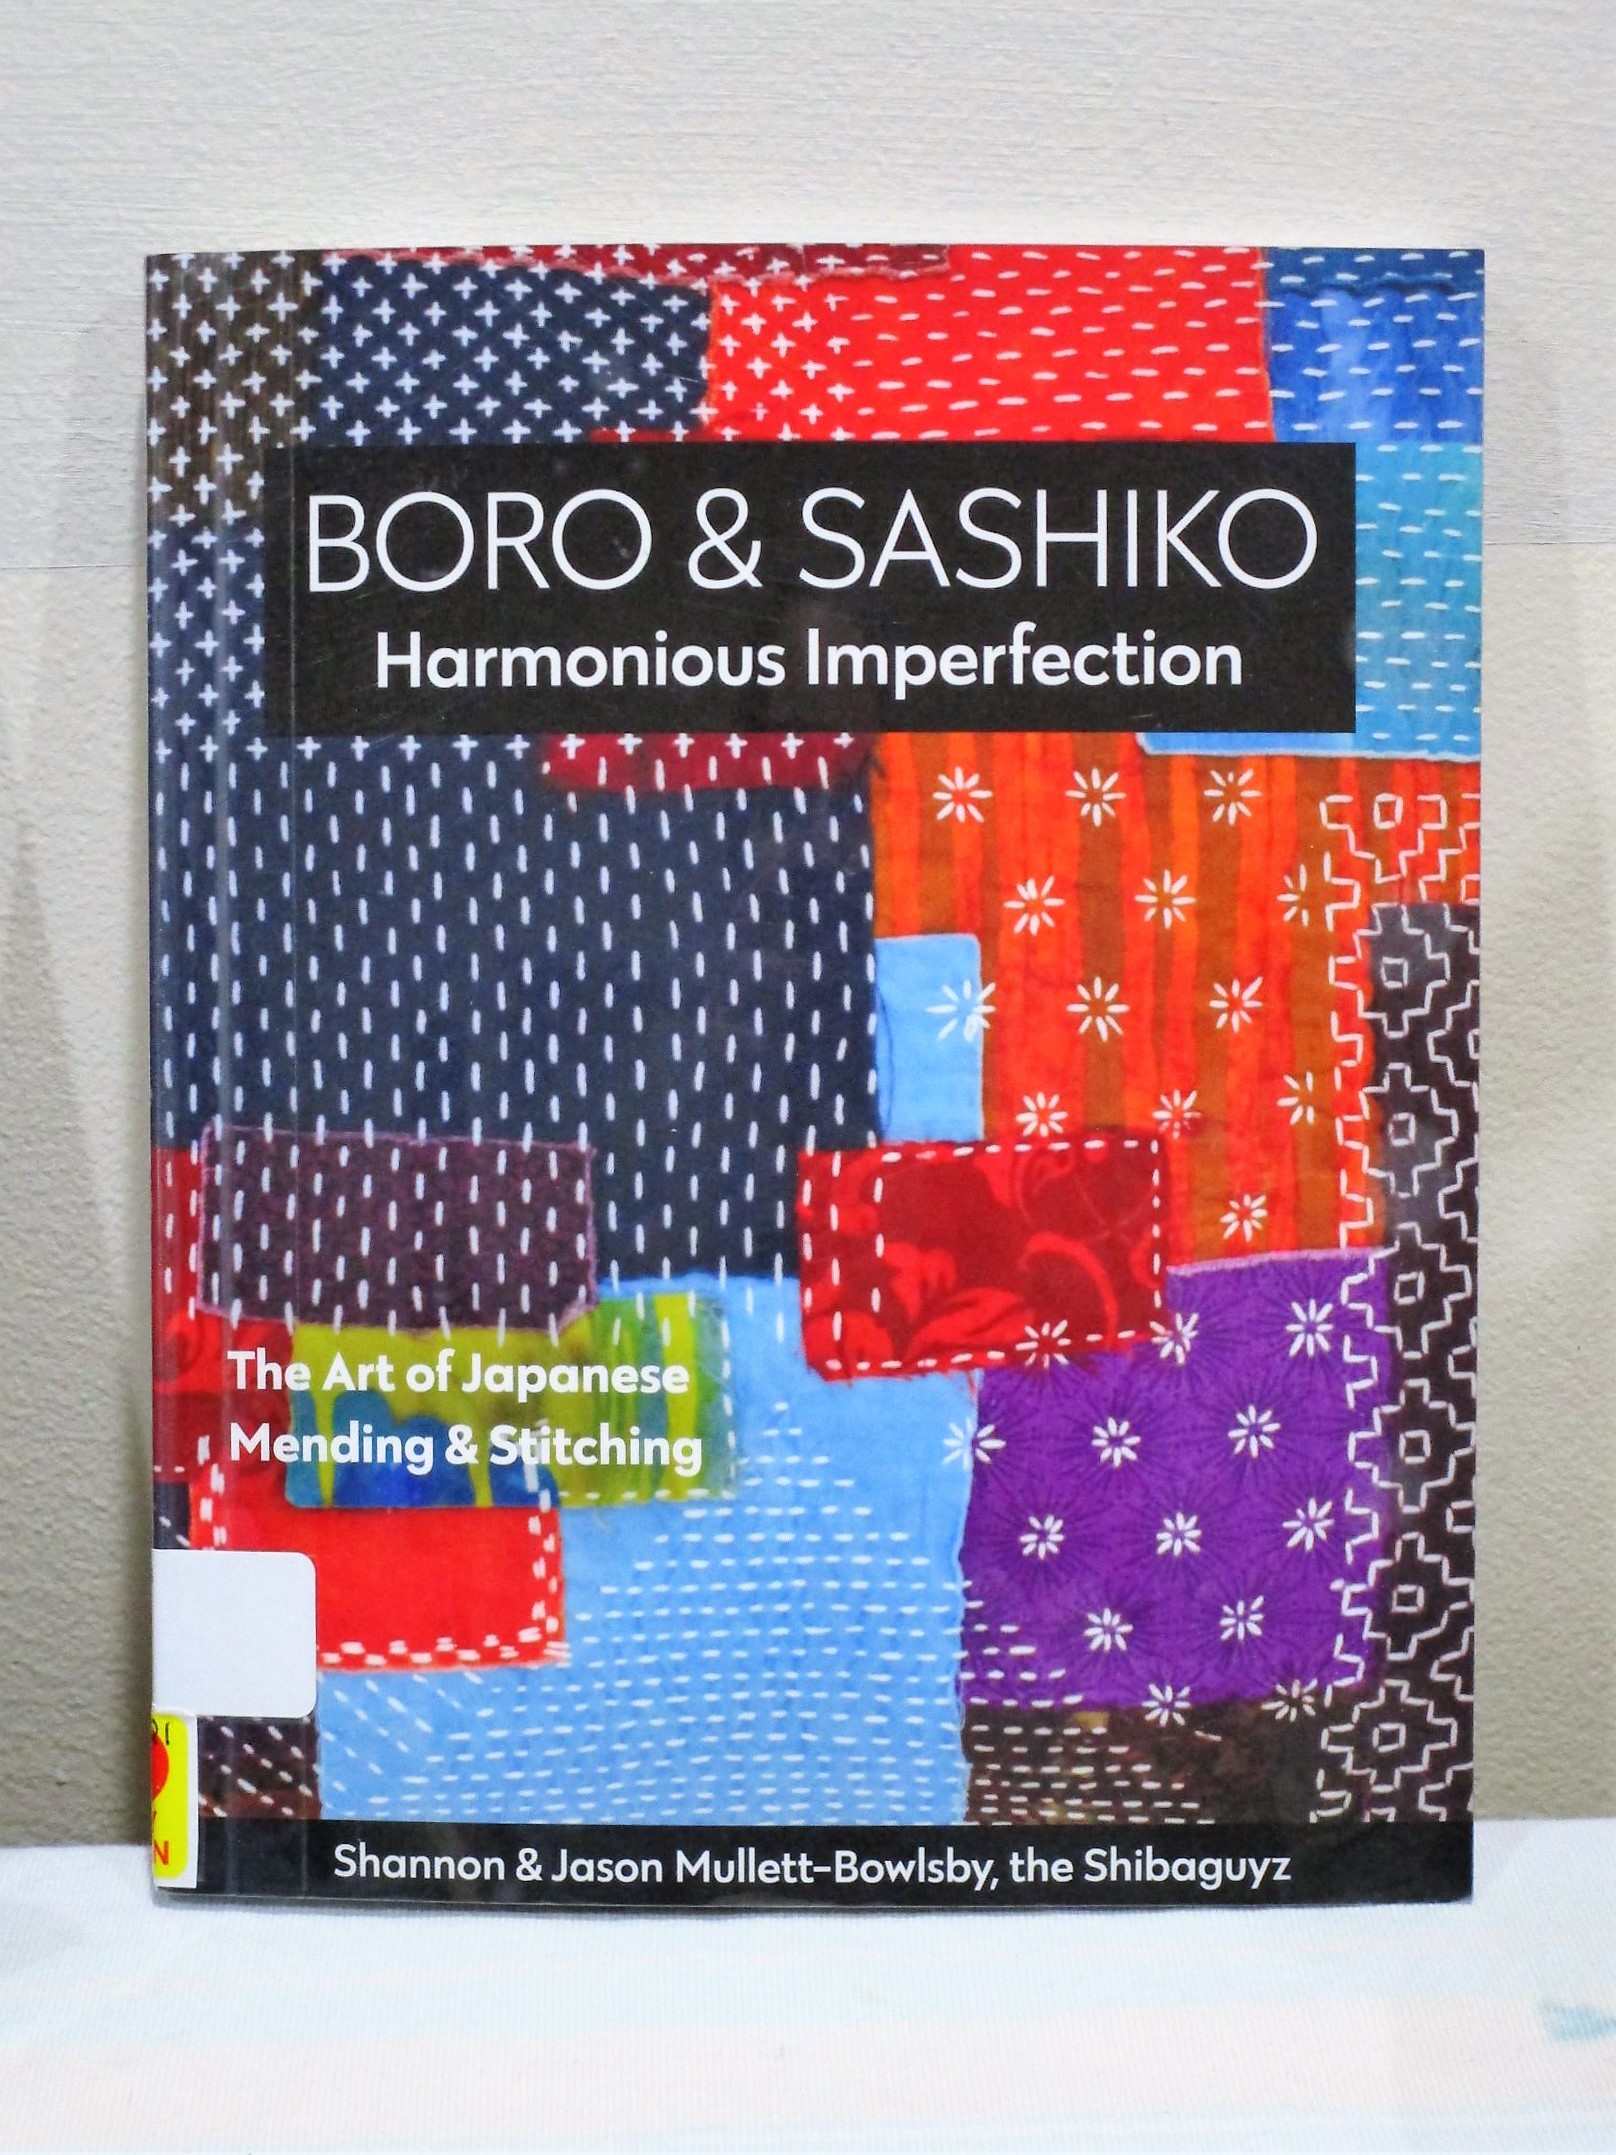
Back two years ago, I became interested in the Japanese art of stitching, aka sashiko and boro stitching. There was a pattern for a knot bag in this book by the Shibaguyz.

I did a post about it on Jan 5, 2022.

To make the bag, I would need fabrics for the base and lining, along with my strips of fabric. Fortunately, I had both. My daughter gave me some yardage of sturdy cotton flannel and my friend and co-worker Scott Perkins gave me a sample of raw silk.

Here is what I came up with using one quilt block made of a circle in a square. I then sewed strips of fabrics around it to cover all of the base and raw edges.

Side One
Side Two

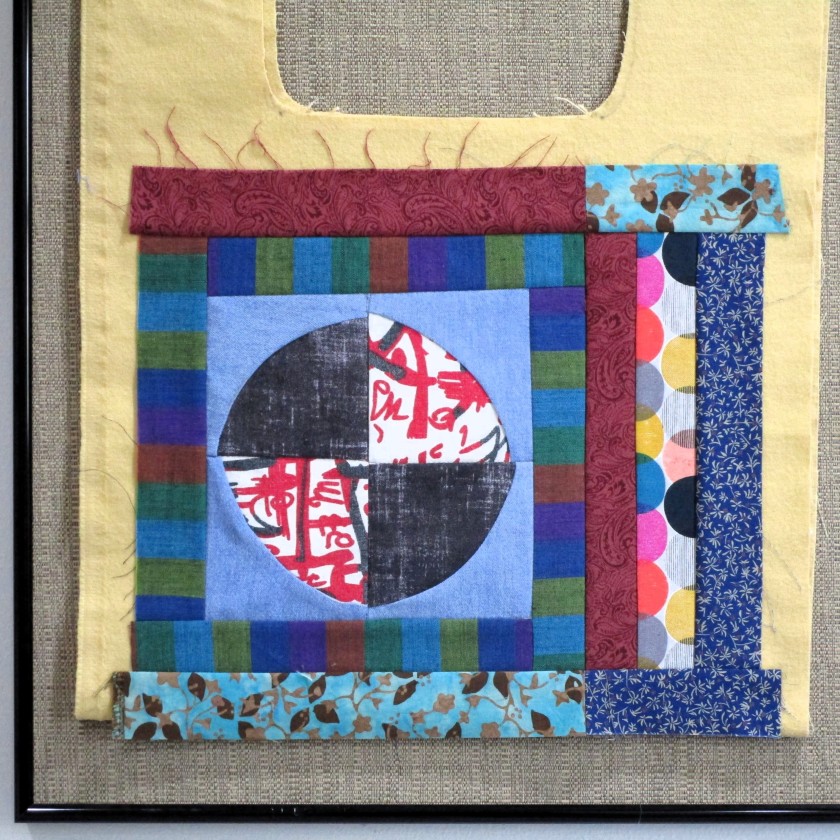
Fabric selection included bits of three men’s shirts. (The dark red and dark green strips, and the blue chambray behind the first circle.) All three of these fabrics had been worked into the Shell Lake Story quilt. So, I am using scraps of scraps!

My next step was to sew up a lining using the same pattern as the base.

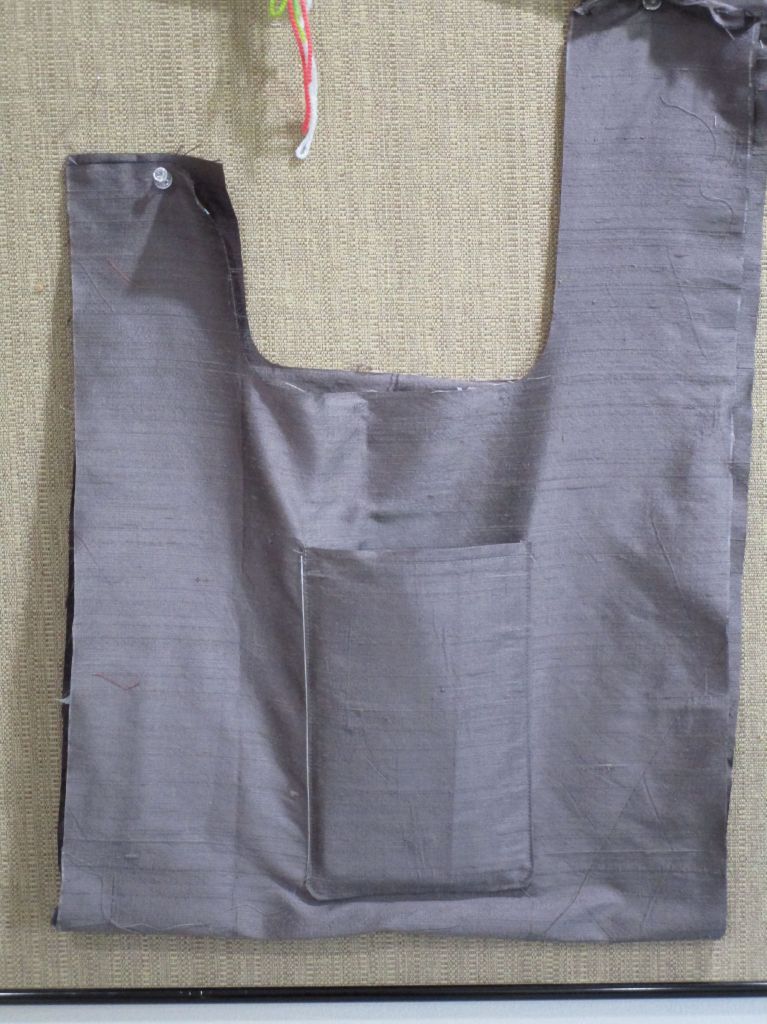
A cellphone pocket in the lining.

Adding the hand stitching took a few weeks. I marked all the stitch lines with a chalk pencil. Using white Sashiko thread I worked a running stitch in straight lines on the strips and circles around the circles.

And here is the front and back of the bag after all the top stitching is in place.

Finally, the seams of bag and lining are sewn up, the bag inserted into the lining with right sides facing and the U-shaped top edges are sewn together. This last step took me two tries, btw, so seam ripping happened.

Turning the bag to the outside, the only remaining steps were to close the strap side seams and top-stitch the opening.

To use the bag, the long handle is threaded through the short handle.

A quick look at the lining before it is turned to the inside. I love the look of the silk, and it is pretty easy to handle. Fraying was the only thing that gave me some trouble. The next time I sew with silk, I will zigzag the seam allowances

Here is the completed knot bag, filled with a knitting project.

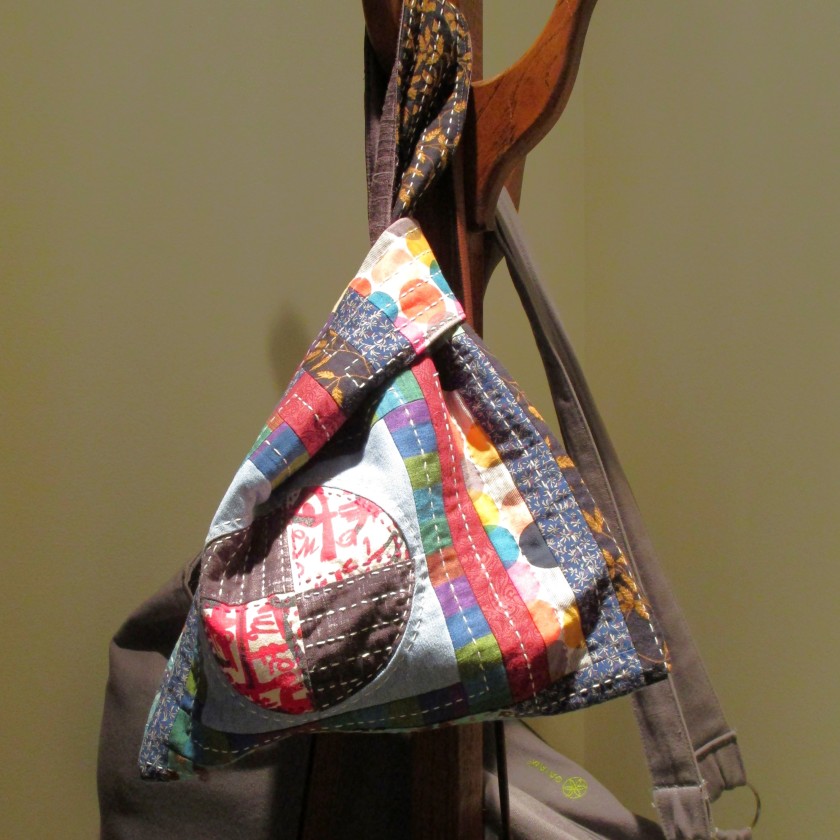
Front of bag as it hangs from a coat rack.

Back of bag.

This project was great fun (except for the seam ripping) and I would enjoy making more of these nifty bags. A larger size would be handy for bigger projects. And what a good way to use up scraps.

Posted in knitting, Living Life Well

Mary Delaney in the Garden

Yesterday I finished the first sock using KDDs design Mary Delaney. During a break in the rain, the sock and I took a stroll through the garden.

Pinned to a panicle of the Oakleaf Hydrangea. As you can see, the blooms are close to opening fully.

Mary Delaney on the rock edging surrounding the herbs. You see lemon thyme here. Very fragrant and excellent in chicken or fish dishes.

Hanging around with the garden peas. This variety is Sugarsnap.

Some of the paeonies haven’t bloomed yet, but buds are swollen. This stop resulted in a few surprised ants walking across the sock.

On the trellis with some clematis blooms. Notice some of the fluffy seedheads. They are fun to touch – springy, but soft as corn silk.

The sock has come to rest on my concrete statue of a garden cherub. I call him Dickon, after the character in A Secret Garden who charmed the wild animals.

I hope you were as amused as I was by this fanciful photo shoot uniting knitting and nature. When the rain starts up again, I’ll cast on sock no. 2.

Posted in knitting

Cast-on Monday: A Kate Davies Sock

Summer is on its way, and that means knitting small, portable projects. Reaching into my yarn closet, I brought out a stashbuster bag all ready to go, using Kate Davies’ sock pattern Mary Delany.

https://www.ravelry.com/patterns/library/mary-delany

I purchased this pattern on Ravelry a few years back when KDDesigns was offering a sale. This will be my second cast- on using it. The first time I followed the pattern pretty closely, but substituted a more “manly” looking chart, since I was knitting socks for dear husband. This time I happily followed Kate’s stranded pattern of little flowers. So far, it has been a joy to work.

My yarns are acquired from three different companies. The beautiful deep tonal blue is Malabrigo Ultimate Sock in a color called Azul Profundo. I purchased it from Jimmy Beans. The aqua tonal yarn is Knitpicks Hawthorne. I’ve mislaid the band and so don’t know the colorway. And the tiny bit of red to be used in the toe and the ribbing is from Hobby Lobby. The box store briefly offered a line of wool + nylon fingering weight yarn in various colors. It turned out to be not-so-good and has since disappeared from the shelves.

Here’s my start. I cast on using the winding cast on method. It is described perfectly in Kate’s pattern, and I had no trouble at all finishing the first toe.

Yesterday while watching PBS, I managed to get most of the foot finished. It now measures 8 and 1/2 inches long.

Front of foot
Back of foot showing the heel increases

This pair of socks will be for ME. Wearing hand knit socks makes me feel pampered. It is a small and affordable luxury.

What new project are you undertaking? Do share.

Posted in knitting

WIP Wednesday: Abstract Rainbow Blanket

This piece of knitting has been in the background of my life for about three months. It is going to be a lap blanket, fashioned in the style of a log cabin block and knitted out of stash skeins.

I’ve modeled my blanket after a Garn Studio Drops design called Abstract Rainbow

https://www.ravelry.com/patterns/library/203-2-abstract-rainbow

The main difference between the actual pattern and my work is that I didn’t follow any instructions. I just improvised based on the look of the DROPS pattern.

So here I am so far:

I quickly used up all of my stash acrylics within the first four stripes. Stubbornly refusing to buy yarn, I cadged my friend into giving me some of her acrylic skeins in similar colorways. After using all the yarn she gave me, the blanket was still not big enough. I gritted my teeth and purchased one Hobby Lobby cream colored skein.

The blanket is now about 42 inches square and I am sitting here with the left-overs, pondering my next move.

My brain tells me that a crocheted border would allow all the leftovers to be worked in. But my gut is resisting this move. I can’t help myself; I have a prejudice against the craft of crochet.

Okay knitters, what would you do? And how big does a lap blanket have to be?

Posted in Living Life Well

A Morning Stroll through the Garden

What a difference a year makes. This spring, we have had sufficient rainfall, and the plants are blooming madly. Bill and I both took photos this morning. Here are mine, taken with my little point and shoot canon.

  1. Solomon’s Seal under the oak tree. 2. Catmint with an onion background. 3. Chives growing in a concrete block. 4. Clematis with blooms the size of my palm. 5. A few paeonies. 6. Mouse-eared coreopsis nestled among various pansies. 7. Crepe myrtle shoots. 8. A collection of textured leaves. 9. Woodland columbines.

The bearded iris are just starting to bloom, but my photos of them didn’t turn out well. Perhaps I can persuade Bill to share a few of his.

There is a storm coming tonight and these blooms may end up shredded by wind. A life on the prairie has its trials. (sigh) It’s best to enjoy nature’s floral bounty promptly, for tomorrow it may be gone.