This school year I will again be teaching fiber arts to students age seven and up. I’ve organized the sessions into 4-week workshops. One workshop will explore techniques to use in embellishing clothing and other fiber objects. Today I am learning to make pom-poms using these:

It seems like an easy, anyone-can-do-it craft to use up extra yarn, so I’m all for it.
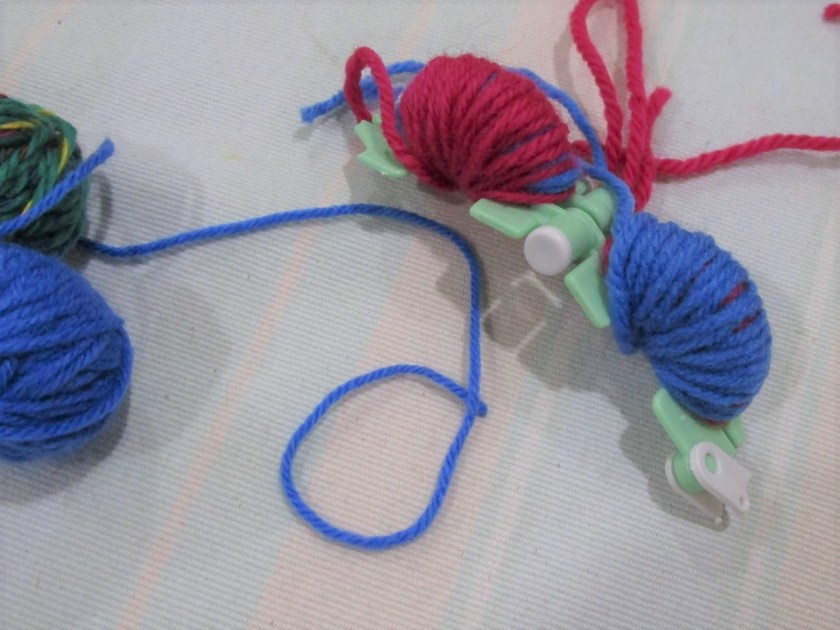
What I learned in my first attempt is that the instructions included with the tool were incomplete. I got lots of bits of yarn falling out of the plastic holder.
After a quick trip to U-Tube – source of every craft technique in the world – I discovered that the yarn needs to be wound until the holder’s center is filled completely. Then, when the holder is closed and the yarn cut, compression keeps the cut bits together long enough until they can be tied up with a piece of yarn.
Winding the yarn 
Here is the holder with the correct amount of yarn 
Cutting 
Wind a piece of yarn around three times, tying after each wrap. I used a surgeon’s knot the last time.
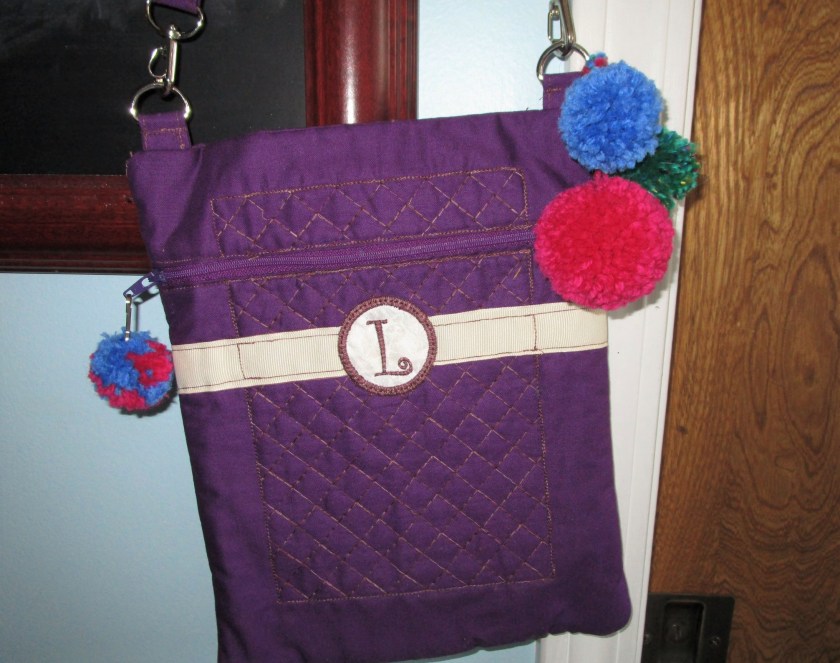
I made one medium and three small. Here they are decorating a cross body bag.
I’m confident all the students will have a great time making pom-poms. I can’t wait to see how they use them to jazz up their clothes One final note: Don’t lose these little pieces, or your pom-pom makers will be useless.


A friend of mine was just talking about these gizmos and how disgusted she was with the way they worked! But the pompoms are cute!
LikeLiked by 1 person
Once I got the proper technique, they worked great.
LikeLike
I remember making Pom poms from two pieces of cereal packet card, cut into rings and yarn wrapped around both.
LikeLiked by 1 person
I’ll give that a try. I will need at least eight makers for the class.
LikeLiked by 1 person
Bernat have a good quick video on the method. Hope it all goes well.
LikeLiked by 1 person